
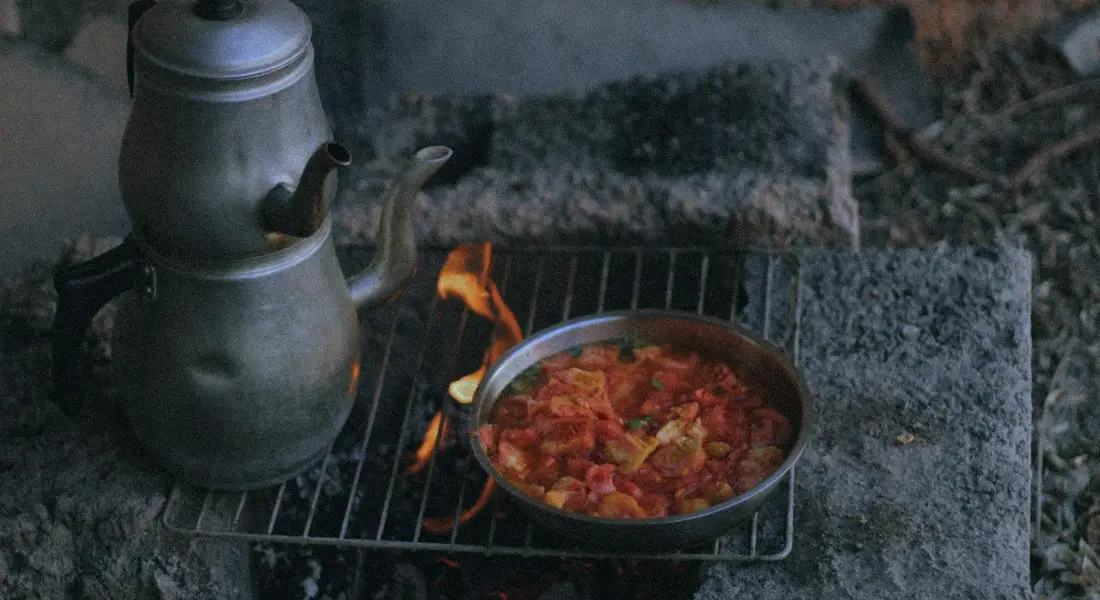
How to Restore Rusty Cast Iron: Can You Save It?
Found a piece of old, crusty, or rusty cast iron at a flea market or in the back of a cabinet and wondered if it’s worth the effort? I’ve been there. The good news is that nearly any cast iron skillet can be brought back to a better-than-new state with a little patience and the right process.
This guide walks you through the complete restoration, from that first disappointing look at the rust to the satisfying sheen of a fresh seasoning layer. Here’s what we’ll cover:
- The simple, non-toxic method for stripping away old seasoning and rust.
- How to build a durable new seasoning foundation, layer by layer.
- The one common mistake that ruins new seasoning and how to avoid it.
- My preferred tools and oils for a finish that lasts for years.
Key Takeaways: Before You Begin Your Restoration
Let’s start with a few simple truths I’ve learned from restoring dozens of pans. These aren’t rules to scare you. They’re the principles that will make your project successful and satisfying.
- Patience is your primary tool. Rushing leads to mistakes, like applying new oil over old gunk. Good restoration cannot be hurried.
- Protect yourself first. Wear safety glasses and chemical-resistant gloves. Flakes of rust and old seasoning can fly, and lye or vinegar can irritate your skin.
- You must create a perfectly clean, bare surface. New seasoning will only bond to clean, dry iron. Any leftover oil, carbon, or rust will cause weak spots.
- Seasoning is a process, not a single event. That first oven session is just the foundation. The real, durable patina builds over months of regular cooking and care.
- There is no single “right” oil. Many work well. The real secret is applying a microscopically thin layer, then polymerizing it completely with heat.
First, Assess Your Cast Iron: What Are You Really Working With?
Before you grab any tools, take five minutes to really look at your pan. A good assessment tells you how much work is needed and prevents you from stripping a pan that just needs a wash.
The Visual and Tactile Inspection
Start with your eyes and fingers. Look for these common issues.
- Flaky, Patchy Seasoning: This looks like peeling paint or a dry lake bed. Run your finger over it. If black or brown flakes come off, this old layer must be completely removed. New oil cannot stick to this unstable base.
- Surface Rust: This is a light, dusty, orange-red coating. It often wipes off on your finger, leaving a stain. Surface rust is a sign of moisture but is generally easy to fix with a scrub and re-seasoning.
- Heavy Rust or Scaling: This is thick, crusty, and pitted. You can’t wipe it off. It may look bumpy and feel rough. This requires more aggressive treatment, often with vinegar soaks.
- Pitting: These are small holes or divots in the metal itself, often left behind after removing severe rust. A few small pits are cosmetic. Extensive pitting can make seasoning difficult, as oil pools in the holes.
- Cracks: Check carefully, especially around the handle and the rim. A cracked pan is not safe for cooking, as it can fail under heat stress. Your restoration journey ends here for that piece.
- Warping: Lay the pan on a perfectly flat countertop, like a glass stovetop or granite slab. Rock it gently. If it spins or wobbles noticeably, the bottom is warped. This is rare in older iron but can happen from extreme thermal shock.
FAQ: Is Old Cast Iron Cookware Safe?
This is the most important question, especially for vintage pieces. The main concern is not bacteria, which is killed by heat and stripping, but heavy metals like lead.
Historically, cast iron was sometimes used to melt lead for fishing weights or bullets. This can leave a toxic residue. If you have any doubt about a pan’s history, especially if it looks like a small, deep pot or has a rough, crusty, whitish residue, test it for lead.
You can buy lead test swabs at hardware stores. It’s a simple, inexpensive step for peace of mind. If a test is positive, do not cook with the pan. It becomes a decorative item.
For typical skillets with just rust and old seasoning, the restoration process of stripping to bare metal completely removes any surface contaminants, making the pan perfectly safe for cooking.
Gathering Your Restoration Toolkit
Before you start, gather your supplies. Having everything at hand makes the process smoother and safer. Think of it like prepping for a small project in the garage.
The Non-Negotiable Essentials
You likely have most of these items at home. Their purpose is to protect you and effectively strip the old gunk without damaging the iron.
- Heavy-Duty Gloves: Wear these to protect your hands from rust, sharp edges, and cleaning solutions. Nitrile or rubberized work gloves are perfect.
- Eye Protection: Safety glasses are a must. Tiny bits of rust, steel wool, or splashes of vinegar can easily get into your eyes.
- Scrubbing Pads: This is your main tool for removing rust and old seasoning. You have two great options.
- Coarse Kosher Salt: Mixed with a little water or oil, salt creates an excellent abrasive paste for scrubbing away light rust and residue without harming the base metal.
- White Distilled Vinegar: This is for a vinegar bath, which chemically dissolves rust. You’ll need enough to fully submerge the piece in a plastic container or trash bag.
- Plastic Trash Bag or Container: Used to hold the vinegar bath. Plastic won’t react with the acid in the vinegar.
Protecting yourself is the first and most important step in any restoration.
Choosing Your Scrubber: Steel Wool vs. Stainless Steel Scrubbers
Both tools work, but they have different strengths. I keep both in my workshop.
Steel wool, like a #00 or #0 grade, is fantastic for its initial bite. It conforms to the skillet’s curves and gets into the tiny pores of the iron. Steel wool is my go-to for tackling thick, baked-on carbon because it cuts through quickly. The downside is that it falls apart rapidly, especially when wet, and can leave little steel filaments behind that will rust if not rinsed away.
A stainless steel chainmail scrubber or a stainless scouring pad lasts much longer. It doesn’t disintegrate and is easier to rinse clean. It’s excellent for maintenance scrubs and for follow-up work after a vinegar bath. For a first-time restoration with heavy rust, I often start with steel wool for the aggressive work, then switch to stainless for the final polish.
Some enthusiasts use an electrolysis tank for extreme rust removal. It’s an advanced, hands-off method that uses electricity to pull rust off the iron. It’s highly effective for pieces that look like they’ve been at the bottom of a lake, but it requires specific gear and safety knowledge.
Nice-to-Have Upgrade Tools
If you find yourself restoring multiple pieces or have one with severe damage, these tools can save you a lot of elbow grease.
- Drill Brush Attachment: A stiff-bristled brush you attach to a power drill. It turns a hour of scrubbing into a few minutes of work for heavy, flaky rust. Use it carefully on low speed to avoid gouging the iron.
- Palm Sander (with 80-120 grit sandpaper): This is only for smoothing out major pitting or a terribly rough cooking surface. You should rarely need to sand, but it’s the right tool for fixing a surface that feels like gravel. Go slow, and never sand a piece with collector’s value.
- Respirator Mask: Essential if you’re doing a lot of sanding or working in a poorly ventilated area. You don’t want to breathe in iron or seasoning dust.
What About a “Cast Iron Reseasoning Kit”?
You can buy these kits, which typically include a scrubber, a small bottle of oil, and sometimes a scraper. They’re convenient if you want everything in one box.
But a good DIY kit is just as effective, often cheaper, and lets you choose your preferred oil. Your DIY reseasoning kit is simply your gathered essentials, plus your chosen seasoning oil (like flaxseed, grapeseed, or crisco) and an oven. Building your own kit means you understand the role of each item, which makes you a better caretaker for your cookware in the long run.
How to Clean and Strip an Old Cast Iron Skillet
This is where the real work begins. The goal is to get down to bare, grayish metal. Start gentle and only get more aggressive if you have to. I treat every new-to-me piece this way, and it has never failed me.
Think of this process like stripping old paint: you want to remove all the old, failing layers so your new foundation sticks perfectly.
Step 1: The Initial Scrub
First, tackle the loose stuff. This is how you clean a used cast iron skillet before you decide if it needs more intensive treatment.
- Use the hottest water you can from your tap.
- Add a good squirt of modern dish soap (forget the old “no soap” myth).
- Scrub vigorously with a brush or scrubby sponge to remove surface grease, dust, and loose food carbon.
- Rinse and dry the pan completely with a towel, then place it on a burner over low heat for a few minutes to evaporate all moisture.
If the pan looks and feels smooth with a consistent dark finish after this, you might be done. You can move straight to re-seasoning. For most old finds, you’ll see patches of rust or thick, bumpy, black gunk. That means you proceed to step two.
Step 2: The Salt and Potato Scrub (For Stuck-On Carbon)
For crusty, baked-on food that a soapy scrub won’t budge, I grab two things from my kitchen: coarse kosher salt and a potato.
- Cut a potato in half. It creates a sturdy, slightly abrasive handle that won’t scratch the iron.
- Pour a generous pile of coarse salt into the dirty, dry skillet.
- Use the cut face of the potato to grind the salt into the pan’s surface, applying firm pressure. The salt acts as a gentle abrasive, and the potato juice helps break down the carbon.
- Wipe out the salty, black sludge, then wash with soap and water again and dry thoroughly.
You can also use a halved onion instead of a potato. This method works wonders on skillets that just need a little extra persuasion to get clean.
Step 3: The Vinegar Bath (For Rust)
If you see the speckled, reddish-brown of rust, you need to dissolve it chemically. Plain white vinegar is the answer, but you must be careful.
Vinegar is an acid, and if left on cast iron for too long, it will eat into the metal itself, creating a pitted, rough surface you do not want. That raises the question: does vinegar damage cast iron, and can it be cleaned safely? We’ll walk through safe cleaning tips and common pitfalls.
Sometimes, you find a pan with decades of thick, flaky, polymerized seasoning that vinegar and scrubbing can’t touch. For this, you have two nuclear options. I use these only when nothing else works. Before resorting to these methods, it’s essential to remove any rust from your cast iron pan.
Removing Rust and Getting to a Smooth Finish

You have a bare, rusty pan. This is the moment you truly begin to recondition it. Your job now is simple: convert every speck of red iron oxide into bare, gray iron. Your goal is a clean, dry, and smooth surface ready for oil.
Start by scrubbing the wet, vinegar-soaked pan under a stream of warm water. Use coarse steel wool. The abrasive action, combined with the water, turns the rust into a slurry that rinses away. Scrub in small circles, applying firm pressure. You will see the red disappear, revealing the dark gray or silver metal beneath. Check out our detailed guide for more tips on removing rust from cast iron cookware.
Scrub until your rinse water runs completely clear with no orange or black streaks.
Sometimes, rust hides in deep pores or tiny pits. If you see stubborn orange specks after a thorough scrub, focus your steel wool directly on those spots. If they absolutely will not budge, you have an option.
You can use a piece of fine-grit sandpaper, like 220-grit, to lightly sand the area. This smooths the pitted surface, making it easier to clean and season later. Some purists argue against sanding, worried it creates grooves for food to stick. In my experience, a light pass to remove a rust pit creates a better foundation than leaving the rust itself.
Once the pan is visually rust-free and rinsed, the next step cannot be rushed. You must dry the pan immediately and completely. Cast iron will develop flash rust-a thin, red film-in minutes if left wet.
First, towel-dry the entire pan aggressively. Then, place it on a stovetop burner over low to medium heat. Let it warm up for three to five minutes. Swirl your hand over the surface (without touching it). You should feel consistent, dry heat radiating from the metal. Heat the pan until it is bone-dry and warm to the touch all over, including the handle and the outside walls.
What Helped Me: My Quick-Dry Trick
I used to struggle with flash rust on pan handles and ornate logos. No matter how fast I towel-dried, a faint orange haze would appear. Now, I keep a hair dryer in my workshop. Right after I towel off the pan, I blast it with the hair dryer on its highest heat setting for about sixty seconds. It forces water out of every crevice. This quick, intense heat treatment stops flash rust dead before it can even think about starting. It is a simple trick that made my results much more consistent.
The Re-seasoning Process: Building Your New Foundation
Think of this not as a chore, but as laying the first bricks for your pan’s future. You’re building a durable, slick foundation one thin layer at a time.
Step 1: Picking Your Polymer (Choosing Your Oil)
Your oil will polymerize, turning into that hard, slick coating. The best cast iron seasoning oil is one you have, can afford, and will use consistently. To help you choose, the ultimate guide to selecting the best oil for seasoning cast iron can help. It explains factors like smoke point, cost, and how often you’ll use it.
I’ve tested many. Here’s a simple comparison.
| Oil/Fat | Smoke Point | Cost & Finish | My Take |
|---|---|---|---|
| Flaxseed Oil | ~225°F (107°C) | Expensive. Can create a beautiful, hard finish but is brittle and prone to flaking over time. | I avoid it. The flaking isn’t worth the initial gloss. |
| Crisco / Vegetable Shortening | ~360°F (182°C) | Very affordable. Creates a reliable, matte finish. The classic choice for a reason. | My workshop staple for decades. For cast iron seasoning crisco temperature, aim for 450°F. |
| Canola or Grapeseed Oil | ~400°F (204°C) / ~420°F (216°C) | Moderate cost. Easy to find. Produce a durable, semi-gloss layer that’s very forgiving. | My current go-to for daily use. Grapeseed’s slightly higher smoke point makes it a great all-rounder. |
Don’t overthink this: Crisco, canola, or grapeseed oil will all give you an excellent, long-lasting foundation.
Step 2: Mastering the “Thin Coat”
This is where most mistakes happen. A thin coat is not what it sounds like.
- Pour about a teaspoon of your chosen oil into the warm, dry pan.
- Use a folded paper towel or cloth to rub the oil over every single surface, inside and out, including the handle.
- Now, take a second, clean towel or paper towel. This is the key.
- Buff the pan aggressively as if you are trying to remove every last trace of oil you just applied.
Your pan should look practically dry, with only a faint satin sheen. If it looks oily or wet, you used too much. This answers the common question: for the final wipe before baking, you are not adding new oil. You are using that clean towel to remove any excess pooled oil. The microscopic layer left behind is perfect.
Step 3: Baking It On: The Polymerization
This step transforms the oil. Heat is the catalyst.
- Place your oiled pan upside down on the middle rack of your oven. Put a sheet of foil or a baking sheet on the rack below to catch any tiny drips.
- Set your oven to a temperature above your oil’s smoke point. A good cast iron seasoning temp is between 450°F and 500°F.
- Bake it for one full hour. This is the standard cast iron reseasoning time needed for the oil to fully polymerize.
Baking it upside down is critical. It prevents oil from pooling in the cooking surface, which leads to sticky spots. Gravity is your friend here.
Step 4: The Patient Cool Down
When the hour is up, turn off the oven. Do not open the door. Do not move the pan.
Let the pan cool completely inside the turned-off oven. This slow cooling prevents thermal shock and lets the new layer set properly.
When it’s room temperature, touch the cooking surface. It should feel dry and smooth, not tacky or sticky. If it feels sticky, you had too much oil on it before baking. It’s okay. Just put it through the process again (thin coat, bake, cool). The next layer will fix it.
Why One Layer Is Never Enough
For a freshly stripped or rusty pan, a single seasoning layer is just a primer coat. It’s vulnerable.
I always do at least two, and usually three, rounds of seasoning on a restoration. Each new layer bonds to the previous one, building thickness and durability like layers of paint on a wall. The first layer adheres to the iron. The second and third layers reinforce the seal, filling in microscopic gaps. This creates the tough, non-stick surface you want. After these foundational layers, your cooking will naturally add more over time.
Caring for Your Newly Restored Cast Iron

You’ve stripped off the old gunk and built up fresh, new seasoning layers. Great work. Now, the goal changes from restoration to simple care. Think of this as moving from a major renovation project to easy, routine home maintenance.
Initial Cooking Tips for a Young Seasoning
Your new seasoning is strong, but it’s still a young foundation. The first few cooks are about being gentle and building confidence, for both you and the pan.
For your first meals, use a bit more oil or fat than you normally would; this provides a protective buffer while the seasoning continues to harden.
Start with foods that are naturally forgiving and not too sticky. My go-tos for a pan’s debut are:
- Cornbread or other baked goods
- Sautéed onions or peppers
- Pan-seared sausages
- Potatoes (fried or roasted with ample oil)
These foods release easily and help deposit beneficial oils onto the surface, reinforcing your hard work without much risk.
The Simple, Daily Cleaning Routine
This is the heart of effortless cast iron care. Forget complicated rituals. After cooking, just follow this straightforward process.
- Let the pan cool slightly, but clean it while it’s still warm.
- Rinse and scrub it with hot water and a brush or non-abrasive scrubber. A little mild dish soap is perfectly fine and won’t hurt your seasoning.
- Dry it completely. I always towel-dry mine and then place it on a low to medium stove burner for 2-3 minutes to evaporate every last drop of water.
- Apply a microscopic coat of oil. Put a few drops of your seasoning oil (like grapeseed or canola) on a paper towel, then wipe the entire surface. Now, take a fresh, dry paper towel and buff aggressively as if you’re trying to remove all the oil you just applied. What remains is the perfect, thin protective layer.
Addressing Common Panic Moments
Don’t worry if things aren’t perfectly non-stick right away. Here’s how to handle two very common concerns.
“What if I see a spot of rust?” A little surface rust can pop up, especially if the pan was put away damp. Don’t panic. Simply scrub the spot with a bit of coarse salt or a gentle scouring pad under warm water, dry the pan thoroughly on the stove, and give it a fresh, thin coat of oil. You might only need to re-season that one spot in the oven if it’s persistent.
“What if food still sticks?” Some sticking, especially in the beginning, is completely normal. It doesn’t mean you failed. It often means the seasoning just needs more time and use to become fully slick. Keep cooking with ample fat, and clean gently after each use. The performance will improve with consistent use.
What to Avoid for a Strong Start
Protecting your fresh restoration is easy when you steer clear of a few pitfalls.
- Avoid prolonged soaking. Don’t leave your cast iron sitting in water for hours. This invites rust.
- Avoid the dishwasher. The harsh detergent and extended moisture will damage the seasoning.
- Avoid cooking very acidic foods for the first several uses. Hold off on long simmers of tomato sauce or wine-based dishes. Acid can interact with the young, still-polymerizing seasoning layer. Once your pan is well-blackened and used, it can handle these foods with proper care.
- Avoid using metal utensils aggressively. While seasoned cast iron is tough, sharp metal edges can scrape the surface. I use metal spatulas, but I keep the edge slightly angled and use a gentle scraping motion.
Alternative Paths and When to Consider Them
Not everyone has the time. Maybe you lack the space for a big project. Restoring cast iron is a commitment, and that’s perfectly okay. For most pieces, the scrub-and-season method is the right place to start. But you have other options. If your cast iron is rusty or cruddy, a step-by-step restoration guide can help you bring it back. It walks you through every stage—from rust removal to seasoning.
When to Hire a Cast Iron Reseasoning Service
Think of these services like a specialist mechanic for a classic car. They have industrial-grade equipment like large electrolysis tanks and commercial ovens. This is a strong choice for a precious family heirloom or a piece with extreme damage, like deep, pitted rust or a thick, crusty buildup of carbon that feels impossible to remove.
I sent my great-grandmother’s deeply pitted Dutch oven to a service once. The cost was about what I’d pay for a new, high-quality skillet, but the sentimental value made it worthwhile. They returned it looking like it had just left the foundry, ready for me to build a new seasoning from bare iron.
For a standard, moderately rusty skillet, the DIY route is more practical, but for an irreplaceable piece, a professional service can offer peace of mind and a flawless foundation.
Advanced DIY Methods for Enthusiasts
If you catch the restoration bug, you might hear about two powerful methods: the lye bath and electrolysis. These are for the dedicated hobbyist.
- A lye bath is a plastic tub filled with water and a lye-based cleaner. It safely dissolves old seasoning and crud without harming the iron. You must use serious safety gear (gloves, goggles) and keep it away from kids and pets.
- Electrolysis uses a battery charger and a washing soda solution to pull rust off the iron at a molecular level. It’s incredibly effective on heavy rust. This method requires handling electrical components and understanding basic safety.
I use both in my workshop for pieces I find at flea markets. They are fantastic tools but involve more cost, space, and safety precautions than the average person needs for a single pan.
Stick With the Simple Path
Here’s the honest truth. For 90% of the old, rusty skillets and pots you’ll encounter, the guide you just read is all you need. Steel wool, elbow grease, a good oil, and a hot oven will solve the problem. You do not need complex chemistry to restore a functional cooking surface. Start with the straightforward method. You can always explore these other paths later if you find a truly challenging project piece that sparks your curiosity.
Common Questions
Do I need a special kit to reseason my cast iron?
No, a dedicated kit is not necessary. Your own supplies-like steel wool, a good oil, and an oven-are just as effective and often cheaper. Understanding each tool’s purpose makes you a better caretaker in the long run.
How long does the reseasoning process take?
Each seasoning layer requires about one hour in the oven, plus cooling time. For a full restoration, plan on three layers over several hours. Patience here ensures a durable, non-stick foundation.
Is it ever worth paying for a professional reseasoning service?
Yes, for irreplaceable heirlooms or pieces with extreme damage. Professional services have industrial equipment for flawless results. For most skillets, though, DIY restoration is perfectly sufficient.
Your Restored Skillet’s New Life
The single most important step comes after the restoration: you must use your pan regularly. Cooking with it, especially with fats, is what truly builds a durable, non-stick seasoning layer that protects your work. For more on keeping that finish in top shape, our guides on proper cleaning and storage are a great next read.
Deep Dive: Further Reading
- How to Restore and Season a Rusty Cast Iron Skillet – Lodge Cast Iron
- How to Restore Rusty and Damaged Cast Iron Skillets and Cookware
- r/howto on Reddit: How do I restore this cast iron?
- How to Remove Rust From Cast Iron (Step-by-Step with Photos) | The Kitchn
- How to Fix Your Rusty Cast Iron – Southern Cast Iron
- How to Restore Rusty Cast Iron – Tulips and Twill
A material science expert by profession, Joseph is also an avid cook. He combines his 10+ years expertise in material science and metallurgy with his passion for cast iron cookware to bring you best hands on advice. His expertise ranges from types of cast iron cookware to best seasoning tips as well as restoration of vintage cast iron utensils. Joe is here to help you solve all your cast iron cookware queries and questions.