
How Do You Cook Chicken Perfectly in a Cast Iron Skillet?
You want that golden, crispy skin on your chicken, but you’re nervous about sticking or damaging your pan’s seasoning. I cook chicken in my cast iron weekly, and with a few simple steps, you can achieve fantastic results while keeping your skillet in top shape.
This isn’t a recipe; it’s a care guide for your pan that happens to involve chicken. Here’s what we’ll cover:
- The best methods for preheating your skillet to prevent sticking.
- Simple timing guides for breasts, thighs, and other cuts.
- How to clean up afterward without harming your seasoning.
- Why a well-maintained cast iron skillet gives chicken an superior crust.
Why Your Cast Iron Skillet Is a Chicken-Cooking Hero
Other pans can’t do what cast iron does for chicken. Its dense metal holds heat steadily, spreading it across the entire cooking surface. This eliminates hot spots that would burn your chicken skin before the meat underneath is cooked.
You get a beautifully crisp, golden sear on the outside with juicy, tender meat inside every single time.
Cast iron is also incredibly versatile. You can start your chicken on the stovetop to get that perfect sear, then slide the whole skillet into the oven to finish cooking it evenly and gently. This one-pan workflow is ideal for chicken breasts, thighs, or a whole spatchcocked bird.
Compare this to a non-stick pan. You can’t get it screaming hot for a sear without damaging the coating. Stainless steel can handle the heat, but it’s notoriously sticky unless your technique is flawless. Cast iron, with a good seasoning layer, offers a perfect middle ground: fantastic searing power with a naturally non-stick surface that gets better with use.
Getting Your Skillet Ready for Chicken Duty
Think of your skillet like an athlete. You wouldn’t ask it to sprint without a warm-up. A proper pre-heat is non-negotiable.
I start by placing my cold, dry skillet on a cold burner. I set the heat to low for about 3-5 minutes. This allows the iron to expand slowly, preventing thermal shock. Then, I turn the heat up to medium or medium-high. For chicken, you generally want a solid medium heat to render fat and crisp skin without scorching.
Do you have to preheat cast iron to cook chicken? Emphatically, yes. A hot pan is what creates that instant sear, which locks in juices and prevents the meat from sticking. Putting cold chicken on a cold pan will steam it, leaving you with rubbery skin and a stuck-on mess.
How to Know When Your Pan Is Ready
You can’t just guess. Use one of these two simple tests.
- The Water Droplet Test: Flick a few drops of water onto the pan’s surface. If they sizzle and evaporate immediately, it’s not hot enough. If they bead up and dance around like mercury, the pan is perfectly preheated and ready for oil.
- The Oil Shimmer Test: Add about a teaspoon of your cooking oil. Tilt the pan to coat the surface. Within 30 seconds, the oil should thin out and start to shimmer. If it just sits there, the pan is too cold. If it immediately smokes, it’s too hot.
Getting the preheat right is the single most important step for preventing stuck-on food and achieving a professional sear.
Choosing Your Cooking Oil
You’ve preheated, now you need oil. For chicken, you need a fat with a high smoke point. This means it can get very hot before it starts to burn and smoke, which can impart off-flavors and damage your seasoning.
My go-to choices are avocado oil, refined safflower oil, or ghee. They all have smoke points well above 400°F. While I love olive oil for finishing, its lower smoke point makes it less ideal for the high-heat sear chicken needs.
The Right Way to Cook: Methods That Protect Your Seasoning

Your cast iron skillet is a tool, not a museum piece. You should use it. But how you use it makes all the difference for the hard-earned seasoning you’ve built. Different chicken cooking methods interact with your pan’s surface in unique ways compared to other ingredients and dishes.
Searing, Baking, and Braising: A Seasoning Impact Guide
Think of your seasoning like a durable, non-stick coating. Different cooking methods test that coating in different ways.
- Searing: This high-heat, fast-cooking method is fantastic for building and strengthening seasoning. The key is using enough fat. A thin, hot layer of oil polymerizes onto the surface as you cook, essentially adding a micro-layer of fresh seasoning. Searing is where a cast iron skillet truly shines, and it rewards your pan’s surface when done correctly.
- Baking: Cooking chicken in the oven at a consistent, moderate heat is very gentle on your seasoning. There’s no aggressive scraping or rapid temperature shocks. It’s a low-risk, high-reward method that maintains your pan’s condition beautifully.
- Braising: This is the method that requires the most forethought. You’re combining liquid and extended cooking time, which can threaten to lift or soften seasoning if your layer is thin or new. The rules here are simple: a well-established, glossy base of seasoning is your best defense, and you should avoid letting acidic braising liquids simmer for hours.
How Do You Cook Chicken in a Cast Iron Skillet? The Core Principles
Forget specific recipes for a moment. The universal process for cooking chicken in cast iron revolves around two things: managing heat and using fat. It’s essential to understand the fundamentals of cooking with cast iron for perfect results.
- Preheat Your Pan Gradually. Start on low-medium heat for 3-5 minutes before turning it up. This allows the entire skillet to warm evenly, preventing hot spots that can cause sticking and uneven cooking.
- Use an Ample, Heat-Stable Fat. Coat the cooking surface thoroughly. I use avocado oil for its high smoke point. This fat layer becomes the interface between your chicken and the seasoning, conducting heat and preventing direct contact that can lead to pulling up the seasoning.
- Let the Chicken Release Naturally. When you place the chicken in the hot pan, leave it alone. It will stick at first. As it sears and forms a crust, it will release on its own. Forcing it loose before it’s ready is a prime way to damage your seasoning.
- Control Your Temperature. After an initial sear, you often need to lower the heat to finish cooking through without burning. Cast iron holds heat incredibly well, so trust that even a medium-low setting provides plenty of cooking power.
This heat-and-fat framework is your guide for everything from a simple breast to a full roast chicken, no recipe required.
The Acid Test: Cooking Chicken with Sauces
You want to make a “cast iron chicken breast with sauce” like a piccata or a tomato-based dish. Here’s the concern: acids (lemon juice, wine, vinegar, tomatoes) can break down your pan’s polymerized seasoning over time, making it feel rough or sticky.
This doesn’t mean you can’t do it. It means you should be strategic. For a quick pan sauce made after searing the chicken, the short exposure time is usually fine for a well-seasoned pan. If you’re planning to simmer chicken in an acidic sauce for 30 minutes or more, consider this approach: sear and cook your chicken in the cast iron, then transfer everything to a different pot or saucepan to finish. Protecting your seasoning is about managing exposure, not total avoidance.
Why a “Cast Iron Chicken Pot Pie” Demands Respect
A pot pie seems gentle, but it’s a perfect storm of seasoning challenges. You have a moist filling that sits against the pan’s surface for a long baking time. If your seasoning is new or patchy, that prolonged moisture can find weak spots and cause issues.
I only use my oldest, most jet-black skillets for dishes like this. That deep, glassy seasoning is nearly impervious to moisture. If your skillet is relatively new, you can create a safe barrier. A light, extra coat of oil applied to the warm, dry pan before adding the filling can act as a protective shield during the long bake. A cast iron chicken pot pie is the goal for a reason-it creates an incredible crust-but it’s a task for a well-seasoned veteran, not a fresh recruit.
Cast Iron Chicken Cooking Times and Temperatures: A Care Perspective
I don’t give recipes, I give care instructions for your pan. The reason we talk about cooking times is simple: every minute your skillet is over high heat is a test for its seasoning.
Prolonged, intense heat can break down that hard-earned polymerized oil layer. Knowing roughly how long something cooks helps you manage that heat exposure and keep your pan in top shape.
Why Time Matters to Your Seasoning
Think of your pan’s seasoning like a durable, non-stick paint job. Direct, sustained high heat is like holding a blowtorch to that paint. It will eventually weaken it. My goal is to help you cook your food perfectly without accidentally “stripping” areas with excessive, guesswork-driven heat.
For example, a common search is “how long to bake chicken breast in cast iron skillet.” This usually means transferring a seared breast to a hot oven to finish. That’s 15-20 minutes of oven heat on your pan’s entire surface, including the sides, which is a significant thermal event for its coating.
Your Best Tool Isn’t a Timer
While general times are helpful, the single best thing you can do for your chicken and your skillet is to use a good digital meat thermometer. Guesswork leads to overcooking. Overcooking means your pan sits on the burner or in the oven longer than it needs to.
Pulling the chicken at the correct internal temperature (165°F for breast, 175°F for thigh) stops the cooking process immediately, preventing unnecessary thermal stress on your cast iron’s seasoning.
- No more poking and guessing.
- No more “five more minutes just to be sure.”
- Your food is safe, and your pan’s finish is spared extra heat.
Different Cuts, Different Heat Loads
Consider what you’re cooking. A thin, boneless chicken breast seared on the stove-top might only need your pan hot for 10-12 minutes total. But if you’re searching for “how long to cook chicken breast in cast iron” for a baked method, that time-and heat exposure-doubles.
Bone-in, skin-on pieces like cast iron chicken thighs are a bigger project. They often need a sear *and* a longer oven finish to render fat and cook through the bone. This means your pan is acting as a heat reservoir for 30-40 minutes or more, which is a long haul for the seasoning layer on its cooking surface. The pan can handle it, but it’s a reminder to ensure your seasoning is robust before such a task.
Your Post-Chicken Cleaning Ritual: Step-by-Step
Perfect chicken is a triumph. What comes next is just as important for your pan’s health. This isn’t a chore, it’s maintenance. Follow this checklist every time, whether you cooked a simple breast or sticky, saucy thighs.
- Let the Pan Rest. Never shock a hot pan with cold water. Move it off the burner and let it cool for 5-10 minutes, until the handle is warm but not scalding. This prevents thermal shock, which can cause the iron to warp or crack.
- Deglaze to Detach. Pour about a cup of warm water into the warm pan. Use a flat-edged wooden spatula to gently scrape up the flavorful browned bits (the “fond”) stuck to the bottom. This quick deglaze loosens debris without the harsh scrubbing that can thin your seasoning.
- Scrub with the Right Tools. Dump the deglazing water. For most cleanups, a drop of dish soap and a non-scratch sponge or brush is perfect. For stubborn, polymerized bits from crispy skin or sugary marinades, use a paste of kosher salt and a drop of water, or a dedicated chainmail scrubber. Both lift gunk without grinding into the seasoning like metal scrapers can.
- Dry and Protect. Rinse the pan and dry it immediately and thoroughly with a towel. Then, place it back on a low burner for a minute to evaporate any hidden moisture. Finally, apply the tiniest, almost-invisible film of oil with a paper towel while it’s warm. This is your final protective step against rust.
I keep my chainmail scrubber right by the sink. For my weekly roast chicken, it makes quick work of the stuck-on skin and fat without any worry. If you encounter a truly stubborn patch, don’t force it. A second, gentle deglaze with warm water will often soften it right up.
Common Mistakes and How to Avoid Them
Even the best tool works against you if used incorrectly. Cast iron is forgiving, but sidestepping these common errors will make your cooking smoother and keep your pan in top shape for decades.
Mistake: Adding cold chicken to a screaming-hot skillet
This is the single biggest reason chicken sticks. A cold, wet protein hitting a blazing hot surface causes the metal to contract violently. The chicken seizes up and bonds to the pan.
Think of it like dipping a hot glass in cold water-it shocks the system. The result is a torn-up crust and chicken that cooks unevenly, as the outside burns before the inside is done.
Always let your chicken sit at room temperature for 15-20 minutes before cooking, and pat it completely dry with paper towels.
You want the surface bone-dry. This guarantees a quick, clean sear and that satisfying release when the crust is fully formed.
Mistake: Using a metal spatula aggressively and scraping off seasoning
A flexible metal spatula is actually a great tool for cast iron. The problem isn’t the metal, it’s the technique. Jamming it straight down and prying at food will dig into your seasoning like a chisel into old paint.
I learned this the hard way on my favorite 10-inch skillet, leaving silver scratches that needed a touch-up. Seasoning is a bonded polymer layer, not a non-stick coating. It needs respect. Fixing any damage is crucial for maintaining its longevity.
Use a thin, flexible metal spatula and focus on sliding it under the food with a gentle forward motion, not a downward chop.
This technique protects your hard-earned patina while still getting a clean flip or move. A good spatula is an extension of your hand, not a crowbar.
Mistake: Letting a pan with chicken juices or acidic sauce sit
After the meal is done, the cleanup clock starts ticking. Cast iron is sturdy, but it’s not inert. Leaving acidic ingredients (like a pan sauce with wine or tomatoes) or salty brines to sit gives them time to interact with the iron and your seasoning. That’s why you’ll often see guidance on cooking acidic foods in cast iron without ruining the seasoning. With a few simple steps, you can enjoy tangy sauces while protecting your patina.
Acids can begin to etch the seasoning layer, making it dull and rough. Salty, wet leftovers create a perfect environment for surface rust to start forming, sometimes in just an hour or two.
Make it a non-negotiable rule to clean your cast iron skillet within 30 minutes of finishing your meal.
A quick post-dinner wash is a small habit that prevents big problems. Your future self will thank you when you grab a clean, ready pan instead of one needing restoration.
Mistake: Cranking the heat too high for too long when searing
Cast iron holds heat wonderfully, but that’s not a license to blast it. When you put an empty pan on high heat for an extended time, you risk burning off the delicate polymerized oils that make up your seasoning.
You might see the surface start to look ashy, dry, or even flake. That’s the seasoning breaking down. The pan isn’t ruined, but you’ve set your non-stick progress back.
Preheat your pan over medium or medium-low heat. Give it a good 5 minutes to come up to temperature evenly.
For a powerful sear, you only need to increase the heat to medium-high just before adding your oil and chicken. This method protects the seasoning while still delivering that fantastic crust.
Mistake: Not drying the pan thoroughly after washing
Water is the arch-nemesis of bare iron. Even a pan with great seasoning can have microscopic pores or thin spots. Any leftover moisture, even the humidity from a warm pan, can lead to rust. This raises the question: does water moisture affect cast iron? Moisture’s role explains why thorough drying and maintaining seasoning matter.
I’ve seen spots appear overnight on a pan I thought was “mostly dry.” Towel-drying is the first step, but it’s rarely enough.
Always do a final dry by placing the clean skillet on a warm stovetop burner for a few minutes until all traces of moisture evaporate.
Run your hand over the surface-it should feel completely dry and warm to the touch. This simple, 2-minute ritual is the best insurance against rust you’ll ever have.
Seasoning Check-Up: What to Do After Cooking Chicken

After a busy cook, your skillet needs a simple check-up. A high-heat sear or a sticky pan sauce can test your seasoning. This is a routine inspection, not a cause for alarm.
Think of your skillet’s seasoning like the paint on a well-used tool. A tough job might leave a smudge or a scratch, but it doesn’t mean you need a full repaint.
How to Inspect Your Pan
Once your pan is clean and completely dry, take a look under good light. You’re checking for two main things.
- Sticky or Gummy Spots: Run your finger over the cooking surface. It should feel smooth, like slick glass. Any tacky or rough patches mean some oil didn’t fully polymerize.
- Dull or Light-Colored Patches: Look for areas that have lost their dark, glossy sheen, especially where the chicken made direct contact. This is normal wear.
A patch that looks dry or lighter than the rest is usually just a thin spot in the seasoning, not bare metal.
The Five-Minute Stovetop Refresh
If you find sticky spots or just want to reinforce the surface, a stovetop season is your best friend. I do this with my own daily driver skillet about once a month.
- Place your completely dry skillet on a burner set to medium-low heat for one minute to warm it up.
- Add about half a teaspoon of a high-smoke-point oil (like grapeseed, canola, or avocado) to the center.
- Using a folded paper towel and tongs, spread the oil over the entire interior surface, including the sides. Your goal is an impossibly thin, even coat. It should look wet, not pooled.
- Turn the heat up to medium. Let the pan heat until it just starts to smoke lightly, then continue for another 1-2 minutes. The smoking will stop when the oil has fully polymerized.
- Turn off the heat and let the pan cool on the stove. That’s it.
This quick process bakes a fresh, ultra-thin layer of polymerized oil right onto your existing seasoning, sealing and smoothing the surface.
Maintenance Coat vs. Full Re-Seasoning
It’s easy to confuse these two very different processes. Here’s how I think about them.
- The Stovetop Refresh (Above): This is routine maintenance. You are adding a single, microscopic “top coat” to protect and enhance what’s already there. It fixes stickiness and minor wear. Do this whenever your pan feels less than slick.
- A Full Oven Re-Seasoning: This is a restoration project. It involves stripping all old seasoning layers (with lye or electrolysis) and building 3-5 new base layers from scratch in the oven. You only need this for severe rust, flaking, or deeply ingrained gunk.
After cooking chicken, you will almost never need a full re-season. The stovetop method is more than enough. I reserve oven sessions for the deeply neglected pans I find at flea markets.
Embrace the Patina
A perfectly uniform, jet-black skillet is mostly a myth for pans you actually use. Minor spots and subtle color variations are not flaws. They are your pan’s patina-a history of every good meal you’ve made.
Those dull spots will darken naturally with your next few cooks as new oils bake onto them, blending seamlessly into the whole. Constant oven re-seasoning to chase perfection is unnecessary and can lead to thick, brittle layers. Trust the process, use your pan, and maintain it simply. That’s how you build a legendary cooking surface.
Handling Specific Chicken-Cooking Scenarios
Cooking different cuts or styles of chicken changes what you ask of your pan. You need to adjust your technique to keep your skillet in top shape for the long run.
Boneless, Skinless Breasts
This lean, low-fat meat is famous for sticking, even in a well-seasoned pan. The trick isn’t more seasoning, it’s proper heat management.
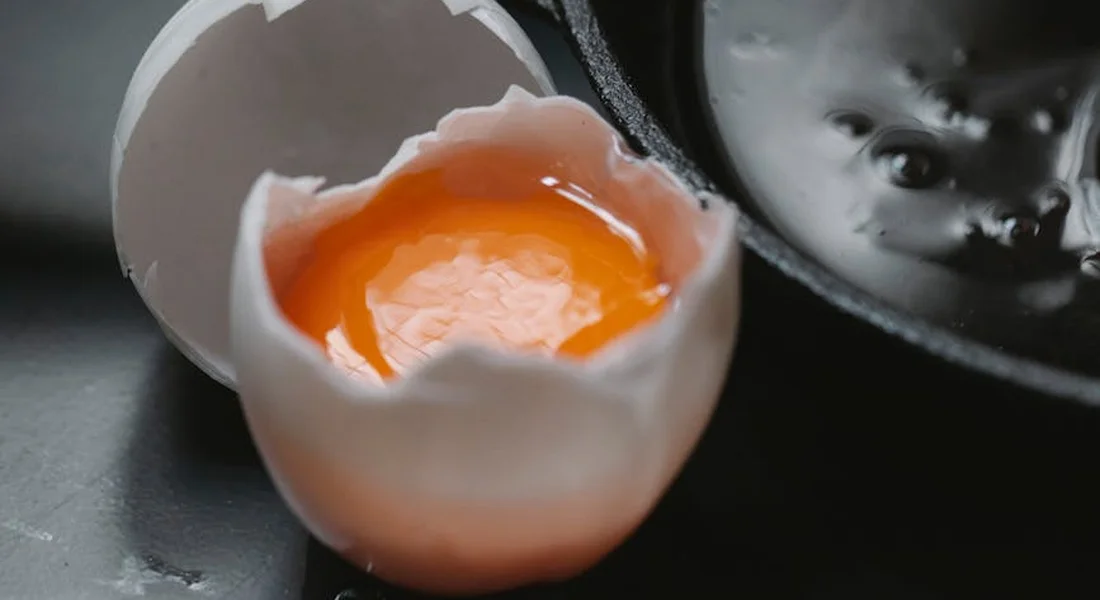
Your skillet needs to be properly pre-heated, and you need a good layer of oil already shimmering in it before the chicken touches the surface. Think of it like frying an egg. A cold pan or dry surface guarantees a tearful, stuck-on mess. Getting the pan and oil properly hot before adding the chicken creates an immediate sear that naturally releases the meat.
If you do get a stubborn spot that sticks, don’t panic and scrape. Let the pan cool, add some warm water, and gently loosen it with a wooden spatula. A quick stove-top re-seasoning touch-up might be needed afterward.
Pan Sauces
A cast iron skillet makes incredible fond-those crispy, flavorful browned bits left after searing. They’re the perfect start for a pan sauce. But you must work quickly after cooking.
Once you’ve removed the chicken, make your sauce. The moment it’s finished, pour it out into a glass, ceramic, or stainless steel bowl or gravy boat. Never let an acidic sauce like wine, lemon, or tomato-based sit in your cast iron, as it can break down your hard-earned seasoning layer.
I have a dedicated small glass pitcher for this. It’s one less thing to worry about while I’m enjoying dinner, and my skillet gets a simple, immediate cleaning with hot water.
One-Pan Meals
Cooking chicken with potatoes, carrots, or other hardy vegetables is convenient. But those heavier, starchy items can be abrasive if you’re not careful.
Use a gentle hand when stirring or turning. A silicone-tipped utensil or a flat-edged wooden spatula is better than a sharp metal fork for moving potatoes around. Let items brown and release on their own before shifting them. Dragging uncooked, starchy food across the seasoning is a common way to create fine scratches that require maintenance.
If you’re doing a lot of one-pan cooking, expect to do a stove-top seasoning refresher more often. It’s normal wear and tear, not failure.
Crispy Skin
This is where your cast iron skillet truly outperforms other pans. Its incredible heat retention creates an unbeatably crisp, golden skin. This method, however, uses high heat for a sustained period. That steady heat is what makes cast iron so effective in cooking. It directly impacts texture and evenness of doneness.
Start with a room-temperature, dry-skinned piece. Place it skin-side down in a pre-heated, lightly oiled pan. Then, be patient. Don’t move it for a good 8-10 minutes. You’re rendering fat and building that crackle.
This high-heat searing is safe for a well-maintained pan, but it’s a stress test for your seasoning. After cooking, let the pan cool completely before cleaning. You might see a slightly drier or chalkier spot on the cooking surface where the intense heat was focused. A very light coat of oil rubbed in after your next wash will usually restore it perfectly.
Your Cast Iron Chicken Checklist
Cooking a great piece of chicken is one thing. Doing it while keeping your skillet in peak condition is the real goal. This checklist isn’t about recipes, it’s about the essential care steps that happen before, during, and after you cook.
Preheat Your Skillet Low and Slow
This is the single most important step for your pan’s health. Putting cold chicken on a cold pan, then cranking the heat, is a sure way to make food stick. It also causes uneven thermal expansion, which can stress the metal over time. I place my skillet over low to medium-low heat for a full 5 minutes. You want the entire pan, including the sides, to be uniformly warm. This gentle preheat allows the seasoned surface to gradually come up to temperature, creating a stable, non-stick foundation for cooking.
Ensure the Cooking Surface is Hot and Properly Oiled Before Adding Chicken
After the slow preheat, increase the heat to your cooking temperature-usually medium or medium-high. Let the pan sit at that heat for another minute or two. To test if it’s ready, flick a few drops of water onto the surface. They should dance and evaporate quickly.
Now, add your high-smoke-point oil (like avocado, grapeseed, or refined coconut). Swirl it to coat the surface. You’re looking for a shimmering, thin film, not a puddle. I use a paper towel to spread it and then almost wipe it all out again. That “whisper-thin” layer is what polymerizes into new seasoning during cooking, while excess oil will become sticky and gummy. Only after the oil is hot and shimmering should you add your chicken.
Use a Thermometer to Avoid Overcooking and Excessive Heat Exposure
This tip protects your food and your pan. Guesswork leads to dry chicken and the temptation to use blistering high heat to finish cooking, which can burn off delicate seasoning. A reliable instant-read thermometer lets you cook chicken to the perfect 165°F safely. This means you can maintain a consistent, manageable heat level. Controlling your heat prevents the “nuclear option” of super-high temperatures, which is the fastest way to damage your hard-earned seasoning layer.
Let the Pan Cool to a Warm, Not Cold, State Before Cleaning
Never shock a hot cast iron pan with cold water. The sudden temperature change can cause the iron to contract rapidly, potentially leading to cracks or warping-it’s rare, but why risk it? After cooking, I simply move the hot skillet to a cool burner or a trivet. Let it cool until you can comfortably hold your hand near the cooking surface. This “warm” state is ideal for cleaning. A warm pan helps loosen stuck-on food bits with less effort, making your cleanup both easier and safer for the pan’s structure.
Clean Gently with Hot Water, Using Coarse Salt for Stubborn Bits if Needed
Modern dish soap is perfectly safe for a well-seasoned pan. I use hot water, a drop of soap, and a soft brush or non-scratch sponge. For any stubborn, stuck-on fond (those delicious browned bits), I use my favorite trick: a paste of coarse kosher salt and a little water. The salt provides gentle abrasion without scratching. This method effectively scrubs away residue without damaging the polymerized seasoning layer you just worked to maintain during cooking. Avoid steel wool or harsh scouring pads, especially after cooking something like chicken where you might be extra worried about germs; the soap and hot water are sufficient.
Dry Immediately and Completely on the Stovetop
Cast iron will rust if left wet. After rinsing, dry the pan thoroughly with a towel. Then, place it back on a stove burner over low heat for 2-3 minutes. This drives off every last bit of invisible moisture. I know it’s dry when the entire surface feels warm to the touch and has a uniform, matte look. This stovetop drying is the best defense against flash rust that can appear overnight from a single drop of leftover water. My own daily driver skillet hasn’t seen a speck of rust in years because of this habit.
Apply a Whisper-Thin Coat of Oil for Storage if the Seasoning Looks Dry
After drying, take a look at your pan’s seasoning. A cook like chicken, especially with a acidic marinade, can sometimes leave the surface looking a little hazy or dry. If it does, apply a tiny drop of neutral oil and wipe it over the entire pan, inside and out. Then, use a clean paper towel and try to wipe all that oil off again. You should not see any gloss or wetness. This microscopic layer of oil acts as a protective barrier during storage, keeping the seasoning stable and ready for your next cook. If the pan still looks slick and black after drying, you can skip this step-it’s already perfect.
Quick Answers
I’m cooking boneless, skinless chicken thighs. They need high heat but sometimes leave a sticky residue. What’s the fix?
That sticky film is excess oil and protein that didn’t fully polymerize. After cleaning, place your dry pan over medium-low heat. Apply a microscopic coat of high-smoke-point oil, heat until it just smokes, then let it cool. This bakes on a fresh, non-stick layer.
After making a chicken pan sauce with lemon or wine, my skillet feels rough. Did I ruin the seasoning?
No, the seasoning is likely etched, not ruined. Acids can dull the polymerized layer. Always transfer finished sauces out of the pan immediately and wash it promptly. A single stovetop seasoning refresh, as described above, will typically restore the smooth surface.
For a “chicken and potatoes” one-pan meal, how do I prevent the potatoes from scratching my seasoning?
Use a gentle hand. Let the potatoes sear and release naturally before moving them; don’t drag them across the surface. A flat-edged wooden or silicone spatula is preferable to metal tongs. This minimizes abrasion, preserving your patina.
Caring for Your Cast Iron After Cooking Chicken
In my kitchen, I rely on one simple rule to keep my skillets in prime condition. Always clean your cast iron while it’s still warm, using hot water and a gentle scrub to remove any stuck-on bits without harsh chemicals. Dry it thoroughly over low heat, then wipe on a minimal amount of oil to reinforce the seasoning and prevent moisture from causing rust. If you want to deepen your knowledge, our guides on fixing sticky seasoning or choosing the right oils offer practical next steps.
Deep Dive: Further Reading
- Cast Iron Chicken Breasts with Garlic Herb Butter ~ Barley & Sage
- Juicy Cast Iron Chicken Breast (Easy Weeknight Recipe)
- Our Best Cast Iron Chicken Recipes – Lodge Cast Iron
A material science expert by profession, Joseph is also an avid cook. He combines his 10+ years expertise in material science and metallurgy with his passion for cast iron cookware to bring you best hands on advice. His expertise ranges from types of cast iron cookware to best seasoning tips as well as restoration of vintage cast iron utensils. Joe is here to help you solve all your cast iron cookware queries and questions.