
How to Cook Everything in a Cast Iron Skillet Without Ruining the Seasoning?
Worried that searing a steak or simmering tomatoes will strip the hard-earned seasoning from your cast iron skillet? You can cook virtually anything in cast iron with a few simple techniques to protect your pan’s finish.
- How to control heat for everything from steaks to vegetables without damaging the seasoning.
- Safe methods for acidic foods like tomatoes that won’t harm your pan.
- Tips for cooking delicate seafood and preventing sticking.
- Easy cleanup habits that keep your skillet in top shape.
The Foundation: Your Pan’s Readiness for Any Task
Cooking everything in cast iron does not start with a recipe. It starts with your pan’s surface. A well-prepared skillet is your most important ingredient.
Think of your seasoning like a good coat of paint on a house. It should be a smooth, semi-gloss barrier. Run your fingers over the cooking surface. It should feel slick, like polished stone, not rough or sticky. That slickness is polymerized oil, your non-stick shield.
You might wonder if you need to season your pan before every cook. You don’t. But you should check it. Before you start cooking, heat your dry pan on the stove for a minute. Add a tiny drop of oil and spread it with a paper towel. If the towel picks up lots of black residue or the surface looks dull and dry, your seasoning is thirsty.
A quick stove-top seasoning can fix this: warm the pan, add a half-teaspoon of oil, wipe it everywhere, then wipe it all out like you made a mistake. Heat it until it just starts to smoke, then let it cool. It takes five minutes and makes a world of difference.
Your new pre-seasoned pan has a thin, factory-applied layer. It works, but it’s like a primer coat. The seasoning you build at home through cooking and occasional maintenance is like adding multiple, durable topcoats. Your own layers bond together and adapt to your kitchen, creating a tougher, more resilient surface over time.
Heat Mastery: Your Secret Weapon Against Sticking
More than any special tool or trick, controlling heat is your best defense against stuck-on food and carbon buildup. It is the core maintenance skill for cast iron.
Cast iron heats slowly and holds heat intensely. Putting food in a cold pan is a sure way to make it fuse to the surface. You must preheat. For most tasks, place your pan on a medium or medium-low burner and give it a solid 5 minutes to warm up evenly.
The “water droplet test” is your visual guide. Flick a few drops of water onto the hot surface. If they sizzle and evaporate instantly, the pan is too cold. If they dance and skitter around like mercury before vanishing, your pan is perfectly preheated and ready for fat and food.
Heat needs vary wildly. Searing a steak requires a fiercely hot pan to create a crust quickly. Cooking eggs or a delicate piece of fish needs gentle, steady medium heat. The difference is like sprinting versus walking. Both get you there, but one requires controlled, patient energy.
This brings us to a common question: can you cook chicken in a cast iron skillet? Absolutely. The key is steady, medium heat. Start with a good preheat, add your oil, then place the chicken. This gives you a golden crust without burning the surface, and the even heat ensures it cooks through without drying out. Rushing with high heat burns your seasoning and leaves you with undercooked chicken and a sticky mess.
| Food Type | Goal | Pan Pre-Heat |
| Steak, Burgers | Deep Sear | High, until smoking lightly |
| Chicken, Pork Chops | Golden Crust, Cooked Through | Medium-High, then adjust |
| Fish, Eggs | Gentle Release | Medium, with good fat coating |
| Baking (e.g., cornbread) | Even Cooking | Preheat in the oven |
Fat and Oil: Choosing Your Cooking Partner
Think of your skillet’s seasoning like a well-waxed car finish. The right fat or oil is your final protective layer. It creates a slick barrier between your food and the iron, preventing sticking and shielding your hard-earned seasoning from abrasion and acidic ingredients.
Using fat is not just for flavor; it’s the most direct way to care for your pan every single time you cook.
The High-Heat Heroes vs. The Flavor Finishers
Not all fats behave the same way when they get hot. Your goal is to match the fat to your cooking temperature to avoid burning, which can leave a gummy residue or even damage seasoning.
For tasks that need blazing heat-like getting a perfect crust on a steak or searing scallops-you want an oil with a high smoke point. This is the temperature at which the oil starts to break down and smoke.
- Avocado Oil and Grapeseed Oil are my workshop favorites for searing. They have very high smoke points (over 400°F) and are relatively neutral in flavor, letting the food shine.
- Refined Coconut Oil is another great option, though it can impart a slight sweetness.
For flavor, nothing beats butter. But its milk solids burn at a low temperature. My method? I use a high-smoke point oil to do the initial sear, then add a pat of butter in the last minute to baste and build flavor. This protects the seasoning and gives you the best of both worlds.
Enough Fat is Non-Negotiable Maintenance
If your food is sticking, your first question should be: “Did I use enough fat?” A miserly teaspoon of oil for a pan full of potatoes is asking for trouble. Using a generous amount is a proactive maintenance step.
That layer of oil does three critical jobs:
- It conducts heat evenly to the food.
- It fills in microscopic pores in the seasoning, creating a smooth cooking surface.
- With gentle heat, it can actually polymerize and reinforce your existing seasoning layers.
Every time you cook with ample fat, you’re not just making dinner; you’re making your pan better for next time. I watch for a shimmering, fluid layer in the pan before I add my ingredients-that’s my visual cue it’s ready.
A Note for Plant-Based Cooking
Many folks search for “cast iron skillet recipes vegetarian” and wonder if the care changes. It doesn’t. Plant-based oils are actually the foundation of most modern seasoning. Oils like avocado, grapeseed, and even classic vegetable oil are fantastic for both building seasoning and daily vegetarian cooking. They provide all the protection and non-stick benefits you need for everything from sautéing mushrooms to frying eggplant.
Cooking Proteins Without Harming Your Seasoning
Your skillet’s seasoning is a living finish that thrives on careful heat and proper use. Cooking protein is where technique matters most for both your meal and your pan.
For Steak and Chops: The Power of a Proper Sear
Getting a great crust on a steak isn’t just for flavor. It’s the secret to an easy cleanup. A weak sear leaves proteins glued to the pan, while a strong one creates a natural release.
You must preheat your skillet slowly and thoroughly. I place my empty pan over medium-low heat for a full five minutes before turning it up. This gentle warmth allows the entire iron mass to expand evenly, preventing hot spots that can cause sticking. To maintain that nonstick edge, keep the skillet well-seasoned and lightly oiled before cooking. This simple prep helps prevent food from sticking in cast iron cookware.
When you add your oil and meat, you should hear a confident, immediate sizzle. If it’s silent, your pan isn’t hot enough. Leave the meat untouched for several minutes to let the Maillard reaction work its magic. When you see the edges beginning to brown, it will release with little resistance.
A perfect sear acts like a non-stick layer, leaving behind fond for pan sauce, not stubborn bits stuck to your seasoning.
After cooking, let the pan cool slightly, then deglaze with a little water or broth while it’s still warm. This loosens any residue effortlessly, so a simple scrub is all you need.
For Poultry: Managing Moisture is Key
Yes, you can absolutely bake chicken in a cast iron skillet. The main challenge is moisture. Chicken skin and marinades release water and sugars that can polymerize onto your seasoning as a sticky, white film. Knowing what can be cooked and seasoned properly is essential for maintaining your cast iron skillet.
To avoid this, pat your chicken pieces completely dry with paper towels before they touch the pan. This is the single most important step for crisp skin. For a whole chicken, I sometimes let the bird air-dry, uncovered, in the fridge for a few hours first.
Start skin-side down in a preheated skillet to render fat and crisp the skin immediately. Don’t crowd the pan, or you’ll steam the meat instead of browning it.
That white residue you sometimes see is just cooked proteins and fats; a good scrub with coarse salt and a brush will remove it without damaging your underlying seasoning layers.
If you’re using a sugary glaze or sauce, apply it in the last few minutes of cooking. Letting sugar caramelize directly on the pan for too long can lead to a stubborn, sticky mess.
For Seafood: Handling Delicate Flesh and Skin
Fish can be intimidating. Delicate flesh tears easily, and skin can seemingly fuse to the pan. The strategy here is confidence, a hot pan, and the right amount of oil.
For fish fillets with skin (like salmon or trout), ensure the skin is bone-dry. Score the skin lightly with a sharp knife in a few places to prevent it from contracting and curling. Use an oil with a high smoke point, like avocado or refined avocado oil, and let it get hot before adding the fish.
Place the fillet skin-side down and apply gentle, even pressure with a spatula for the first 30 seconds. This ensures full contact for that crucial crispness. The fish will tell you when it’s ready to flip. The flesh will turn opaque about two-thirds of the way up the side, and the skin will release freely.
For skinless fillets or scallops, a dusting of rice flour or cornstarch creates a light barrier that promotes browning and protects your seasoning from direct moisture contact.
With shellfish like shrimp or scallops, make sure they are thoroughly dry. A wet shrimp will steam and stew, leaving behind a watery residue. Get your pan good and hot, cook in batches if needed, and remove them promptly once done to prevent overcooking.
Handling Vegetables and Acidic Foods

This is where many cooks hit a snag. You hear you shouldn’t cook tomatoes or deglaze with wine in your cast iron. The worry is real, but the rule isn’t absolute. It’s about understanding the chemistry and managing your expectations.
Why Acidic Foods Can Be Tough on Seasoning
Think of your skillet’s seasoning as a thin, hard layer of polymerized oil. Acidic ingredients like tomatoes, lemon juice, or vinegar can act like a very mild solvent on that layer. They don’t “eat” the metal, but they can break down the seasoning bonds, making the surface feel rough or looking dull. This reaction is slow and depends entirely on time and heat-a quick tomato sauce simmer won’t ruin your pan, but a three-hour acidic braise might strip it bare.
I keep a dedicated, well-seasoned skillet for my longer acidic cooks. For everything else, I use two simple rules:
- Keep it quick. Sauté cherry tomatoes for five minutes? Go for it.
- Re-oil promptly. After cooking anything acidic, wash, dry, and give the cooking surface a super-thin wipe of oil before storing it. This helps reinforce any slightly compromised spots.
Mastering the Vegetable Roast (Without the Stuck-On Mess)
The goal is caramelized, tender veggies, not a scrubbing session afterward. The secret is less about the vegetable and more about your pan’s temperature and the oil’s readiness. I call it the “shimmer, not smoke” test.
Follow these steps for flawless results:
- Preheat your skillet. A cold pan is a sticky pan. Put your dry skillet in a cold oven, then set it to 425°F. Let it heat with the oven for at least 15 minutes.
- Toss veggies in oil. Coat your cut vegetables in a high-heat oil (like avocado or refined coconut) in a separate bowl. This ensures every piece is slick.
- Check the pan’s heat. Carefully pull the hot skillet from the oven. Add a single drop of water. If it dances and evaporates instantly, it’s ready. The oil should shimmer when added, not immediately smoke.
- Add the veggies. They should sizzle on contact. Don’t crowd the pan. Give them space so they roast, not steam.
That initial hot sizzle creates an instant non-stick barrier, letting you get those perfect browned edges with minimal sticking. If things do stick a little, deglaze with a bit of water or broth after cooking-it lifts the fond and you can pour those tasty juices right over your meal.
Do You Need to Re-Season After Something Acidic?
Not usually. “Re-seasoning” means a full oven cycle, and that’s overkill for most meals. What you need is maintenance. After washing your pan post-acidic cook, dry it thoroughly on the stovetop. Then, take the same paper towel you used for drying, add a few drops of your seasoning oil, and wipe the entire cooking surface. This “conditioning wipe” is your best defense-it protects the existing seasoning and slowly builds it back up over time. Only if the surface looks patchy, feels sticky, or food starts sticking consistently should you consider a full re-season.
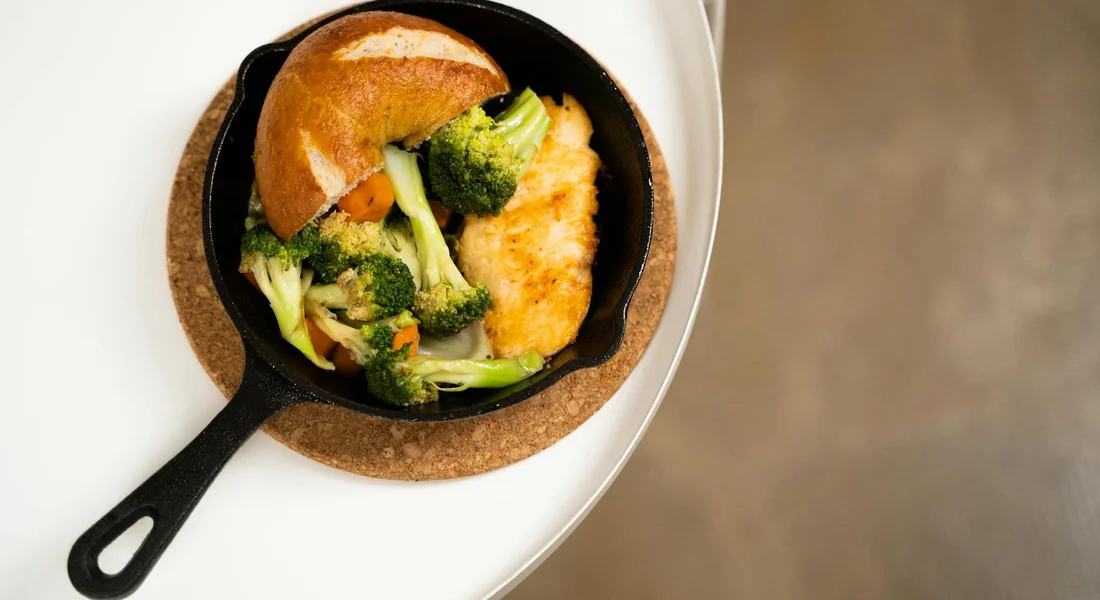
Pan-Prep for a One-Pan Vegetable Dinner
I see searches for “cast iron skillet recipes for dinner” all the time. While I don’t provide recipes, I can tell you the perfect pan-prep makes any recipe work. For a classic one-pan roast with proteins and veggies, your preparation is everything. Mastering a few essential cast-iron techniques—seasoning, proper heating, and oiling—helps guarantee perfect results. These essential techniques will be tied together with implicit links in the next steps.
Start with a clean, seasoned, and preheated skillet. If you’re adding a protein like chicken thighs, cook them first to render fat. Remove them, then add your harder vegetables (like potatoes or carrots) to that hot fat. You’re building flavors in layers and using the rendered fats to prevent sticking for the next stage. Softer veggies like peppers or zucchini go in last. This method uses the pan’s heat retention perfectly and ensures nothing steams or sticks, giving you a simple, successful dinner with easy cleanup.
The Right Cleanup for What You Just Cooked
Think of cleaning not as a chore, but as the first step in preparing your pan for its next meal. It is the most important thing you can do after cooking. A perfectly seasoned layer can be undermined by leftover food particles that burn during your next preheat. Proper cleaning protects your seasoning by removing the debris that would otherwise carbonize and weaken it.
Your Post-Cook Cleaning Decision Flow
You don’t need a complicated routine. Just assess the pan and choose one of these paths.
- Quick Wipe-Out: For foods that left little to no residue, like searing a steak or toasting nuts. While the pan is still warm (not scorching hot), use a dry paper towel or dishcloth to wipe it clean. You’re done.
- Hot Water Scrub: This is your standard, go-to method. For pans with light residue, a bit of fond, or sticky spots. Rinse the warm pan under hot tap water while scrubbing with a stiff brush or non-abrasive scrubby sponge. This gets most jobs done.
- Chainmail for Stubborn Bits: For baked-on cheese, fused eggs, or that crispy edge from cornbread. Use a chainmail scrubber under hot running water. It’s my favorite tool. The flexible rings scrape off carbonized bits without damaging the seasoning’s surface, like a gentle ice scraper for your pan.
The Sticky and Sugary Stuff
Some foods demand immediate attention. High-starch items, like hash browns or fried potatoes, can leave a gummy, glue-like layer. Sugary glazes and barbecue sauces will caramelize and then harden into a cement-like shell if left to cool in the pan.
For these, I use the “hot pan, hot water” rule. As soon as you plate the food, fill the still-hot skillet with an inch of water and return it to a warm burner for a minute to loosen everything. Then, proceed with your chainmail or brush. Letting these residues cool is the main cause of difficult, frustrating cleanups.
A Soapy Truth for a Trustworthy Pan
Let’s settle this. Modern liquid dish soap is safe for your seasoned cast iron. The old warning was for lye-based soaps, which haven’t been used in homes for decades. This is one of the myths we debunk in our guide on using soap with cast iron. The biggest myth—soap ruins your seasoning—doesn’t hold up for modern cookware.
Food grease and oil are different. Your seasoning is polymerized oil, a hard, bonded layer. Soap and water wash away the loose, unpolymerized cooking oils and food residues. Using a drop of soap like Dawn ensures you are cleaning off all organic material, which prevents rancidity and protects your hard-earned patina from breakdown. After washing, just remember the cardinal rule: dry it thoroughly, every time, with a towel and a quick stovetop heat-up.
When to Seek Professional Restoration Help
Most cast iron issues can be solved at your kitchen sink. Sometimes, though, a piece needs more than home care can provide. Knowing when to call in a pro saves you time and can rescue a skillet you thought was lost for good.
Signs Your Pan Needs a Professional
If you run into any of these problems, a professional restoration might be your best option.
- Severe, Scaly Rust: Surface rust that wipes off with vinegar is one thing. If the rust is deep, creating a rough, pitted texture you can feel with your fingernail, it has compromised the iron itself. Home methods often can’t restore a smooth cooking surface from this.
- Warping (A Spinner): Set your pan on a flat countertop and press the center. If it rocks or spins, it’s warped. This causes uneven heating and makes cooking frustrating. This is a structural metal issue that home seasoning cannot fix.
- Thick, Flaky Carbon Buildup: A little baked-on food is normal. A hardened, cratered layer of carbon over an eighth of an inch thick is like concrete. Trying to chip or burn this off at home can damage the underlying iron or take an unreasonable amount of effort.
- Deep Pitting: Pits are small holes or craters in the metal, often from long-term rust damage. While a few small pits won’t ruin a pan, a heavily pitted surface will never be non-stick and can trap food and moisture, leading to constant rust problems.
What Professional Restoration Involves
Professional shops typically use methods that are too aggressive or expensive for most home users.
The most common professional process is sandblasting (or its gentler cousin, soda blasting). They use high-pressure air to blast fine media against the pan, stripping it down to bare, gray iron in minutes. It removes every speck of rust, old seasoning, and carbon without chemicals.
For valuable vintage pieces with minor warping or milling marks, some specialists offer re-machining. They use a large lathe to shave a thin, even layer off the cooking surface, making it perfectly smooth and level again.
This level of work is worth the cost primarily for heirloom pieces, rare brands, or skillets with significant sentimental value. For a common modern lodge skillet, the restoration cost may be close to buying a new one. But for your grandparent’s 100-year-old pan? Having it professionally returned to like-new condition is often a worthy investment.
When to Stop Cooking on a Damaged Pan
If your pan has damage that prevents you from scrubbing it completely clean after each use, you should stop cooking with it.
A warped pan that doesn’t sit flat on your burner is a safety hazard and cooks poorly. Deep pits or cracks that harbor old food and moisture can breed bacteria and cause rancid oils to taint your food. Continuing to use iron that can’t be properly cleaned compromises both your safety and your seasoning efforts.
If you’re facing one of these extreme scenarios, don’t feel defeated. It simply means your cast iron has a story that needs a specialist’s chapter. Getting it professionally restored gives you a flawless foundation to build your own seasoning and cooking memories upon for decades to come.
Alternative Tools and Methods for Specialized Tasks
Your 12-inch skillet is a kitchen hero, but even heroes have a specialized team. Using the right cast iron tool for the job makes cooking easier and protects your pan’s seasoning from unnecessary stress. With a new Lodge skillet, a thorough seasoning sets the foundation for lasting performance. A complete, step-by-step guide to seasoning a new Lodge cast iron skillet ensures you get it right.
Choosing the Right Pan for the Task
Think of your skillet collection like a painter’s brushes. You have a versatile round one, but sometimes you need a different shape. A standard skillet with sloped sides is perfect for sautéing and flipping. A flat griddle or grill pan is the clear choice for items that release a lot of moisture, like mushrooms or a fatty steak, as the ridges keep the food above the juices. For a big batch of seared vegetables or a frittata, a larger surface area prevents crowding and steaming.
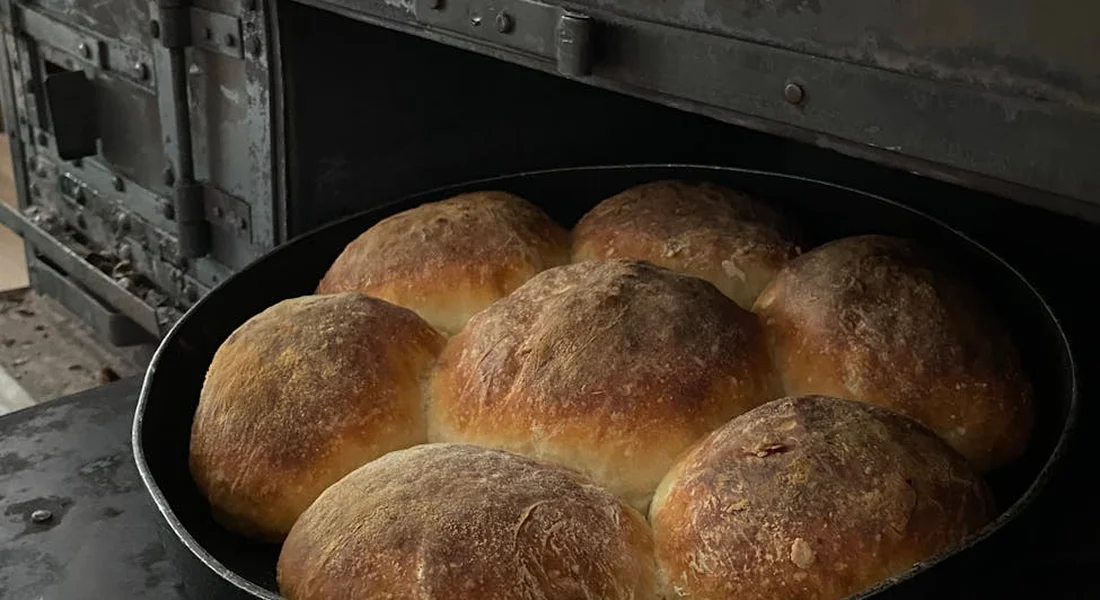
For deep frying, braising, or baking bread, a Dutch oven’s high walls and tight-fitting lid create an environment a skillet simply can’t match. My daily driver skillet handles 90% of my cooking, but I always reach for my Dutch oven for soups and no-knead bread. It’s not about having every piece, but knowing which one you have will work best.
Smart Cleaning Tools Beyond the Sponge
Soap and a soft sponge are fine for daily wipedowns. For the tough stuff, you need the right tool. When you’ve seared a steak or have baked-on cheese from fajitas, a flexible metal fish spatula or a dedicated flat-edged scraper is your best friend.
These tools apply focused pressure to lift stuck-on bits without the abrasive scrubbing that can thin your seasoning. For clean cast iron skillets, the best tools and methods emphasize gentle, effective cleaning. I keep a metal scraper by my stove. After cooking, while the pan is still warm, I gently scrape the cooking surface. It takes off food residue in seconds, often making a full wash unnecessary. A quick, targeted scrape preserves your hard-earned seasoning far better than aggressive scrubbing with a rough sponge.
Practical Seasoning for a Frequently Used Pan
Oven seasoning is the best method for building a base coat or repairing major damage. For a pan you use multiple times a week, a full one-hour oven session after every use isn’t practical. For maintenance, stovetop seasoning is a perfect middle ground.
Here’s my simple process after cleaning and drying my daily skillet:
- Place the dry pan over low to medium heat for one minute.
- Add 1/4 teaspoon of your chosen oil (I use grapeseed) and spread it thinly with a paper towel.
- Let the pan heat for 5-10 minutes. You’ll see it start to smoke slightly and the finish may darken.
- Turn off the heat and let it cool on the burner.
This quick treatment polymerizes a tiny, fresh layer of oil, constantly reinforcing your pan’s non-stick surface where it matters most-the cooking surface. It takes minutes and keeps your primary pan in peak condition between deeper oven maintenance sessions.
Common Questions
I cooked chicken with a glaze and now my pan has a sticky, white film. Did I ruin the seasoning?
No, you didn’t ruin it. That residue is just polymerized sugars and proteins from the glaze. Scrub it off while the pan is warm using coarse salt and a stiff brush or a chainmail scrubber with hot water.
I want to use my skillet over a campfire. How do I protect it from the extreme heat and ash?
Campfire heat is intense and uneven. Always use a sturdy grate to stabilize the pan and avoid placing it directly in roaring coals. Afterward, clean off soot and ash with hot water and re-apply a thin coat of oil before storing to prevent flash rust.
I cook vegetarian meals almost exclusively. Does my cast iron need different care?
No, the care is identical. Plant-based oils are ideal for both cooking and seasoning. Just ensure you’re using enough fat during cooking to maintain the non-stick surface and perform a quick stove-top seasoning wipe after cleaning to keep the seasoning robust.
Your Skillet’s Care After Cooking Anything
The most reliable way to enjoy your cast iron for decades is to tend to its seasoning immediately after cooking, no matter what you’ve made. I always wash mine with a little soap, dry it over heat, and rub in a whisper-thin layer of oil before it cools. You can find more on choosing the right oil or fixing a damaged finish in our library of care guides.
Related Guides and Information
- How to Season a Cast Iron Pan (It’s Easier Than You Think!)
- r/castiron on Reddit: How to season your skillet: A detailed guide
- How to Season – Lodge Cast Iron
A material science expert by profession, Joseph is also an avid cook. He combines his 10+ years expertise in material science and metallurgy with his passion for cast iron cookware to bring you best hands on advice. His expertise ranges from types of cast iron cookware to best seasoning tips as well as restoration of vintage cast iron utensils. Joe is here to help you solve all your cast iron cookware queries and questions.