
How Can You Season and Maintain Cast Iron Grill Grates for Perfect Results?
If your cast iron grill grates are developing rust or food sticks every time you cook, you’re not alone. I’ve been there with my own grates, and a proper seasoning process is the simple fix that builds a resilient, non-stick surface.
This guide walks you through the hands-on methods I use, covering everything from start to finish:
- How to thoroughly clean and prepare your grates for the best seasoning adhesion.
- Selecting the right oil and applying it in thin, even layers for durability.
- Easy after-use routines that protect your seasoning and stop rust.
- What to do if you encounter common issues like sticky spots or minor rust.
Do Cast Iron Grill Grates Really Need Seasoning?
Think of seasoning as the cast iron’s protective skin. It’s a hard, slick layer formed when you apply a thin coat of oil and bake it at a high temperature. The heat causes the oil to polymerize, bonding it to the metal.
Yes, your bare cast iron grill grates absolutely need a good seasoning. Unlike your grill’s painted steel lid or aluminum burners, the cast iron grates are raw, unfinished metal. Without a polymerized oil coating, they will rust the moment they get wet.
There is one big exception to this rule. If your grates are coated in a glossy, colored porcelain enamel, do not season them. That enamel is a glass-like coating that is already non-stick and rust-proof. Seasoning it will just create a greasy, sticky mess that can burn and smoke.
A proper seasoning layer gives you three major advantages every time you cook.
- It stops rust. The polymerized oil seals the raw iron from air and moisture.
- It creates a natural non-stick surface. Over time, a well-built seasoning makes grill marks release cleanly and prevents delicate foods from tearing.
- It makes cleanup incredibly simple. After grilling, you can often just brush off the char. Food residue doesn’t weld itself to the metal.
How to Prepare Your Grill Grates for a New Seasoning Layer
Preparation is everything. You cannot build a strong seasoning on a dirty or rusty foundation. The goal is to get down to bare, clean metal.
Start with a thorough cleaning. For brand-new grates, scrub them with warm, soapy water and a stiff brush to remove any factory dust or protective wax. For grates with light surface rust or old, gummy grease, use coarse salt as a gentle abrasive with a bit of oil, or a dedicated cast iron scrubber. These steps prepare your cast iron stove grates for a clean restoration.
The most critical rule is to start with a surface that is completely clean, completely dry, and slightly warm. Any moisture, grease, or old carbonized gunk will prevent the new oil from bonding properly.
Handling problems depends on their severity.
- For light rust, a vigorous scrub with vinegar or a specialty rust remover paste will usually take care of it. Rinse and dry immediately.
- For heavy, flaking, or uneven old seasoning, you need to strip it. The most controlled method is to use an oven’s self-cleaning cycle, which incinerates the old layers. For a less intense option, a lye-based oven cleaner in a trash bag works well over a few days.
Once your grates are clean and dry, warm them up. Place them on your grill over medium heat for about 5-10 minutes, or in a 200°F oven. This opens the microscopic pores of the cast iron. It helps the first layer of oil sink in for a stronger bond, much like applying stain to warm wood.
The Right Tools and Oils for the Job

Seasoning is just oil baked onto iron until it transforms into a slick, durable layer. Your choice of oil and tools makes the difference between a flaky finish and a perfect patina.
Choosing Your Oil
Not all oils are equal for the high heat of seasoning grill grates. You want an oil with a high smoke point that polymerizes well. Think of polymerization like the oil turning into a hard, plastic-like coating.
| Oil | Best For | Watch Out For |
|---|---|---|
| Flaxseed Oil | Creates a famously hard, glossy finish. | It’s expensive and can flake over time if applied too thick. |
| Canola, Grapeseed, or Avocado Oil | Excellent, affordable all-purpose options. High smoke points make them ideal for grill seasoning. | No significant downsides. These are my daily drivers. |
| Crisco or Vegetable Shortening | A classic, forgiving choice. Easy to apply a thin layer. | Can feel a bit gummy if over-applied. Works best at slightly lower temps. |
Modern Seasoning Alternatives
Beyond the bottle, you can find seasoning sticks, pastes, and sprays. I keep a conditioning stick in my grilling kit for quick touch-ups. These products are convenient, but a simple bottle of canola oil works just as well for a full seasoning session.
Your Simple Toolkit
You don’t need specialty gear. Gather these items before you start:
- Lint-free cloths (old t-shirt fabric is perfect) or paper towels
- A stiff brush for cleaning
- Tongs for handling hot grates
- Heat-resistant gloves – this is non-negotiable for safety
Step-by-Step: How to Season Cast Iron Grill Grates
Grates have more nooks and crannies than a skillet, but the process is the same. Clean iron, thin oil, high heat.
Your Two Main Method Options
You have a choice: use the grill’s own burners or your kitchen oven. Both work. Your decision depends on your gear and tolerance for smoke.
Method 1: Seasoning Directly on Your Grill
This is my preferred method. It contains the mess and smell outdoors where it belongs. This process assumes your grates are clean and dry.
- Fire up your grill. Aim for a medium-high heat, around 400-450°F (204-232°C). You want it good and hot.
- Place the clean, dry grates on the grill. Let them heat for 10-15 minutes. This opens the pores of the metal.
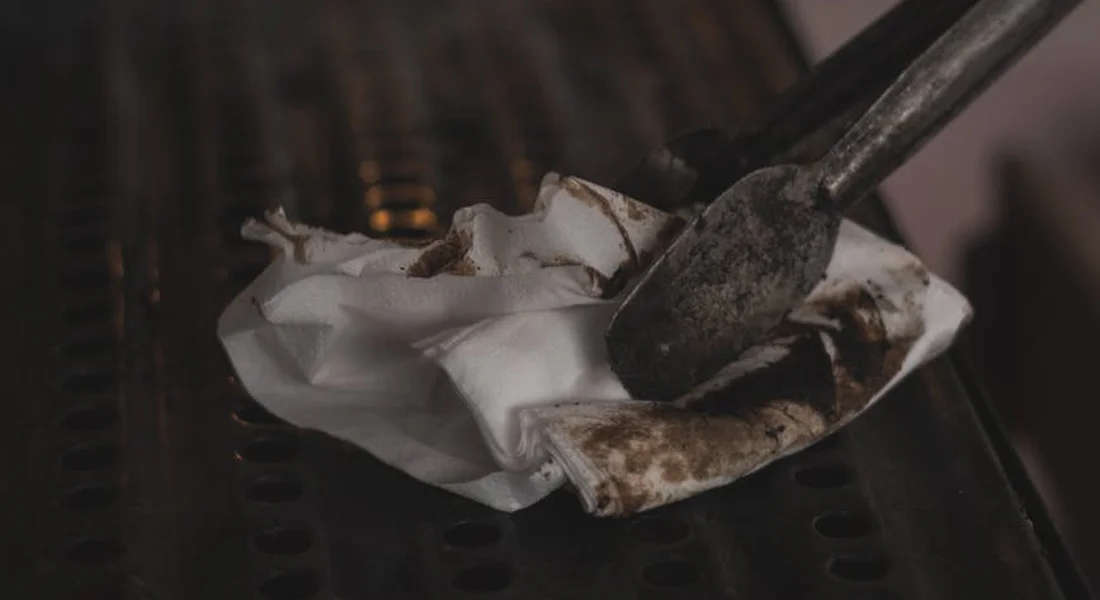
- Using tongs and a folded cloth, carefully apply a tiny amount of oil to the hot grates. This layer should be so thin it looks like you made a mistake and wiped it all off. Coat all sides.
- Let the oil bake on. You’ll see it stop smoking and change from a wet look to a dry, matte finish. It often darkens. This polymerization takes 15-30 minutes.
- Turn off the grill and let the grates cool inside it. Repeat steps 3 and 4 for 2-3 more ultra-thin layers.
Those multiple, thin layers build a foundation much stronger than one thick, tacky coat.
Method 2: Can You Season Grill Grates in the Oven?
Yes, absolutely. An oven provides even, consistent heat. Just be ready for some smoke.
- Preheat your oven to 450-500°F (232-260°C). This is the standard cast iron seasoning temp.
- While it heats, give your clean, dry grates a microscopically thin coat of oil on all surfaces.
- Place the grates on the top rack with a sheet of aluminum foil on the bottom rack to catch any drips.
- Bake for one hour. Turn the oven off and let the grates cool completely inside.
- Apply a second or third thin layer using the same process.
The oven method’s main pro is even heating, which is great for thorough polymerization. The con is the smoke it generates in your kitchen. Always use your oven’s vent fan and open a window. Your kitchen will smell like a diner for a few hours, but that’s the smell of success.
Your Grill Grate Seasoning and Care Checklist
Think of this as your master reference for perfect grates. You can follow these steps for a first-time seasoning or to refresh an older, neglected set.
- Give your grates a deep clean. If they are new, scrub with warm, soapy water to remove any factory residue. If they are used, you may need to scour off rust or old, flaky seasoning first.
- Dry the grates completely. Towel-dry them, then place them over a medium flame on your grill or in a warm oven for a few minutes to evaporate all moisture.
- Apply a thin, even coat of high-smoke-point oil (like canola, grapeseed, or flaxseed) to every surface. Use a cloth or paper towel to wipe off as much oil as you applied. The goal is to leave only a microscopic, shiny layer, not a wet, sticky one.
- Place the oiled grates in a cold oven or a cold grill set for indirect heat.
- Heat the grates to 450-500°F (232-260°C) and let them bake for one hour.
- Turn off the heat and let the grates cool completely inside the oven or grill before removing them. This slow cooling is part of the polymerization process.
Follow this simple table of essentials to keep your process on track.
| Do This | Don’t Do This |
| Use a very thin layer of oil. | Use butter, olive oil, or a thick, gloppy coat. |
| Let grates cool completely in the heat source. | Remove them while hot or quench them. |
| Store them bone-dry. | Put them away damp or in a humid shed. |
How to Maintain That Perfect Seasoning
Good seasoning is built over many cooks, not just one session in the oven. Your daily care is what makes it last for years.
The Right Way to Clean After Grilling
The best time to clean your grates is while they are still warm from the grill, not hot enough to burn you, but warm enough that debris is loose. I keep a dedicated wire brush by my grill for this, especially when cleaning cast iron grates.
Scrub the grates thoroughly with the brush to knock off any charred food. For stubborn bits, crumple up a ball of aluminum foil and use it like a scrubber with your tongs. This approach also tackles stubborn burnt-on food from cast iron, lifting stuck bits without harming the seasoning. It’s quick and chemical-free, a smart step before reseasoning. This dry-cleaning method preserves your hard-earned seasoning better than any other approach.
If you have sticky residue from sugary sauces, it’s okay to use a little water. Lightly wet your brush or a cloth and scrub the spot. You can even use a drop of mild dish soap. Just avoid soaking the grates or using harsh steel wool.
Immediately after cleaning, dry the grates fully. Put them back over the grill’s dying heat for a minute to evaporate all water. Then, while they are still warm, take a paper towel with a few drops of your seasoning oil and give them a very light wipe. This protective layer is your final step after every cook. Maintaining cast iron grill grates and other stove components becomes easier when this routine is part of your regular cleaning. Keeping up the habit helps protect the surface and ensure consistent performance.
Storing Your Grates for Longevity
If you are putting your grill away for the winter or won’t be using it for a few months, proper storage is non-negotiable. Rust is always waiting for a chance.
Start with a perfectly clean and dry grate. Follow the post-grill cleaning steps above, ensuring no moisture remains. The ideal storage spot is indoors, in a dry place like a garage shelf, basement, or closet. Avoid damp outdoor sheds or covered patios where humidity can linger.
For long-term storage, I give my grates one extra protective coat. After their final warm oil wipe, I’ll sometimes put them in the oven for one more short seasoning cycle. This adds a tougher barrier against atmospheric moisture. You can also just apply a slightly heavier (but still thin!) coat of oil before tucking them away.
Either way, I check on my stored grates once a season. If they look dry or have a faint dusty rust, I know it’s time for a quick scrub and re-season before the next barbecue.
Common Grill Grate Mistakes and How to Avoid Them

Grill grates have more nooks and crannies than a skillet, which makes them a bit trickier to care for. A few common errors can lead to frustrating results. Let’s fix them.
Sticky, Gummy, or Flaking Seasoning
If your seasoning feels tacky or starts peeling off in little chips, there’s almost always one culprit. You used too much oil during the seasoning process.
Think of oil like paint. A thick, gloppy coat will never cure hard. It stays soft and eventually flakes away. A thin, almost invisible coat polymerizes into a hard, slick shell.
If your grates are already sticky, you need to remove the excess oil and start over.
- Heat the grates in your oven or on your grill to soften the gummy oil.
- Use a stiff brush and some coarse salt to scrub off all the soft, sticky residue. You may need a scraper for thick spots.
- Wipe them clean, then apply a new, microscopically thin layer of oil for your next seasoning cycle.
Rust Coming Back Too Fast
Rust is a sign that water defeated your seasoning. It usually happens because the grates weren’t dried completely after cleaning.
Towel-drying isn’t enough. Water hides in the tight spaces between the grate bars and under any remaining food bits.
The only reliable fix is to apply heat until every bit of moisture is gone.
After washing, put the grates back on a hot grill or in a warm oven for 10-15 minutes. You should see no steam. Once they are bone-dry and slightly warm, you can apply a tiny protective film of oil before storage. This routine helps keep clean porcelain enameled cast iron grill grates looking their best. Keeping them dry and lightly oiled preserves the enamel’s finish and performance.
Damaging the Seasoning During Cleaning
It’s tempting to attack stuck-on food with the toughest tool you have. This can strip away your hard-earned seasoning.
Steel wool and metal grill brushes are for heavy rust removal or stripping a pan bare for restoration. Using them for everyday cleaning is like using sandpaper to wipe down a dining table.
For routine cleaning, use tools that scrub food off without sanding the seasoning away.
- A nylon-bristle grill brush or a dedicated cast iron scrub brush works well.
- For stubborn bits, use a wooden or nylon scraper.
- A paste of coarse salt and water is a gentle, effective abrasive that won’t harm the patina.
What Worked for Me: A Quick Tip from My Workshop

I learned this lesson the hard way with a set of lodge grates. I seasoned them, they came out perfect, but after the first cook they were a mess. Food stuck in every groove. I felt like I’d done something wrong.
Then I realized the issue. I was treating the seasoning like a finish. It’s not. It’s a non-stick cooking surface. The real trick isn’t just building the seasoning, it’s learning how to cook on it properly from the very first use.
Here’s my hard-won advice. After you finish your final seasoning cycle and the grates have cooled, don’t just put them away. Give them a “dry run.”
- Heat them up on your grill until they are very hot.
- Take a paper towel, fold it, and grab it with tongs.
- Dip the corner in a high-smoke-point oil (like grapeseed), then wipe it across the hot grates. You’ll see a tiny bit of smoke.
- Let the grates cool on the grill. This creates an instant, ready-to-use non-stick layer on top of your fresh base seasoning.
That first cook will go much smoother. The grates will perform better right away, and you’ll avoid the discouragement of food sticking to your brand-new work.
Common Questions
What’s the ideal temperature when seasoning with Crisco or vegetable shortening?
Crisco polymerizes well at 400-450°F (204-232°C). Keep it slightly lower than flaxseed oil to prevent burning the fats. A thin, even coat at this heat will create a durable, non-gummy layer.
Are pre-made seasoning sticks, sprays, or compounds worth using?
They offer convenience for quick touch-ups, especially on grill grates. For building a base seasoning, traditional liquid oils applied with a cloth give you more control over thickness. I keep a stick in my kit for maintenance but reach for the bottle for serious seasoning sessions.
Can I make an effective seasoning paste or wax at home?
Yes, by blending a high-smoke-point oil with a harder fat like beeswax or fully hydrogenated coconut oil. The goal is a spreadable consistency that melts into a thin layer. Apply sparingly-too much will create the same sticky mess as any excess oil.
Keeping Your Grill Grates Cooking Strong
For flawless results, focus on building a resilient seasoning layer by oiling your clean, warm grates after every use. This simple habit protects the iron and creates a natural non-stick surface that improves over time. You might also find my guides on storing cast iron to prevent rust and the best methods for cleaning heavily soiled pieces helpful for your entire collection.
Related Guides and Information
- How to Season Cast Iron Grill Grates for Your Gas Grill | Griller’s Spot
- What is the best way to season cast iron grill grates? – Quora
- How to Season Cast Iron Grill Grates Step-by-Step – Utopia
- How to Care For Cast-Iron Grill Grates – Char-Griller
- Seasoning Cast Iron Grids – Broil King
- Do My Cast Iron Cooking Grates need to be Seasoned? | Burning Questions | Weber Grills
A material science expert by profession, Joseph is also an avid cook. He combines his 10+ years expertise in material science and metallurgy with his passion for cast iron cookware to bring you best hands on advice. His expertise ranges from types of cast iron cookware to best seasoning tips as well as restoration of vintage cast iron utensils. Joe is here to help you solve all your cast iron cookware queries and questions.