
How Do You Clean a Cast Iron Pan After Cooking?
You just finished a great meal, but now you’re facing the dirty pan. You might worry that washing it will ruin the precious seasoning you’ve worked so hard to build. The truth is, cleaning your pan the right way is one of the best things you can do to protect that seasoning. I’ve felt that worry with my own skillets, but a proper clean-up is simpler than you think.
This guide walks you through the entire process, from a simple rinse to tackling tough, stuck-on messes. Here’s exactly what we’ll cover:
- The fast, two-minute clean for everyday use.
- How to safely remove stuck-on food without damaging your pan.
- The crucial drying and re-oiling step that stops rust.
The Cast Iron Cleaner’s Toolkit
You don’t need a cabinet full of specialty gear. A few reliable tools handle every cleaning job.
- Chainmail Scrubber: This is my personal favorite. Think of it as a gentle grater. Its metal rings scrape off stubborn, stuck-on food without cutting into your pan’s hard-earned seasoning. It’s perfect for the aftermath of a good sear.
- Stiff Nylon Brush: This is your everyday workhorse. Use it for quick cleanups of light residue. The stiff bristles get into corners and the pour spout. It’s very gentle on the seasoning.
- Coarse Salt (Kosher or Sea): Salt acts as a mild, natural abrasive. Sprinkle a handful in your warm, dry pan and scrub with a paper towel or cloth. It’s excellent for lifting light grease and polishing the surface. You just wipe or rinse it away after.
- Mild Dish Soap: The old rule about never using soap is outdated. Modern dish soaps are mild and won’t strip your seasoning. A drop helps cut through grease. It’s a tool for cleanliness, not an enemy.
If you’re wondering how to clean your Lodge cast iron skillet, these are the exact tools for the job. Lodge’s factory seasoning is incredibly durable and designed to handle this kind of sensible cleaning.
The Basic, No-Stress Cleaning Method
This simple routine is what I do after almost every meal. It keeps my pans in great shape without any fuss.
- Let the pan cool, then rinse. Wait until the pan is warm, not scalding hot. Run it under warm tap water to loosen any food bits. For a very greasy pan, you can wipe out excess oil with a paper towel first.
- Scrub with your chosen tool. Grab your chainmail, brush, or salt. For most daily cooking, a quick scrub with the nylon brush and a tiny drop of soap is perfect. If food is stuck, the chainmail scrubber makes short work of it.
- Rinse thoroughly with warm water. Make sure all soap bubbles and food particles are gone. Look closely.
- Dry it completely. This is the most important step. Water is the only thing that can quickly ruin your pan. Dry it aggressively with a towel, then place it on a stovetop burner over low heat for 2-3 minutes. This drives off every last bit of moisture. When the pan feels warm and dry to the touch, you’re done.
This basic method is truly all you need 90% of the time. It’s fast, effective, and protects your seasoning.
Quick Snapshot: Your Post-Cooking Cleanup
| Scenario | Best Tool | Action | Dry Method |
| Light Residue (e.g., from eggs) | Stiff Nylon Brush | Quick scrub with warm water. | Towel dry, then warm on stove. |
| Stuck-On Food (e.g., seared meat crust) | Chainmail Scrubber | Scrub under warm running water. | Towel dry, then warm on stove. |
| Baked-On Grease | Coarse Salt or a drop of Soap with Brush | Scrub with salt in a dry pan, or use soapy water. | Towel dry thoroughly, then warm on stove. |
How to Clean Stubborn, Stuck-On Food
Sometimes, your dinner leaves a stubborn memory behind. You’re not dealing with simple grease. This is food that has burned onto the hot metal or polymerized, bonding with your seasoning. Don’t reach for metal tools or harsh cleaners. Gentle heat and patience are your best tools here.
The most reliable method for serious stuck-on bits is the “simmer and scrape” technique. It uses the power of steam to loosen everything. After cooking, add about half an inch of water to the warm pan. Place it back on the burner and bring the water to a gentle simmer. Let it bubble for a few minutes. You’ll see the gunk start to soften and lift from the surface. Use a wooden or nylon spatula to gently scrape the bottom. Pour out the dirty water, and you’ll find the pan much easier to scrub clean with your usual brush.
For a dry, abrasive clean, nothing beats a coarse salt and oil scrub. Kosher salt or coarse sea salt works perfectly. Pour a tablespoon of salt into the dry pan, then add a teaspoon of oil. Use a paper towel or a cloth to grind the mixture into the cooking surface. The salt crystals act like tiny, natural scrubbers that lift debris without harming the good seasoning underneath. Wipe or rinse it all out when you’re done. For tougher spots, you can reach for a light baking soda paste (baking soda mixed with a splash of water) for gentle scrubbing that won’t strip the seasoning. This safe approach complements salt scrubs and helps keep cast iron in top shape.
If a particularly aggressive cleaning session removes a patch of your hard-earned seasoning, don’t panic. Simply dry the pan completely, apply the thinnest possible layer of oil to the bare spot, and heat the pan on the stovetop until it just starts to smoke. This quick touch-up bonds a fresh, protective layer to that spot.
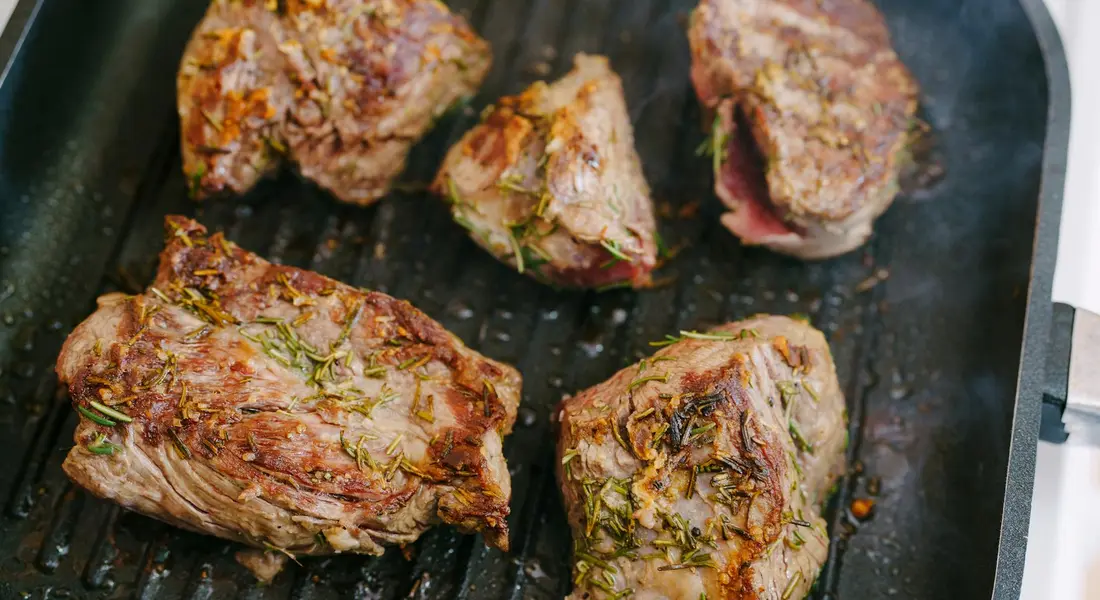
How Do I Clean a Cast Iron Grill Pan or Skillet with Ridges?
Those beautiful grill marks come from a surface that loves to trap food. Cleaning a ridged pan or grill grate requires a change in your tool. A standard flat brush won’t reach into the valleys. You need a stiff-bristled brush designed for the job.
Look for a brush with nylon or stiff natural bristles that can get into the grooves. Hold the brush at an angle and use a back-and-forth motion along the length of the ridges, not across them. This lets the bristles sweep down into the channels. If food is really lodged, use the salt scrub method mentioned above, working the salty oil paste deep into every groove.
My own grill pan taught me a simple trick. After the main scrub, I do a final pass with a rolled-up paper towel. I push it through the grooves like I’m cleaning a rifle barrel. This picks up any last particles the brush might have missed and ensures the ridges are completely dry before I apply oil.
Drying and Oiling: The Steps That Stop Rust
This is the most critical part of the entire process. Cast iron rusts because it’s mostly iron, and iron reacts with oxygen and water. Your seasoning is a barrier, but water left on the surface will find a way through. Drying your pan is non-negotiable.
Always dry your pan immediately after washing. Start by towel-drying it aggressively. Then, apply gentle heat to evaporate every last molecule of water. You have two great options:
- Place the pan on a stovetop burner over low heat for 2-3 minutes.
- Put it in a warm oven (around 200°F) for 10-15 minutes.
You’ll know it’s dry when the surface feels warm and looks completely matte.
The final, thin coat of oil you apply after drying is not for building seasoning, it’s for creating a seal. Think of it as a temporary raincoat you put on the pan before storing it. This microscopic layer of oil displaces any ambient moisture and protects the iron until your next use.
Use the “wipe on, wipe off” technique. Put a few drops of a neutral oil (like canola, grapeseed, or Crisco) on a paper towel. Rub it over the entire pan, inside and out. Then, take a fresh, clean paper towel and buff the surface as if you’re trying to remove all the oil you just put on. You want the pan to look dry to the touch, with only a hidden, molecular layer of oil remaining. Any more than that will become sticky.
Can I Leave Oil in My Cast Iron Overnight?
It’s a common thought: if a little oil is good, a pool of oil must be better for protection. I advise against it. Leaving a visible layer of oil in the pan, especially overnight, causes two problems.
First, that thick oil will never fully polymerize at room temperature. It will remain a sticky, tacky film that attracts dust and lint. Second, many cooking oils can turn rancid over time. You don’t want your next omelet tasting like old oil. The practice of leaving a puddle of oil “for storage” often leads to a gummy pan that needs to be cleaned all over again.
Stick to the method that works: a perfectly dry pan with a buffed-on, almost-invisible coat of oil. This keeps your cast iron ready, protected, and never sticky, especially when you season and maintain your cast iron regularly.
Common Cleaning Mistakes and How to Avoid Them

Even with the best intentions, a few common missteps can set your pan’s seasoning back. Recognizing these pitfalls is your first line of defense.
Mistake 1: Soaking the Pan or Leaving It Wet
Leaving your pan in a sink of water is an invitation for rust. Cast iron is porous, so it doesn’t just get wet on the surface. Water seeps into the microscopic pores of the metal. If it sits there, oxidation begins. That’s rust. Rust on cast iron can be especially tricky to deal with.
I treat my skillet like I would a good chef’s knife. I clean it right after it’s cool enough to handle. If you have stubborn food, let it soak in hot water for 10-15 minutes while you finish your meal, but never for hours.
Leaving your pan wet, especially submerged, is the fastest way to create a rust problem you’ll have to fix later.
Mistake 2: Using the Dishwasher
This is a hard rule. The dishwasher’s combination of harsh detergent, extremely hot water, and prolonged moisture is catastrophic for cast iron. It will aggressively strip away your hard-earned seasoning and guarantee rapid, widespread rust. No amount of seasoning will save it from the dishwasher’s onslaught.
Think of your seasoning as a protective coat of paint. The dishwasher is like a power washer with paint stripper mixed in. Your pan will come out bare and vulnerable.
Mistake 3: Using Overly Harsh Abrasives
For day-to-day cleaning, you don’t need wire wheels, power sanders, or even metal scrapers unless you’re tackling a major restoration. Using these routinely is like sanding your wooden cutting board after every use. You’ll never build up a stable surface.
I keep a chainmail scrubber for tough, stuck-on bits, but my first reach is for a nylon brush or a paste of coarse salt. Save the heavy artillery for true battlefield conditions, not for cleaning up after scrambled eggs.
Mistake 4: Not Drying Thoroughly
Towel-drying is not enough. That thin film of moisture you can’t see is what causes flash rust overnight. The fix is simple and takes one minute.
- After towel drying, place the pan on a stovetop burner over low to medium heat.
- Let it warm for 60-90 seconds until all visible moisture is gone and the pan is warm to the touch.
- Turn off the heat and let it cool. Now it’s truly dry.
This heat-dry step is non-negotiable for me. It’s the single habit that stopped my pans from ever getting spotty rust.
Mistake 5: Storing With a Lid On While Damp
A sealed environment traps any remaining moisture against the iron, creating a perfect humid chamber for rust to bloom. If you store your pan with a lid, make absolutely certain it is bone dry first.
I often store mine without a lid, or I’ll place a paper towel between the pan and the lid to wick away any potential humidity. Good air circulation is your friend.
Is a Rusty Cast Iron Pan Ruined?
Almost certainly not. Finding a patch of rust can feel like a failure, but it’s just a normal part of the cast iron journey. Light, surface rust is a cosmetic issue, not a death sentence.
Your pan is not ruined. Rust is a temporary condition you have the power to reverse.
Here’s the simple process: scrub the rust away with vinegar or a mild abrasive, dry the pan completely, and then apply a fresh, thin layer of oil to protect the bare metal. This is just a targeted re-seasoning job. We’ll cover the full restoration process for rusty pans in the next section, but know that your skillet is far more resilient than it looks.
When to Seek Professional Help or Advanced Restoration

Most care is confidently in your hands. But there are times when a project exceeds typical home maintenance. Knowing when to call in a professional saves you time, frustration, and can rescue a piece that seems lost.
Scenario 1: Extreme, Pitted Rust
Surface rust is one thing. Deep, pitted rust that looks like the surface of the moon is another. If scrubbing doesn’t reach into the deep holes, or if the metal itself feels compromised, professional electrolysis can safely neutralize rust you can’t see.
Scenario 2: Thick, Tar-Like Carbon Buildup
Decades of gunk can fuse into a rock-hard, black layer that regular cleaning can’t touch. Trying to sand or chip this off at home can damage the pan’s surface. A professional service might use a thermal cleaning oven to turn this buildup to ash without harming the iron.
Scenario 3: A Damaged or Warped Pan
Cracks, significant chips, or a noticeable warp that prevents even heating are structural issues. A professional can assess if the piece is salvageable or if the damage is too severe.
Professional “cast iron cleaning via electrolysis” is a game-changer for severe cases. It uses a mild electrical current to literally pull rust and crud away from the iron, leaving a perfectly clean, gray surface ready for new seasoning. This approach is a strong option for removing rust from cast iron and restoring it to like-new condition. If you have a family heirloom or a find that’s in truly rough shape, searching for a “cast iron cleaning service near me” is a wise move. They have the tools and expertise to handle the projects that go far beyond a simple scrub-down.
Quick Answers
I’ve heard about “cast iron cleaning via electrolysis.” What is that for?
Electrolysis is a professional restoration technique for stripping a pan down to bare, gray iron. It uses a mild electrical current in a water bath to lift away rust and carbon buildup without damaging the metal. Reserve this for an heirloom or a pan with severe, pitted rust that home methods can’t fix.
How do I clean and maintain my chainmail scrubber?
Rinse your chainmail scrubber under hot water after each use and shake it dry. Occasionally, wash it with a drop of dish soap to remove grease, then dry it thoroughly to prevent rust. Its simple design requires no special care-just don’t let it sit wet.
When should I look for a “cast iron cleaning service near me”?
Seek a professional service for extreme cases: deep pitting, warping, or historical pieces with decades of tar-like buildup. They have tools like thermal cleaning ovens and electrolysis tanks for jobs beyond routine care. For everyday cleaning and seasoning maintenance, your own toolkit is all you need.
Preserving Your Pan’s Seasoning After Cooking
The single most important habit is to dry your cast iron pan completely after washing, using gentle heat on the stove to drive off every drop of water. I always finish by wiping on a barely-there layer of oil, which safeguards the seasoning on my own skillets and keeps them ready for the next meal. If you’re curious about fixing rust spots or comparing different oils for seasoning, our other guides dive into those specifics.
Expert Resources and Citations
- r/AskCulinary on Reddit: What is the proper way to clean a cast iron skillet?
- How to Clean – Lodge Cast Iron
- This Is the Only Way I’ll Ever Clean a Cast Iron Pan Again (It Took Zero Effort!)
- How to Clean and Season Cast-Iron Cookware | Reviews by Wirecutter
- How To Clean A Cast Iron Pan (Without All The Mystery!) – Once Upon a Chef
- What is the best way to clean a cast iron pan so that it does not go rusty? – Quora
A material science expert by profession, Joseph is also an avid cook. He combines his 10+ years expertise in material science and metallurgy with his passion for cast iron cookware to bring you best hands on advice. His expertise ranges from types of cast iron cookware to best seasoning tips as well as restoration of vintage cast iron utensils. Joe is here to help you solve all your cast iron cookware queries and questions.