
How Do You Clean Cast Iron with Baking Soda and Salt?
Scrubbing your favorite skillet shouldn’t leave you afraid you’ve ruined it. Cleaning with baking soda and salt is a gentle, effective way to remove grime while protecting your pan’s seasoned surface.
I use these methods on my own pieces, and here’s what I’ll cover to help you clean with confidence:
- When and how to use baking soda for stubborn, stuck-on food.
- Why plain salt is my favorite gentle scrubber for everyday cleaning.
- Safe scrubbing tools that clean thoroughly without damaging seasoning.
- The right way to dry and lightly oil your pan after washing.
Key Takeaways: A Clean Pan Is a Happy Pan
Cleaning cast iron is not about stripping it bare. Your goal is to remove the food residue, not the hard-earned seasoning layer that makes your pan non-stick.
This guide rests on three reliable pillars: the baking soda paste, the salt scrub, and choosing the right tool for the job. Master these, and you can handle nearly every post-meal situation.
No matter which cleaning method you use, completely drying the pan and applying a whisper-thin coat of oil is the final, non-negotiable step to stop rust.
What we discuss here is for routine cleaning after cooking. If your pan has thick, flaky carbon buildup or active rust, that’s a restoration project, which is a different, more intensive process.
The Baking Soda Paste: Your Gentle Chemical Helper
Think of baking soda (sodium bicarbonate) as a mild, abrasive cleaner that also helps break down stubborn, sticky bits. It’s my first choice for tackling baked-on cheese or sauces.
To make the paste, just mix a tablespoon or two of baking soda with enough water to form a spreadable consistency, like thick yogurt.
- While your pan is still slightly warm (not scalding hot), spread the paste over the problem area.
- Let it sit for 10-15 minutes. This gives it time to work on the gunk.
- Use a soft brush or non-scratch scrubber to work the paste in gentle circles. The gunk should lift away easily.
- Rinse thoroughly with warm water.
The baking soda paste lifts residue with minimal physical effort, preserving your underlying seasoning.
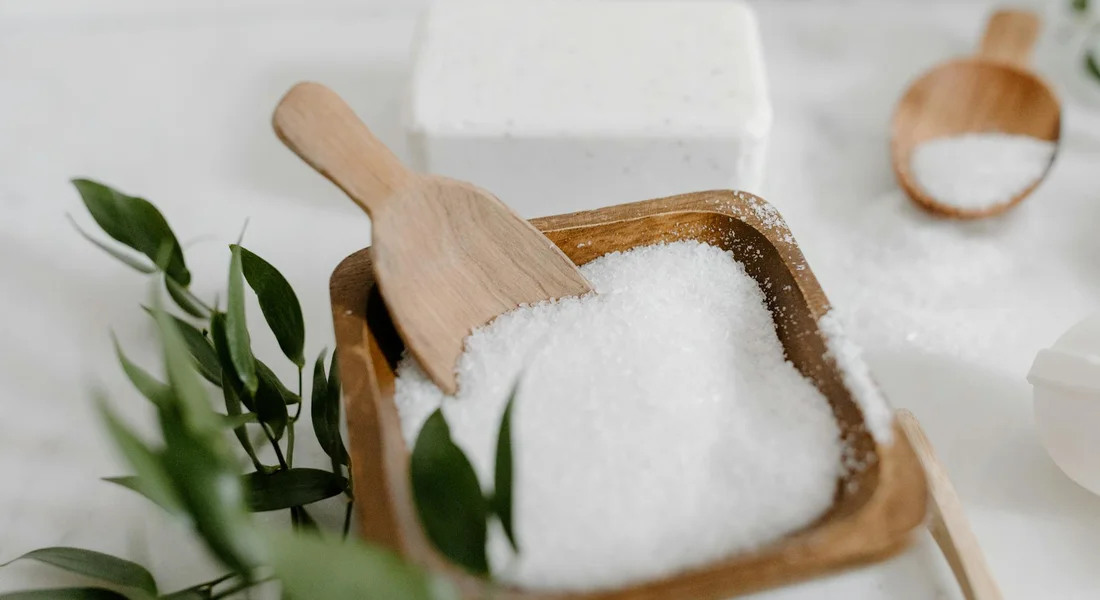
The Salt Scrub: The Pure Physical Scour
Coarse salt (like kosher or sea salt) is a fantastic, natural abrasive. I use this method for cleaning right after searing a steak, when I have fond and bits stuck to a hot pan.
- After removing your food, pour about a quarter cup of coarse salt into the still-warm, dry pan.
- Use a folded paper towel or a clean cloth to firmly scrub the salt around the pan’s interior. The salt granules will act like tiny scrubbers.
- Once the salt looks dirty and the stuck bits are gone, simply dump it out and wipe the pan clean with a dry towel.
You don’t even need to rinse. It’s a fast, effective dry-cleaning method.
Choosing Your Tools: From Safe to Save-For-Later
The tool you pick is as important as the cleaner. Using the wrong one is the quickest way to scratch your seasoning.
Here’s a simple comparison of common tools:
| Tool | Best For | Notes |
|---|---|---|
| Nylon Brush or Scrubber | Daily use, light food residue | Perfectly safe, my most-used tool. |
| Chainmail Scrubber | Stuck-on bits, hardened food | Great for scraping without harming seasoning. Rinse and dry it well after use. |
| Plastic Scraper or Dough Cutter | Pried-up edges of stuck-on food | Useful for getting under crusty spots before scrubbing. |
| Copper or Steel Wool | Rust or carbon removal (Restoration) | Avoid for routine cleaning. This is for stripping a pan, not maintaining one. |
Stick with nylon, chainmail, or plastic for everyday cleaning to keep your seasoning intact.
The Can’t-Skip Finale: Dry and Protect
Water is the enemy of bare iron. After rinsing (or after a salt scrub), you must remove all moisture.
- Dry the pan thoroughly with a towel.
- Place it on a stove burner over low heat for 2-3 minutes, or in a warm oven, to evaporate any hidden water.
- Once it’s fully dry and just warm, apply a few drops of a high-heat oil (like vegetable, canola, or flaxseed) to the interior.
- Use a fresh paper towel to spread the oil into a thin, even layer, then use a second dry towel to buff off any excess. The surface should look satin, not glossy.
This quick heat-and-oil ritual after every wash is what builds a durable, rust-proof patina over time.
What Helped Me: The Day I Stopped Being Scared of Soap
I used to be a member of the “No Soap, Ever” club. I’d clean my pans with just hot water and frantic scrubbing, terrified that a single drop of detergent would ruin years of seasoning work. My pans ended up with a faint, greasy film.
The “aha” moment came when I was restoring a vintage skillet. I had to strip it completely with lye, which is far harsher than any dish soap. I realized that modern, mild dish soap isn’t strong enough to cut through polymerized seasoning-the hard, plastic-like layer created by heating oil. It only removes the loose, surface grease and food oils that water alone can’t get.
Using a drop of mild soap for a particularly greasy clean-up is perfectly safe and leads to a better, truly clean cooking surface.
That experience cemented my core principle: gentle, effective cleaning isn’t a threat to your pan. It’s what protects it. You’re removing the elements that can spoil, leaving the robust seasoning underneath to do its job. It shifted my focus from fear to understanding, and my pans have never been better.
Why Your Cast Iron Cleaning Method Actually Matters

Think of food residue left in your pan as a tiny sponge. It soaks up moisture and holds it against the iron, creating the perfect spot for rust to start. A quick, sloppy clean might leave those particles behind, which can be detrimental to cast iron cookware.
Proper cleaning prevents rust by completely removing those water-attracting food bits.
But there’s a balance. Scouring your pan with steel wool or a harsh abrasive pad is like using sandpaper on a finished table. You risk scraping off the polymerized oil layer-the seasoning-that makes your pan non-stick.
Harsh scrubbing can strip the seasoning you’ve carefully built up, setting you back to square one. My own 10-inch skillet went through a dull patch because I was too aggressive with a metal scraper.
This brings me to a common fear. Many people still think dish soap is the enemy of cast iron. That advice comes from a time when soaps contained lye, which could break down seasoning. Modern dish detergents are much milder.
For a well-seasoned pan, a drop of today’s dish soap is perfectly safe and helps cut through grease. I use it on my daily driver after cooking burgers or bacon.
How to Clean Cast Iron with a Baking Soda Paste
Can you use baking soda to clean cast iron? Yes, without a doubt. It’s my first choice for dealing with stubborn, stuck-on food without worry.
Baking soda works because it’s a mild, physical abrasive. Imagine the difference between polishing with a soft cloth and scrubbing with coarse sand. It lifts grime through gentle friction.
Baking soda is effective because it scours away messes without chemically damaging the polymerized oil of your seasoning.
Here is my step-by-step method for using a baking soda paste. You’ll need baking soda, water, a soft brush or cloth, and a pan that’s still warm (not scorching hot) from the stove.
- Make a thick paste. Mix about a tablespoon of baking soda with just enough water to form a consistency like toothpaste.
- Apply the paste. Spread it over the messy areas of your warm pan. The warmth helps the paste work into the debris.
- Scrub gently. Use your soft brush or cloth to work the paste in a circular motion. You’ll see the grime start to lift.
- Let it sit for stuck-on food. For truly baked-on spots, leave the paste on the area for 5 to 10 minutes. Do not let it dry out completely.
- Rinse thoroughly. Wash the paste away under warm running water, wiping the pan clean with your brush or cloth.
Letting the paste sit for a short time loosens tough residues, but always rinse it off before it dries into a chalky film. I find this works wonders on the baked-on cheese from a frittata in my griddle pan.
How to Use Salt as a Natural Cast Iron Scrubber
Sometimes, you just want to clean your pan without getting it wet. That’s where a simple salt scrub comes in. It’s my favorite method for quick, between-use cleanups.
Not all salts are equal for this job. Kosher salt or another coarse sea salt works best. Table salt is too fine and will dissolve into a slurry too quickly. The larger, irregular grains of kosher salt act like tiny, abrasive scrubbing particles that break up food residue without being harsh enough to scratch your seasoning. Think of them like a gentle, natural sandpaper.
The process is straightforward. I use it on my daily skillet all the time.
- While the pan is still warm (but not screaming hot), sprinkle a generous handful of coarse salt over the cooking surface.
- Add just a drop or two of cooking oil. This helps the salt particles glide and bind to the gunk.
- Take a folded paper towel or a small cloth and start scrubbing in small circles, using the salt-oil mixture as your paste.
You’ll feel the satisfying grit of the salt crunching through stuck-on bits. It’s a tactile confirmation that it’s working. Wipe out the entire mess with a clean paper towel, and you’re done. Your pan will be clean, dry, and ready for its next use or a quick wipe of fresh oil for storage.
Choosing Your Cast Iron Cleaning Tools: Brushes, Chains, and Pads
Having the right tool makes cleaning feel less like a chore and more like simple maintenance. Let’s compare your options so you can pick what works for your kitchen.
Start with the gentlest options and work up only as needed.
- Nylon Brush or Dish Brush: This is your daily driver. It’s perfect for wiping out a pan that just had scrambled eggs or sautéed vegetables. It won’t harm the seasoning at all.
- Stiff-Bristle Brush (like a Lodge Scrub Brush): This is a step up for more stubborn, stuck-on food. The bristles are firm and can get into the corners and pores of the iron. It provides more scrubbing power while still being safe for your pan’s surface.
- Chainmail Scrubber: This is your specialist tool for breaking up serious, baked-on crust. The little rings are fantastic at scraping off carbonized food without removing your good, polymerized seasoning. A chainmail scrubber is excellent for dislodging chunks, but it doesn’t polish or smooth the surface-it’s a scraper, not a finisher. I follow it with a softer brush or cloth.
You should avoid SOS or Brillo pads (which contain soap and steel wool) for routine cleaning. The steel wool fibers are too aggressive and will scratch away your hard-earned seasoning. Save them only for the most extreme stripping jobs, like removing thick, flaky rust.
Many companies sell dedicated cast iron cleaning kits, which often include a chainmail scrubber and a stiff brush. They’re convenient. But a simple, sturdy dish brush from the store and a box of kosher salt will handle 95% of your cleaning needs. It’s what I used for years before I ever bought a special tool.
How to Handle Tough Jobs: Stuck-On Food and Rust Spots
Sometimes, a simple scrub isn’t enough. If you’ve got a patch of food that’s fused to the pan like concrete, don’t reach for metal tools or harsh chemicals. Your goal is to lift the mess without gouging the seasoning underneath.
For truly baked-on messes, a baking soda paste is your best friend. Baking soda is mildly abrasive and, when mixed with water, creates a gentle alkaline paste that helps loosen carbonized gunk. It’s my go-to for salvaging pans I find at flea markets.
Here’s how to do it:
- Mix baking soda with a little water to form a thick paste, like the consistency of peanut butter.
- Apply this paste directly to the stuck-on area. Let it sit for 15-20 minutes. This gives it time to work.
- Use a non-metallic brush or a folded-over paper towel to gently scrub the paste into the spot. You should feel the gunk start to break up.
- Rinse thoroughly with hot water. Repeat if necessary for stubborn spots.
The baking soda paste method is safe, effective, and won’t damage your hard-earned seasoning like steel wool can.
Dealing with the Dreaded Orange Spots: Light Surface Rust
Finding a few specks of rust can feel like a failure, but it’s a common and totally fixable part of cast iron care. This method is only for light, dusty surface rust, not deep pitting—deep rust requires more intensive restoration.
You’ll need white vinegar, which is a mild acid. The key is a gentle, controlled application. Never soak your pan in vinegar, as prolonged contact will eat the iron itself.
- Create a 50/50 solution of white vinegar and water in a spray bottle or bowl.
- Dampen a cloth or paper towel in the solution and gently rub the rusted area. You’ll see the rust transfer to the cloth.
- Immediately rinse the area with hot water and dry it completely.
This process will have stripped the seasoning from that spot, leaving bare, vulnerable iron. You must re-season that area immediately. Dry the pan on the stove, apply a thin layer of oil to the spot, and heat it until it smokes. You may need to do this a couple of times to build a protective layer back up.
Vinegar is a tool for spot-treatment only; always follow it with immediate drying and re-oiling to prevent the rust from coming right back.
For pans that are completely covered in rust or have heavy buildup, professional restoration methods like electrolysis or lye baths exist. These are fantastic tools for restorers, but they are not part of routine cleaning or something you typically do at home. Think of them as major surgery for a skillet, while baking soda and vinegar are more like first aid.
Remember, these are troubleshooting steps for occasional problems. If you’re using baking soda or vinegar after every meal, you’re cleaning too aggressively. Your everyday routine should be much simpler.
What to Do Right After You Clean Your Cast Iron
Cleaning is only half the job. The steps you take in the five minutes after washing are what protect your pan from rust and keep the seasoning strong. This isn’t just for deep cleans; it’s the exact routine you should follow after every single use.
First, give the pan a final rinse with the hottest tap water you have. Hot water heats the iron, helping it dry faster. Then, dry it immediately and aggressively with a clean, dry towel. Don’t let it air dry. Water droplets are the enemy — especially if you soak your skillet for too long.
Even after a vigorous towel dry, microscopic water will remain in the pores of the iron. That’s why the next step is non-negotiable.
Place your clean, towel-dried pan on a stove burner over low to medium heat for 3-5 minutes. You want to see all traces of moisture vanish and the entire pan become warm to the touch. I do this with my daily driver skillet after every wash. It’s the single best habit you can build to stop rust.
Once the pan is completely dry and warm, it’s time for a protective coat. This is where many people go wrong by using too much oil. You need a microscopically thin layer.
- Put a few drops of your seasoning oil (like flaxseed, grapeseed, or Crisco) on a paper towel.
- Wipe the oil onto the entire cooking surface, including the exterior and handle.
- Now, take a fresh, clean paper towel and aggressively wipe the pan again. Your goal is to buff off as much oil as humanly possible, as if you made a mistake and are trying to remove it all.
The thin film that remains is perfect. You can leave the pan on the warm stove for another minute to set this layer, or just let it cool and store it. This isn’t a full oven seasoning session, just a maintenance coat that protects the bare iron from humidity.
This “wash, dry on heat, oil lightly” routine is the complete answer to cast iron cleaning after cooking. It’s simple, fast, and builds incredible long-term protection. Do this every time, and your pan will only get better.
When Cleaning Isn’t Enough: Recognizing a Need for Help

Even the best cleaning routine has its limits. Most of the time, a little baked-on food or surface rust is no big deal. But sometimes, you’ll find a piece that’s in real trouble.
I once picked up a skillet from a flea market that was practically a geology project. The crust was so thick I couldn’t tell if it was food, carbon, or a fossil. That’s the first sign you need more than a scrub: a thick, uneven, rock-hard layer of carbonized gunk that you can’t chip off with a spatula or scrubber. The second major sign is deep, pitted rust that covers a large area or has eaten into the iron itself, not just a superficial orange dusting.
What “Cast Iron Cleaning Service Near Me” Really Means
If you search that phrase, you’re not looking for a simple wash. You’re looking for professional restoration. This is for the true “project pans.” These services use industrial tools like electrolysis tanks or media blasters to strip a pan back to bare, gray metal, a process that’s overkill for 99% of home maintenance.
For your daily drivers and even most thrift store finds, you will never need this. The gentle methods we’ve discussed-from salt scrubs to baking soda pastes-are powerful enough to handle virtually every mess you or a previous owner can create.
The Simplicity of Consistent Care
The goal isn’t to have a pan that never gets dirty. The goal is to build a relationship with your cookware where cleaning is a quick, easy step, not a dreaded chore. My most trusted skillet gets a hot water rinse and a light scrub after every single use. That consistent, gentle care is what builds a dark, slick, glassy patina over years.
Think of that patina as your pan’s immune system. A strong, well-maintained seasoning layer actively protects the iron underneath from sticking and rust. Your best defense against ever needing drastic restoration is a simple, post-cooking clean-up routine performed faithfully.
Quick Answers
Is electrolysis a valid cleaning method for my daily skillet?
No. Electrolysis is a powerful restoration tool for stripping a pan completely back to bare iron, removing thick rust and decades of carbon. It is not a cleaning method for your seasoned, in-use cookware. For routine care, stick with the baking soda, salt, and safe scrubbing methods outlined above.
Are dedicated cast iron cleaning kits worth buying?
They can be convenient, but are not necessary. A kit typically pairs a chainmail scrubber with a stiff brush, which are excellent tools. However, a simple nylon brush and a box of coarse salt will handle nearly every job. Invest in a single chainmail scrubber if you frequently deal with stuck-on food, but don’t feel a full kit is required for proper care.
When should I consider a professional cast iron cleaning service?
Only for extreme cases of neglect, like severe, pitted rust or a pan crusted with a quarter-inch of carbonized grime that home methods cannot touch. These services perform restoration, not cleaning. For 99% of situations, including most thrift store finds, the gentle methods you’ve learned here are more than sufficient to restore a pan to cooking condition.
Your Cast Iron Cleaning Routine Made Simple
For daily care, a soft scrub with baking soda or coarse salt is all you need to lift food residue while safeguarding your pan’s seasoning. Make it a habit to dry the cookware completely over heat and apply a microscopic layer of oil after every wash-this simple act is what builds a durable, non-stick patina over decades. If you’re dealing with rust or want to refresh the surface, our articles on stripping and re-seasoning cast iron cover the next steps.
Related Guides and Information
- r/castiron on Reddit: Can you use baking soda instead of salt to scrub your cast iron when cleaning? Read an article that contradicts what a lot of people say which is to not use baking soda unless you want to remove cast iron seasoning.
- How To Clean Your Cast Iron Pan
- Can you clean cast iron with baking soda? – Quora
A material science expert by profession, Joseph is also an avid cook. He combines his 10+ years expertise in material science and metallurgy with his passion for cast iron cookware to bring you best hands on advice. His expertise ranges from types of cast iron cookware to best seasoning tips as well as restoration of vintage cast iron utensils. Joe is here to help you solve all your cast iron cookware queries and questions.