
How Do You Clean Cast Iron Without Ruining the Seasoning?
You just cooked a great meal, but now you’re staring at a dirty skillet, worried that washing it will strip away all your hard-earned seasoning.
Modern dish soap is perfectly safe for seasoned cast iron, and a proper clean is the foundation of keeping your cookware in top shape for decades. This guide walks you through the entire process, from post-dinner mess to storage-ready. You will learn:
- The right way to use soap and scrubbers on seasoned iron.
- Why drying is more critical than washing to prevent rust.
- How a tiny bit of oil after cleaning maintains your pan’s finish.
The Truth About Washing Cast Iron with Soap
Let’s tackle the biggest question first. Are you supposed to wash a cast iron skillet with soap? The short answer is yes, you absolutely can. The old rule came from a good place. Our grandparents used harsh, lye-based soaps. Lye is a powerful alkali that strips away fats. It would eat right through the polymerized oil layers that make up your seasoning.
Modern dish soaps are different. They are mild detergents designed to cut grease from dishes, not strip chemically bonded polymer from metal. Using a drop of modern dish soap on a well-seasoned pan is perfectly safe and is the best way to clean it after cooking greasy foods. I do it with my own daily driver skillet all the time.
The real enemies of your cast iron are not a little soap. They are prolonged soaking, which leads to rust, and using harsh abrasives like steel wool on a new or fragile seasoning layer. Some readers still worry that soap will ruin seasoning. We’ll debunk this long-standing myth as we dive into the truth about soap and cast iron.
Your Step-by-Step Cleaning Routine
This is the simple, three-part process I use after every meal. It keeps my cookware in top shape without any fuss.
Phase 1: Wash
- Let the pan cool slightly, but clean it while it’s still warm. Food bits come off easier.
- Use hot water and a drop of mild dish soap. Scrub with a nylon brush, sponge, or a dedicated chainmail scrubber for stuck-on food.
- For light scrubbing without soap, use a handful of coarse salt with a damp sponge. The salt acts as a gentle abrasive. Just rinse it all away thoroughly.
Phase 2: Dry
- This is the non-negotiable step. Towel-dry the pan completely, inside and out.
- Then, place it on a stovetop burner over low heat for 2-3 minutes. This drives off every trace of moisture you can’t see. I watch for the last tiny steam wisps to disappear.
Phase 3: Protect
- Once the pan is dry and warm, apply a microscopic layer of oil. Use a paper towel to rub in about half a teaspoon of a high-smoke-point oil (like canola, grapeseed, or flaxseed).
- Now, do the “paper towel test.” Take a fresh, dry paper towel and wipe the entire cooking surface. If the towel comes away clean, you’ve applied the perfect amount of oil. If it shows streaks, you used too much. Buff it again until no oil transfers.
- Let the pan cool and store it. This tiny oil layer protects the iron until its next use.
Quick Snapshot: Your Cast Iron Cleaning Toolkit
| Tool | Best For | Use With Caution |
|---|---|---|
| Nylon brush or scraper | Daily cleaning, removing food bits. | Not for heavy carbon buildup. |
| Coarse salt & sponge | Light scrubbing without soap. | Can be messy; rinse thoroughly. |
| Chainmail scrubber | Stubborn, stuck-on food. | Excellent for flat surfaces, can be harsh on new seasoning. |
| Mild dish soap | Cutting grease after cooking fatty foods. | Perfectly safe. Avoid antibacterial or “power” soaps. |
How to Clean Different Types of Cast Iron
While the core principles of cleaning are the same, the shape and finish of your cookware can change your approach slightly. Here is how to handle the most common pieces.
Skillets and Frying Pans
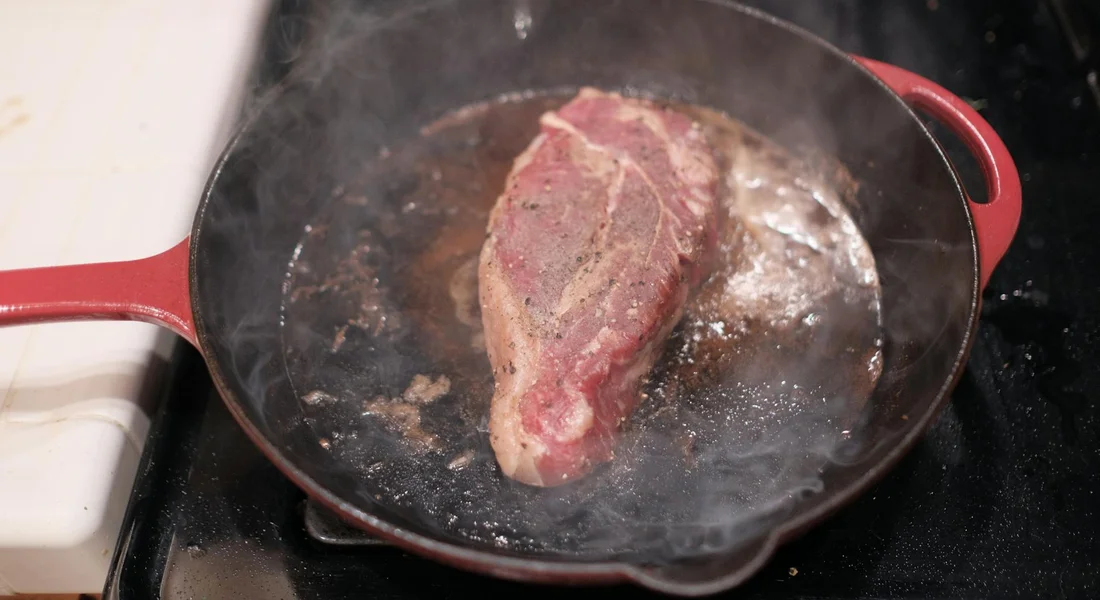
Your everyday skillet gets the most direct, high-heat cooking. Focus your cleaning on two areas: the cooking surface and the exterior bottom.
After cooking, while the pan is still warm, use a dedicated cast iron brush or scraper to loosen any food. For stubborn, stuck-on bits, a paste of kosher salt and a drop of water works wonders as a gentle abrasive. Always clean the entire interior cooking surface, paying special attention to where the sidewall meets the floor of the pan, a common spot for buildup.
The exterior bottom, especially after a stovetop sear, often gets overlooked. That area can collect a film of grease and carbon. Give it a scrub with your brush and a little soap. Keeping the bottom clean ensures better, more even heat transfer from your burner to your food next time you cook.
Dutch Ovens (With and Without Enamel)
You must first identify what you have. Is the entire pot, including the lid, bare black cast iron? Or does it have a smooth, often light-colored, glass-like coating on the inside? This changes everything.
For a traditional bare cast iron Dutch oven, clean it like a deep skillet. The lid is often the trickiest part. The dimpled underside is designed to baste your food, but it traps moisture and food particles. Use a stiff-bristled brush to work into those dimples after every use to prevent a crust from forming that’s much harder to remove later.
If your Dutch oven is enameled, treat that interior coating like glass. Avoid metal scrubbers or abrasive cleaners that can scratch it. Use a soft sponge, nylon brush, and baking soda for tough stains. Most importantly, never shock hot enamel with cold water, as the sudden temperature change can cause it to crack. Let the pot cool down first.
Griddles and Grill Pans
Those beautiful sear marks come at a cleaning cost. Grooves and ridges create tiny corners where food and grease love to hide.
Your best tools here are a sturdy nylon or bamboo scraper and a brush with firm bristles. While the griddle is warm, use the scraper at a 45-degree angle to “shave” along the grooves, pushing debris toward the edge. Follow up immediately with a brush and hot water. A plastic scraper is ideal because it’s stiff enough to clean but won’t damage your seasoning like metal might.
Because water pools in those low spots, these pieces are prone to surface rust if not dried perfectly. I always give my grill pan an extra two minutes on the stovetop burner after towel-drying to be absolutely sure every crevice is bone-dry.
Drying Your Cast Iron: The Step You Can’t Skip
Letting your cast iron air-dry is asking for trouble. Water left on the surface reacts with the iron, and rust can start in minutes. I have seen pans develop orange spots after just one careless night. Rust prevention begins the moment you finish washing, so drying is not optional.
Proper drying is a two step process. First, towel dry immediately. Then, apply heat to remove any hidden moisture. This method guarantees no water is left behind to cause damage.
- Towel dry immediately: As soon as you rinse your skillet or dutch oven, grab a clean, dry towel. Wipe the entire piece, inside and out. Pay special attention to the handle base and any ridges on a griddle, where water loves to hide.
- Apply heat: After towel drying, use heat to evaporate the last traces of water. This final step is what truly seals the deal against rust.
You have two reliable choices for applying heat, the stovetop or the oven. Each works well for different situations.
| Method | Best For | How It Works |
|---|---|---|
| Stovetop | Speed and efficiency | Place the pan on a burner over medium heat for 2 to 3 minutes. It is direct and fast. |
| Oven | Thorough, even drying | Put your cookware in a preheated oven at 200°F (95°C) for 10 to 15 minutes. This is great for multiple pieces. |
I use my stovetop for my daily skillet, but for my dutch oven after a deep clean, the oven’s even heat is more trustworthy.
Your pan is ready when it is bone dry and warm to the touch. If you feel any cool spots or see moisture, it needs more heat. I always test by gently touching the cooking surface. That warm, dry feeling is the clear sign your cast iron is safe and ready for storage or its next use.
Fixing Common Problems: Rust, Stickiness, and Buildup
Even with great care, your cast iron can run into a few common issues. The good news is that almost every problem is fixable. Let’s walk through solving rust, sticky spots, and tough buildup by learning how to fix and repair cast iron seasoning.
Many readers ask about cleaning cast iron with salt and vinegar. This combination is a classic, gentle abrasive for stuck-on food, but the vinegar is key for tackling light rust. We’ll cover that method in detail next and discuss whether vinegar can damage cast iron.
Spotting and Removing Rust
Finding a reddish patch on your skillet can be alarming, but don’t panic. First, figure out what you’re dealing with. Light surface rust looks like a dusty film you can often wipe with your finger. Deep rust, or pitting, looks like small, rough craters in the metal.
For light surface rust, a simple vinegar bath works wonders.
- Mix equal parts white vinegar and water in a container large enough to submerge the rusty area.
- Soak the pan for no more than an hour. Vinegar is an acid, and leaving it too long can etch the iron.
- Scrub the area with a stiff brush or scouring pad. The rust should come off easily.
- Rinse the pan immediately and dry it completely on the stovetop.
Any time you strip rust away, you are removing the protective seasoning layer, so you must re-season that spot. Apply a thin coat of oil to the bare metal and follow your standard seasoning process.
Dealing with Sticky or Gummy Spots
If your pan feels tacky or leaves a greasy residue on your fingers, that’s un-polymerized oil. It happens when you use too much oil during seasoning or don’t heat it long enough to bond to the iron.
Fixing this is straightforward. Heat the pan on your stovetop over medium heat for a few minutes to soften the gumminess. Let it cool slightly, then scrub the sticky spot with a brush and a bit of coarse salt or a drop of dish soap. Rinse and dry thoroughly.
The final step is a quick stovetop seasoning to re-bond a proper layer: apply a microscopically thin coat of oil, heat the pan until it just starts to smoke, then let it cool. This touch-up polymerizes the oil correctly, leaving a dry, slick finish.
Handling Burnt-On Carbon Buildup
Carbon buildup is not your smooth, black seasoning. It’s a crusty, flaky, often lumpy layer of burned food and oils that sits on top of the seasoning. It can flake off into your food and create hot spots.
For minor patches, a good scrub with a chainmail scrubber after cooking often keeps it in check. For a pan completely encased in decades of carbon, you need to reset it by stripping everything back to bare iron.
This is a last resort. The two most effective methods are using your oven’s self-cleaning cycle or a cold lye bath. Both require caution. The self-clean cycle gets extremely hot and can warp thin or antique pans. A lye bath is a powerful chemical stripper that demands safety glasses and gloves.
What Helped Me: I once revived a thrift-store skillet that was completely black and crusty. A lye bath was the only option. I wore gloves and eye protection, mixed the lye in a plastic tub outdoors, and let the pan soak for four days. The result was gray, bare iron, ready for a completely fresh start. It required patience and respect for the process, but it saved a great piece of cookware.
When to Re-Season After Cleaning
You’ve just cleaned your pan. Now what? The goal isn’t to strip it back to bare metal after every use. Most of the time, you’re just topping up the protective layer that makes cast iron so great. Think of it like waxing a car-you don’t repaint it every time, you just give it a quick protective coat. After you’re done cooking, give it a quick rinse and a light oiling to maintain that seasoning. That small post-cook routine is the heart of cleaning and maintaining your cast iron skillet.
You can almost always give your clean, dry pan a simple oil wipe to keep its seasoning in top shape.
The Simple Oil Wipe (Your Go-To Move)
This is maintenance, not a major repair. After you’ve washed and completely dried your skillet, do this:
- Place your warm, dry pan on a stove burner over low heat for one minute.
- Add ½ teaspoon of your preferred seasoning oil (like grapeseed, canola, or crisco) to the pan.
- Use a folded paper towel to rub the oil over every surface, inside and out.
- With a fresh, clean paper towel, buff the oil until the pan looks almost dry. You’re leaving a microscopic layer.
- Turn off the heat and let the pan cool on the stove.
I do this to my daily driver skillet after probably 90% of my cleanings. It takes two minutes and keeps the non-stick surface slick and rust-free.
When You Need a Full Oven Seasoning
Sometimes, cleaning reveals problems that a simple wipe can’t fix. This connects directly to the troubleshooting you might have done. A full seasoning session is needed when your cleaning process has removed or damaged the existing polymerized layer.
If your pan looks dull, feels rough, or shows light rust after cleaning, it’s time for the oven.
- Stripped or Patchy Seasoning: Did you have to scrub off burnt-on gunk with coarse salt or a chainmail scrubber, leaving behind a dull, grayish, or uneven surface? That’s exposed iron. It needs a new base coat.
- Rust Spots (Even Tiny Ones): If you see any orange or reddish specks after drying, that’s active rust. A quick wipe with oil will just trap it. You must remove the rust completely, then re-season to protect the fresh metal.
- After Stripping or Using Lye/Oven Cleaner: This one’s obvious-if you’ve intentionally stripped the pan bare to restore it, a full, multi-layer oven seasoning is your essential next step.
Your Quick Decision Guide
| After Cleaning, Your Pan Looks/Feels… | Your Action |
|---|---|
| Shiny, slick, and black. No new marks. | Just do a simple oil wipe. You’re maintaining perfection. |
| Dull, dry, or slightly rough. Color is uneven. | It needs a full oven seasoning cycle (or two). |
| Has spots of orange or red (rust). | Remove all rust first, then perform a full oven seasoning. |
| Gray, bare metal is visible. | Definitely start a full oven seasoning process. |
Remember, seasoning is a cumulative process. One thin, perfect layer is better than a thick, sticky one. If you’re facing a situation that calls for oven seasoning, we have detailed guides on that exact process. For now, just know that a clean, dry pan is always the right starting point, whether you’re doing a quick wipe or a full restore.
Storing Cast Iron for the Long Term
Proper storage is the final, critical step in cast iron care. It protects the seasoning you’ve built and guards against rust when your pan is resting. Storing it properly prevents rust damage and preserves the seasoning between uses. Store it in a dry spot and wipe on a light coat of oil before putting it away.
The goal is simple: keep moisture away from the iron.
The Three Golden Rules of Storage
Follow these three steps every time you put a piece away, whether for a week or a season.
- Completely Dry: After washing and towel drying, always heat the pan on a stovetop burner for a minute or two. This drives off every trace of water you can’t see.
- Lightly Oiled: While the pan is still warm from drying, apply a microscopic layer of oil with a paper towel. Then, use a clean towel to buff it off until the surface looks dry. You’re not adding oil, you’re leaving a protective film.
- In a Dry Place: Store your cookware in a cabinet, not under the sink or in a damp basement. Good air circulation helps.
This light oiling acts like a final shield, filling in any microscopic gaps in the seasoning to block humidity from reaching the bare iron.
How to Stack Pans Safely
Stacking saves space, but cast iron is heavy and can scratch. Never stack pans directly on top of each other’s cooking surfaces.
I place a paper towel, a clean cloth, or even a felt pan protector between each piece in my stack. This simple buffer prevents scuffs and keeps the seasoning on your prized skillet intact. Some folks store their pans with the cook side down on a soft towel, which also works well. That level of care helps maintain cast iron cookware, including skillets and pans, for years to come. It’s all part of a broader care and maintenance routine for cast iron cookware and more.
A Note on Lids and Dutch Ovens
This is a common mistake. Never store a lid tightly on a pot or Dutch oven. It traps any residual moisture inside, creating a perfect environment for rust to start.
Instead, rest the lid askew on top or store it separately. I learned this the hard way with a vintage Dutch oven. I stored it with the lid clamped shut over a humid summer, and found a faint ring of surface rust inside when I opened it months later. Airflow is your friend.
With these habits, your cast iron will be ready to go, not starting from scratch, the next time you fire up the stove.
When to Seek Professional Help
Most cast iron care is wonderfully straightforward. The steps you’ve learned for cleaning, drying, and maintaining will serve you for decades. I use them on all my daily drivers, from my 12-inch skillet to my cornbread wedge pan.
Some damage, however, goes beyond simple seasoning issues and requires a specialist’s touch.
Problems You Shouldn’t Fix at Home
There are a few types of damage where a home restoration attempt could make things worse or even be unsafe. If you encounter any of these, it’s time to pause.
- Deep Structural Cracks: A fine, shallow surface crack (a “heat check”) might be okay for display, but a crack that goes through the wall of the pan is a terminal flaw. It can harbor bacteria and may worsen with heat, leading to a sudden break.
- Severe Warping: A slight wobble on a glass stovetop is common with vintage iron. A severe warp that prevents the pan from sitting flat on any surface creates uneven heating and makes cooking nearly impossible.
- Major Pitting or Erosion: While surface rust is an easy fix, deep pitting that looks like the metal has been eaten away compromises the pan’s structure and leaves places seasoning cannot properly adhere.
Handling Sentimental or Valuable Pieces
I have my great-grandmother’s griddle. When I first got it, it was buried under decades of crust. For a piece with that kind of history, I thought twice before grabbing my steel wool.
Consulting a professional restorer is the wisest choice for heirloom or antique cast iron where the piece’s history or value is unknown. They have the tools and expertise to assess the iron’s integrity and use methods, like electrolysis tanks, that remove rust and gunk without damaging the base metal. They can also identify rare brands and advise on preservation versus full restoration for collectibles.
You Can Handle Almost Everything Else
Let’s end on the most important point. For the overwhelming majority of issues-sticky residue, light rust, uneven seasoning, or that “off” smell-the methods in this guide are all you need.
Stubborn buildup just needs a good scrub. Rust means a re-seasoning session is due. A sticky pan often tells you it was washed but not dried properly. These are not emergencies; they are just part of the cast iron journey. Trust the process, and your pan will trust you back.
Common Questions
Can I clean my cast iron stove grates in the dishwasher or oven?
Do not put bare cast iron grates in the dishwasher. The prolonged, humid cycle will guarantee rust. For a deep clean, use your oven’s self-cleaning cycle or scrub them with a paste of baking soda and water, then re-season immediately.
What’s the right way to use salt and vinegar to clean cast iron?
Mix equal parts vinegar and water to soak off light surface rust for up to one hour-no longer. For stuck-on food, make a paste with coarse salt and a few drops of vinegar to scrub; the salt abrades while the vinegar cuts grease. Rinse and dry thoroughly, as you must re-season any area where rust was removed.
Is cleaning with just salt effective?
Yes, coarse salt is a superb, gentle abrasive for routine cleaning. While the pan is still warm, scrub with a handful of salt and a damp cloth or sponge to lift residue without soap. Rinse all the salt away completely to avoid any potential corrosion, then follow with your usual drying and oiling routine.
Caring for Your Cast Iron for Generations
The single most important piece of advice is this: treat cleaning not as a chore, but as the final, vital step of every cook. A proper clean and a thorough dry are what protect your seasoning and stop rust from ever getting started. For more on building and fixing that all-important surface, our guides on seasoning from scratch and removing rust are great next steps.
Citations and Authoritative Sources
- How to Clean and Season Cast-Iron Cookware | Reviews by Wirecutter
- Seasoned Cast Iron Cleaning & Care – Lodge Cast Iron
- How to Clean – Lodge Cast Iron
- r/grilling on Reddit: How do you clean and season your cast iron skillet?
- How to Clean a Cast Iron Pan
A material science expert by profession, Joseph is also an avid cook. He combines his 10+ years expertise in material science and metallurgy with his passion for cast iron cookware to bring you best hands on advice. His expertise ranges from types of cast iron cookware to best seasoning tips as well as restoration of vintage cast iron utensils. Joe is here to help you solve all your cast iron cookware queries and questions.