
How Do You Clean, Season, and Maintain Your Cast Iron Skillet?
Is your cast iron skillet losing its non-stick magic or showing rust? I’ll show you how a simple routine can restore and protect it for years.
Here’s what we’ll cover to get your skillet in top shape:
- The gentle, effective way to clean cast iron without damaging your seasoning.
- My hands-on seasoning method for building a durable, slick layer.
- Easy daily habits to keep your pan ready for the next cook.
- How to spot and fix common issues like rust or sticky spots.
Key Takeaways: Your Quick Start Guide
Think of cast iron care as three simple rules.
- Clean it gently, right after cooking.
- Season it with layers of oil so thin they look like a mistake.
- Use it often. Regular cooking is the best maintenance.
Your pan is not fragile. It survived a century in someone else’s kitchen before it found you. Minor scratches or dull spots are not failures, they are just part of its story. Cast iron rewards consistent, simple care far more than it punishes occasional imperfect technique.
A well-loved skillet improves with age. The more you use and care for it, the better its non-stick surface becomes and the deeper its character grows. It’s less like a delicate heirloom and more like a favorite pair of jeans that fit you perfectly.
Understanding Your Pan’s “Skin”: What Is Seasoning?
Seasoning is not oil soaked into the metal. It is oil transformed by heat into a new substance. This process is called polymerization. Heat causes the oil’s molecules to link together into long, tough chains, creating a hard, slick coating bonded to the iron.
Imagine painting a wooden deck. One thick, gloopy coat will be sticky and peel. Several whisper-thin coats, baked dry between applications, create a durable, protective finish. Seasoning works the same way.
Do not be fooled by the term “pre-seasoned.” Factory seasoning is a single, thin base coat applied for rust protection during shipping; it is a starting point, not a finish line. Your job is to build upon it with your own layers from your kitchen.
We all dream of that classic black, glossy finish. But a bronze or even patchy brown pan still cooks beautifully. Color is an aesthetic milestone, but slickness is the true measure of a well-seasoned pan. Focus on how food slides, not just how it shines.
How to Clean Your Skillet After Cooking

Your cleaning routine doesn’t need to be complicated. Start with the gentlest method that gets the job done. For most meals, a quick clean-up is all you need.
The Quick Rinse
Right after cooking, while the pan is still warm (not scorching hot), take it to the sink. Rinse it under hot water and give it a scrub with a stiff brush. This simple step removes most food residue without fuss. The goal is to wipe the slate clean for your next meal, not to sterilize the pan.
The Soap Question, Settled
Let’s clear this up forever. Using modern, mild dish soap is perfectly safe for your seasoned pan. The old warning came from a time when soap contained lye, which would strip seasoning. Today’s soaps don’t do that. They cut grease and clean effectively. I use a dot of soap for greasy pans all the time. Your seasoning is polymerized oil, bonded to the iron like a tough paint job. Soap and water won’t hurt it.
For Stuck-On Bits: The Salt Scrub
Sometimes food gets baked on. Don’t reach for metal tools yet. Grab some coarse kosher salt. While the pan is still slightly warm, sprinkle a generous amount of salt into it. Use a folded paper towel or a cloth to scrub the gritty salt around the stuck spot. The salt acts as a gentle, natural abrasive. It lifts the gunk without damaging your seasoning layer. Rinse it away, and you’re done.
For Real Battles: The Chainmail Scrubber
For that tenacious, crusty mess (like burned-on cheese or a caramelized sauce), you need a chainmail scrubber. It looks aggressive, but it’s a game-changer. Run the pan under hot water, then use the flat chainmail pad to scrub the problem area with a circular motion. The flexible rings scrape off hard carbon while gliding smoothly over your polymerized seasoning. It’s the most effective tool I own for tough jobs, and it won’t rust.
The Non-Negotiable Step: Dry It Completely
This is the most critical part of cleaning. Water is cast iron’s only real enemy. Do not, under any circumstance, let your pan air dry. Even a thin film of moisture will cause rust. Dry every inch of the pan immediately with a towel. Get the handle, the bottom, and the cooking surface bone dry. Proper drying is especially important after cleaning your cast iron pan to ensure it remains rust-free.
Finishing the Job: Heat on the Stove
After towel drying, there can still be invisible moisture in the pores of the iron. To be absolutely sure, place the dry pan on a stove burner over low to medium heat for about five minutes. You’ll see any leftover water evaporate. This gentle heat drives off the last bits of moisture and warms the iron, preparing it for a quick protective oil coat before storage. When the pan is warm to the touch, take it off the heat. It’s now clean, dry, and ready for its next use.
How to Season Your Skillet (New or Old)
Whether your skillet is fresh from the factory or a century-old heirloom, the goal of seasoning is the same: to build a durable, non-stick layer of polymerized oil. The process is identical for both. The only difference is in the preparation.
For a brand-new, pre-seasoned skillet, you just need to wash it with warm, soapy water to remove any factory dust or protective coatings (learn more about cleaning cast iron skillets), then dry it completely. For an old, rusty, or sticky skillet, you’ll need to strip it back to bare metal first using a method like the yellow-cap oven cleaner spray or a vinegar bath. Start with a clean, dry, bare-metal surface for the best bond.
The Universal Oven-Seasoning Method
This is the best way to build robust, even layers of seasoning. Think of it like painting a wall. You want multiple thin, perfect coats, not one thick, gloppy one that will take forever to dry and might be sticky.
- Heat your oven. Set it to 450°F to 500°F. This high heat is necessary to polymerize the oil.
- Apply your oil. Using a paper towel, put a small amount (about a teaspoon for a 10-inch skillet) of a high-smoke-point oil like flaxseed, grapeseed, or refined avocado oil onto the entire surface of your warm, dry skillet. Warm the pan slightly on the stove first for better oil flow.
- Wipe it ALL off. This is the most critical step. Take a fresh, clean paper towel and buff the oil into the metal. Then, aggressively wipe out every visible drop of oil you can. Your pan should look practically dry, with only a faint sheen; if it looks wet, you used too much oil and must wipe more away.
- Bake it upside down. Place your skillet upside down on the middle rack of your preheated oven. Put a sheet of aluminum foil or a baking sheet on the rack below to catch any microscopic drips. Bake for one hour.
- Let it cool slowly. Turn the oven off and let the skillet cool completely inside. Rushing this by taking it out hot can cause the seasoning to crack.
What You’ll See and Smell
During the hour in the oven, the oil will undergo a chemical change. It will stop being just oil and will bond to the iron, becoming a hard plastic-like layer. You might notice a faint, sharp smell, similar to the scent of a hot engine. That’s normal. You might also see a slight change in color, from shiny to a more matte finish. When it’s done and cooled, it shouldn’t feel sticky or tacky at all. If it does, the oil layer was too thick.
Oven vs. Stovetop Seasoning: When to Use Each
| Method | Best For | Process |
|---|---|---|
| Oven Seasoning | Building foundational layers from scratch, seasoning after restoration, or doing a full re-season. | Heats the entire pan evenly from all sides, creating a strong, uniform layer on the cooking surface, exterior, and handle. |
| Stovetop Seasoning | Quick maintenance after cooking, fixing a small sticky spot, or boosting the cooking surface. | Direct heat from the burner focuses only on the pan’s interior, making it fast but less thorough for overall protection. |
I use my oven for the initial 3-4 seasoning rounds on any restored piece, then rely on the stovetop for quick touch-ups after I’ve cooked something acidic or scrubbed it hard.
Do I Add More Oil During the Process?
No, you do not. This is a common point of confusion. You apply the oil once, at the very beginning, and then you wipe almost all of it off. You do not add more oil when you put it in the oven, and you do not add more oil during the “final rub down” before the 60-minute bake. Adding more oil at any point after the initial wipedown will simply create a thick, sticky layer that will not polymerize correctly. The same towel you used to apply the oil is now saturated, so always use a fresh, clean paper towel for the crucial “wipe it all off” step.
Daily Maintenance Habits for Lasting Performance

Forget the idea of a big, daunting weekly chore. Keeping your cast iron in top shape is about easy, two-minute habits you do right after you cook.
Think of it like wiping down your counter. It’s a quick part of cleaning up, and it makes everything better for next time.
The Two-Minute After-Clean Routine
After you wash and dry your skillet, there’s one more simple step. That little extra step helps keep the seasoning strong and makes the next use a breeze. It’s all part of cleaning and maintaining your cast iron skillet after cooking. I do this with every single one of my pans, from my daily driver to my fancy vintage piece.
- Put your completely dry, warm skillet on the stovetop.
- Add a tiny drop of oil-about half the size of a dime-to the cooking surface.
- Use a folded paper towel to rub the oil over every inch, inside and out.
- Now, take a fresh, clean paper towel and buff the entire pan. Your goal is to wipe away every visible trace of oil.
This “maintenance coat” fills in microscopic gaps in the seasoning and creates a barrier against humidity, stopping rust before it can start. If your pan feels even slightly greasy after buffing, you used too much oil. Wipe it again.
Store It Smart to Keep It Dry
Cast iron’s worst enemy is trapped moisture. How you put your pan away matters just as much as how you clean it.
Never stack pans while they are still warm or have any dampness. That creates a perfect, humid environment for rust. If you must stack them in a cupboard, place a paper towel or a clean cloth napkin between each pan.
The best practice is to store your skillet with the lid off or upside down in a dry, airy place, which lets any residual heat or moisture escape. I keep a paper towel in the bottom of my storage cabinet just for this purpose.
Cook with Temperature in Mind
Two common problems-sticking and cracking-often come from heat management. Your skillet loves consistent, moderate heat.
Always preheat your pan slowly over low to medium heat for a few minutes. This gives the iron time to expand evenly. Putting a cold pan on a roaring hot burner can cause thermal shock, which might lead to cracking over time.
Sticking usually happens when food meets a pan that isn’t hot enough. A properly preheated skillet will cause water droplets to sizzle and dance, telling you it’s ready for oil and food. Sticking can often be prevented by ensuring your pan is properly heated and oiled before adding food.
Your Best Tool Is Regular Use
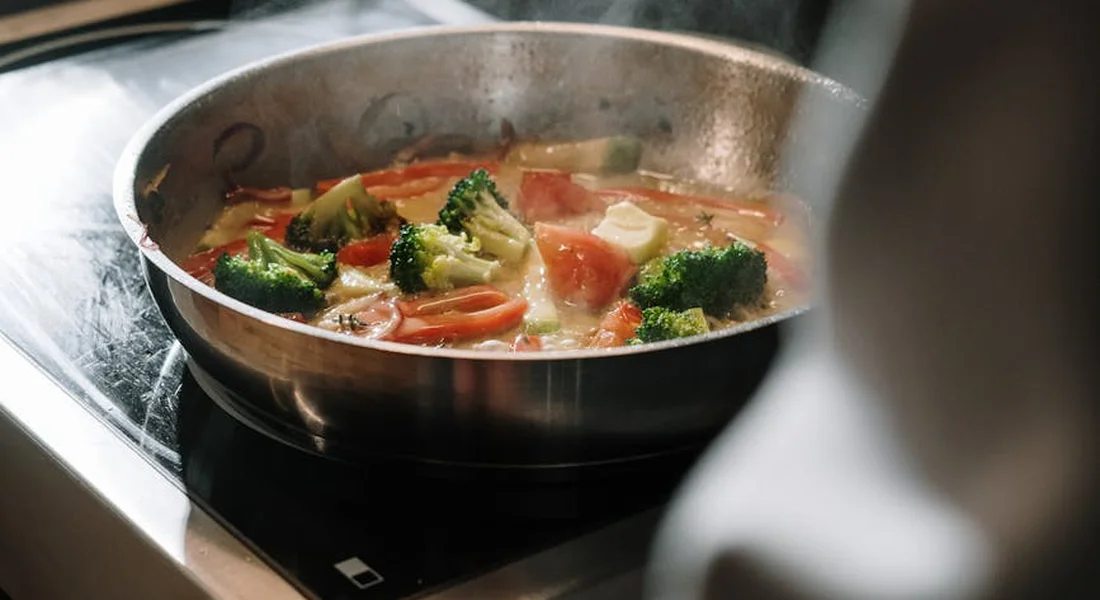
The absolute best thing you can do for your cast iron is to cook with it often, especially when you’re using butter, oils, or animal fats. Cooking with the right techniques helps maintain its seasoning.
Each time you sauté onions or sear a steak, you are gently reinforcing and smoothing that layer of seasoning. The heat and fats from regular cooking work together to keep the surface hard and non-stick.
A well-used skillet that gets a quick maintenance coat after each wash will rarely need a full re-seasoning in the oven. The maintenance becomes almost invisible, just a simple part of your cooking routine.
Must-Have Tools and Kits for Cast Iron Care
A proper cast iron care kit isn’t fancy. It’s a simple collection of a few dedicated tools that make maintenance easy and effective. Having these items on hand stops you from grabbing the wrong tool in a moment of frustration.
Think of this kit as your first line of defense for your pan. A basic kit includes tools for cleaning, drying, and applying a protective coat of oil.
- A Stiff Brush or Scrubber: This is for removing food bits after cooking.
- Lint-Free Cloths or Rags: These are for wiping out your pan after cleaning and for applying a thin layer of oil.
- A Dedicated Bottle of Oil: This is your seasoning and maintenance oil, kept separate from your general cooking oils.
- A Reliable Drying Method: This could be a dedicated towel or a stovetop burner.
Choosing Your Scrubber: A Quick Comparison
Not every mess requires the same level of cleaning. Matching your tool to the job protects your hard-earned seasoning.
A stiff nylon brush with firm bristles is my daily driver. It easily sweeps away soft, fresh food residue without being abrasive. I use it right after cooking while the pan is still warm.
For stuck-on bits, a chainmail scrubber is the expert tool you want. The flexible metal rings are fantastic at scraping off crusted food without harming the polymerized seasoning layer underneath. It works like a gentle, super-effective eraser.
A gentle sponge is perfect for the most delicate jobs, like wiping out a pan you only used to warm tortillas. It’s also ideal for giving a brand-new vintage find its first gentle wash. Avoid harsh, abrasive scouring pads at all costs; they will scratch your seasoning like sandpaper on paint.
The Best Cloth for the Job
You need a cloth that applies oil in a perfectly thin, even film. For this, nothing beats a simple, plain cotton cloth. An old t-shirt or a pack of shop towels from the hardware store works perfectly.
Cotton cloths don’t leave lint behind, and they give you the control you need to wipe away every visible drop of excess oil. I avoid paper towels for the final oil application because they can shred and leave tiny fibers that burn into the seasoning.
Oils for Seasoning and Maintenance
The oil you choose becomes your pan’s protective coating. You want an oil with a high smoke point that polymerizes well into a durable layer.
- Grapeseed Oil: This is a modern favorite for good reason. It has a high smoke point and builds a very hard, durable seasoning layer over time. It’s my personal go-to for maintenance.
- Crisco or Vegetable Shortening: This is a classic, reliable choice. It’s easy to apply a thin layer because it’s solid at room temperature. Many veteran collectors swear by it for initial seasoning on bare iron.
- Flaxseed Oil (with a caveat): Flaxseed oil creates a beautiful, hard initial finish that looks like glass. But that hardness can be brittle. I’ve seen flaxseed layers chip off in large flakes with thermal stress. If you use it, know that it may require more careful maintenance.
For regular maintenance after cooking, you only need a tiny amount of your chosen oil. The goal is to coat the pan with a layer so thin it looks dry, protecting it from rust until its next use.
Fixing Common Problems: Rust, Stickiness, and Flaking
Even the most loved skillet can run into trouble. Rust happens. Food sticks. That beautiful black layer starts to look spotty. The good news is every single one of these issues has a straightforward fix. Think of it not as a failure, but as routine maintenance for a tool that lasts generations.
Removing Rust Without Damaging Your Pan
A little surface rust is no reason to panic. It’s just iron reacting with oxygen and water. Your goal is to remove only the rust, not the good metal or any remaining seasoning underneath. For a complete guide with proven techniques on removing rust from cast iron cookware, showing safe, effective steps to restore your skillet without harming the seasoning.
For light, dusty rust, a paste of baking soda and water often does the trick. Scrub it with a non-metallic brush or a piece of chainmail, rinse, and dry immediately.
For more stubborn rust, white vinegar is your best friend. Its mild acidity dissolves rust without harming the iron. Once the rust is removed, you can restore the cast iron to a like-new condition with thorough cleaning and proper seasoning. Seasoning seals the surface and helps prevent future rust.
- Create a 50/50 mix of white vinegar and water in a sink or tub.
- Submerge the rusty area for no more than 30 minutes. Longer can etch the metal.
- Scrub the rust away. It should wipe off easily.
- Rinse the pan and dry it completely on the stovetop to prevent flash rust.
After any rust removal, the bare iron must be re-seasoned right away to protect it.
When Food Constantly Sticks
If everything you cook seems to weld itself to the surface, your seasoning is likely too thin or worn down. It’s not non-stick magic yet. This is a very common fix.
First, make sure you’re preheating your pan properly. A cold cast iron skillet is a sticky cast iron skillet. Give it a good 3-5 minutes over medium-low heat before adding any fat or food.
If you’re preheating correctly and food still sticks, the pan is telling you it needs more seasoning. Don’t strip it. Just give it one or two fresh oven seasoning layers. That new polymerized oil will fill in the microscopic pores and create a smoother cooking surface. I often do this with my daily driver skillet after a particularly messy cook, like searing sticky marinated chicken.
Dealing with Patchy or Flaking Seasoning
Flaking is different from stickiness. It’s when you see black flecks in your food or the seasoning layer looks like cracked paint. This usually means the seasoning was applied too thickly in the past, creating a brittle layer that can’t adhere properly.
When seasoning flakes, it’s best to remove it and start fresh. Trying to season over a flaking base is like painting over peeling paint. The problem will just come back.
To strip the old seasoning, you can use the oven’s self-cleaning cycle (only for solid, vintage pieces, as it’s hard on modern pans) or a lye-based oven cleaner in a trash bag. Once you’re down to bare, gray iron, you begin the seasoning process from the very beginning.
A perfectly seasoned pan has many thin, hard layers. One thick, gummy layer will always fail.
Why Your Eggs Are Sticking (And How to Stop It)
Eggs are the ultimate test of a skillet’s surface and your technique. If they’re sticking, check these two things first: heat and fat.
- Heat Control: Never cook eggs on high heat. Preheat your skillet on low to medium-low for a solid 5 minutes. The entire cooking surface needs to be evenly, gently hot.
- Ample Fat: Use enough butter or oil. Let it heat up in the pan until it shimmers before adding your eggs.
- Patience: Don’t move the eggs immediately. Let them set for a minute. A properly cooked egg will release from a well-seasoned pan on its own.
If you do all this and they still stick, refer back to the section above. Your skillet is asking for a fresh, thin layer of seasoning to smooth out its surface.
Every Mistake is Fixable
I once found a severely rusted, crusty skillet at a flea market. It looked like a lost cause. I soaked it in vinegar, scrubbed for an hour, and seasoned it three times. Today, it’s my go-to for cornbread, with a glassy-smooth finish. The point is, short of a physical crack, you can almost always bring cast iron back.
Rust, stickiness, and flaking are not signs you’ve ruined your pan. They are simply the next steps in your journey with it. If rust appears, don’t panic—re-season and keep cooking. A well-seasoned pan stays happiest with regular use. Clean it, re-season it, and keep cooking. Each time you fix a problem, you learn more about the material and build a better cooking partner.
Other Ways to Build Your Seasoning
Formal oven seasoning creates the initial base coat, but I don’t put every single one of my pans in the oven every week. The most durable and beautiful seasoning develops through regular use. Think of it like breaking in a pair of leather boots, versus just polishing them once.
Just Cook With It
This is the slow, natural, and most rewarding way to build your skillet’s patina. Every time you cook with fat and apply heat, you are adding a microscopic layer to the seasoning. Over months and years, this creates an incredibly tough, non-stick finish with rich color.
Focus on dishes that involve oil and are not highly acidic for the first few months. For my 10-inch daily driver, that meant lots of cornbread, seared meats, and fried potatoes.
This method builds seasoning that is uniquely resilient because it bonds with the metal through the normal stresses of cooking.
- Always preheat your pan.
- Use a moderate amount of cooking oil or fat.
- After cooking and cleaning, always do a quick dry and very light oil rub while the pan is still warm.
Quick Stovetop Seasoning
This is my go-to for maintaining a pan or fixing a small spot that looks dry. It’s perfect for applying one single, fast layer of seasoning without heating up your whole kitchen.
- After washing and drying, place your clean skillet on a medium-low burner for 2-3 minutes to warm it up.
- Apply a few drops of oil and spread it with a paper towel until the entire surface looks dry, just like the oven method.
- Increase the heat to medium. You’ll see the oil begin to smoke.
- Let it smoke lightly for about 5-10 minutes, then turn off the heat and let the pan cool.
Stovetop seasoning is not a replacement for a full oven seasoning session, but it’s an excellent tool for maintenance and spot repairs.
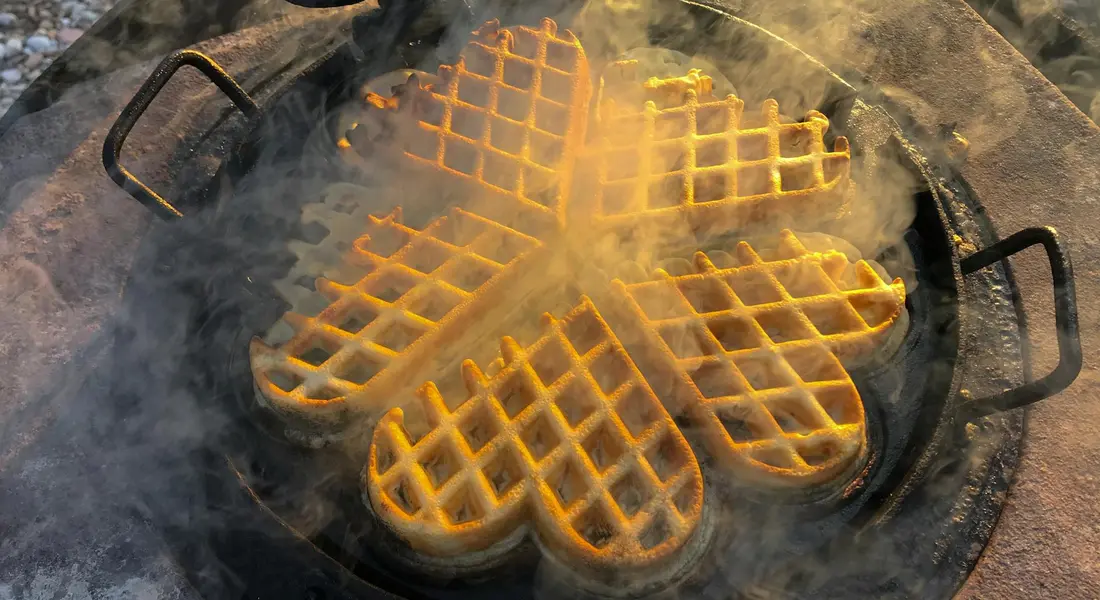
Grill or Campfire Seasoning
This is a situational method that works in a pinch. If you’re camping or your oven is out of commission, you can absolutely season over an open flame. The key is having control over the heat.
I’ve re-seasoned a Dutch oven lid over charcoal. The process is the same: a whisper-thin layer of oil and enough consistent heat to polymerize it. The challenge is avoiding direct, sooty flames that can deposit carbon and create a spotty finish.
While effective, open-fire methods require more attention to avoid uneven heating and soot, which you’ll have to scrub off later.
The Principle is Universal
Whether you’re using an oven, a stovetop burner, a grill, or just cooking dinner, the core rule never changes. A vanishingly thin layer of oil, combined with enough heat to transform it, is what builds seasoning.
If you remember that one rule, you can adapt to any situation. A thick layer will always become sticky. Insufficient heat will leave the oil raw. Getting this right is what turns a piece of iron into a trusted kitchen tool.
Your Cast Iron Care Checklist
Think of this as your quick-reference guide. Follow these steps after every use, and your skillet will only get better.
- Clean while the pan is still warm. Once your food is out, let the pan cool just enough that you can handle it comfortably. Warm water and a bit of soap are fine. Scrub with a brush or a chainmail scrubber for stuck-on bits.
- Dry it completely, every single time. Rust forms with moisture. Towel-dry it well, then place the pan on a stovetop burner over low heat for 2-3 minutes. This drives off every last bit of water you can’t see.
- Apply a whisper-thin layer of oil. With the pan still warm from the stove, add a few drops of a high-smoke-point oil (like grapeseed, canola, or avocado) to the interior. Use a paper towel to spread it over the entire cooking surface, sides, and handle. This is the most common mistake: wipe it like you’re trying to remove all the oil. You should barely see a sheen.
- Let it cool and store it. Turn off the heat and let the pan cool on the stovetop. Once cool, you can put it away. For long-term storage in a humid place, a single paper towel inside the pan can help absorb ambient moisture.
That’s the full routine. It becomes second nature. When your seasoning looks dull, feels sticky, or has a patch that seems bare, you move to a maintenance seasoning.
For a Maintenance Seasoning
- Start with a perfectly clean and dry pan (following steps 1 and 2 above).
- Apply that impossibly thin layer of oil to the entire pan, inside and out.
- Place the pan upside-down in a cold oven, with foil or a sheet pan on the rack below to catch any drips.
- Heat the oven to 450°F (232°C). Once it reaches temperature, bake the pan for one hour.
- Turn the oven off and let the pan cool completely inside before removing it.
The best maintenance, however, is simply to cook with it often. Each time you sear a steak or fry an egg, you’re adding to that protective patina. Don’t overthink it. Just start cooking.
Common Questions
I’m new to cast iron. Should I focus on daily upkeep or a perfect seasoning first?
Focus on the daily routine first: clean gently, dry thoroughly, and apply a microscopic coat of oil after each use. A perfect, glossy seasoning comes from consistent care over time, not from a single heroic effort. Your goal is to build habits, not instant patina.
What’s the single most useful tool in a cast iron care kit, and why?
A chainmail scrubber. It’s the only tool that efficiently removes stuck-on food without damaging your hard-earned seasoning. Pair it with dedicated, lint-free cotton cloths for applying oil; this combination solves 95% of maintenance issues you’ll encounter.
I follow all the steps, but I still get a sticky spot. What did I do wrong?
You likely used too much oil during your last maintenance coat or seasoning session. A sticky residue means the oil did not fully polymerize because the layer was too thick. Scrub the spot with hot water and chainmail, then re-apply a truly thin layer of oil and heat until it smokes lightly on the stovetop.
The Daily Ritual That Builds Your Seasoning
The single best thing you can do for your skillet is to make a habit of drying it over heat and applying a whisper of oil after every wash. That consistent, thin layer is what builds a lasting, non-stick patina far more effectively than any heroic, once-a-year reseasoning project. When this feels automatic, you can explore our guides on fixing minor scratches or the pros and cons of different oil types.
Sources and Additional Information
- Cleaning & Care – Lodge Cast Iron
- r/cookingforbeginners on Reddit: Cast-Iron Maintenance
- 3 Foods to Avoid Cooking in Your Cast-Iron Skillet, According to Experts
- How to Clean and Care for Cast Iron Cookware
A material science expert by profession, Joseph is also an avid cook. He combines his 10+ years expertise in material science and metallurgy with his passion for cast iron cookware to bring you best hands on advice. His expertise ranges from types of cast iron cookware to best seasoning tips as well as restoration of vintage cast iron utensils. Joe is here to help you solve all your cast iron cookware queries and questions.