How Do You Cook Perfect Fajitas in a Cast Iron Skillet?
You’re excited to make sizzling fajitas, but you’re worried the high heat and marinades might ruin your pan’s hard-earned seasoning. I’ve cooked countless fajitas in my own skillets, and with the right care, your cast iron will handle it beautifully and come out even better.
This article focuses on the cast iron know-how, not the recipe, to help you succeed. Here’s what we’ll cover:
- How to safely preheat your skillet for that perfect, even sear.
- Managing acidic ingredients like lime juice to protect your seasoning.
- Simple cleanup steps that maintain your pan’s non-stick patina.
- Why your cast iron is the best tool for authentic, sizzling fajitas.
Why Cast Iron is the Ultimate Fajita Pan
Can you cook fajitas in a cast iron skillet? Absolutely. It’s not just possible, it’s the best tool for the job. The signature of a great fajita is that aggressive, smoky sear on thinly sliced meat and vegetables. You need a pan that can deliver and hold intense, steady heat the moment your food hits the surface.
Thinner pans fail here. When you add a pile of cold, wet ingredients to a stainless steel or aluminum pan, the temperature plummets. You end up steaming and stewing your fajita components instead of searing them. Cast iron is different. It has tremendous heat capacity, meaning it stores a lot of energy. When you add food to a properly preheated cast iron skillet, it barely notices, maintaining the high heat needed for a perfect char. That heat retention acts like a battery, keeping the pan hot even when you add ingredients. It’s what drives the crisp sear and even cooking.
That well-maintained seasoning layer on your pan is your other secret weapon. It’s not a non-stick coating like Teflon. It’s a hardened, polymerized layer of oil that fills the microscopic pores of the iron, created through the process of polymerization. When hot and lightly oiled, it creates a remarkably slick surface that lets you get those beautiful sear marks without leaving half your dinner stuck to the pan. My go-to 12-inch skillet has a deep black patina from years of use, and it releases fajita strips with just a gentle nudge from my tongs.
Preparing Your Skillet for the High-Heat Sizzle
Success starts before any food comes out of the fridge. You must prepare your pan correctly. Never put a cold skillet on high heat. This can cause thermal shock and lead to warping or cracking over time. Instead, start it on a low burner for about five minutes. This allows the entire mass of iron to begin warming evenly before preheating and seasoning your cast iron cookware.
Then, gradually increase the heat to medium-high. Give it another five minutes or so. You want the entire cooking surface, including the sides, to be uniformly hot. A common test is the water bead test. Flick a few drops of water onto the pan’s surface. If they evaporate instantly, it’s not ready. If they dance and skitter around in little balls, you’ve reached the right temperature.
Right before you add your food, add your cooking oil. Swirl just enough high-smoke-point oil (like avocado or refined safflower) to coat the surface. You add it now, not at the start of preheating, to prevent the oil from breaking down and becoming sticky. A thin, fresh coat of oil on a blazing-hot, seasoned pan is the ultimate barrier against sticking. Stainless steel pans can stick if they’re not preheated or properly oiled. Mastering the heat-oil balance translates to better searing and easy deglazing techniques.
A strong, dark seasoning layer is critical for this high-heat job. A new or thin seasoning might struggle or become spotty. If your pan’s seasoning looks a little pale or dry, spend some time building it up with a few oven seasoning sessions before tackling fajitas.
Getting the Temperature Just Right
Look for visual cues. The oil in the pan should shimmer and thin out almost immediately. It might just start to wisp a little smoke, especially if it’s a cast iron pan. You should feel a strong, radiating heat when you hold your hand a few inches above the surface.
The main risk is going too far. Overheating your skillet can damage your hard-earned seasoning. If the oil smokes violently the second it hits the pan, or you see the surface start to look dry, ashy, or cracked, you’ve gotten it too hot. If your pan starts smoking aggressively before any food is added, carefully remove it from the heat and let it cool down. You can always heat it up again, but you can’t un-burn a layer of seasoning. It’s better to be at a solid medium-high than a destructive high. Listen to your pan, and trust the heat it’s already stored.
The Cooking Process: Protecting Your Pan’s Seasoning
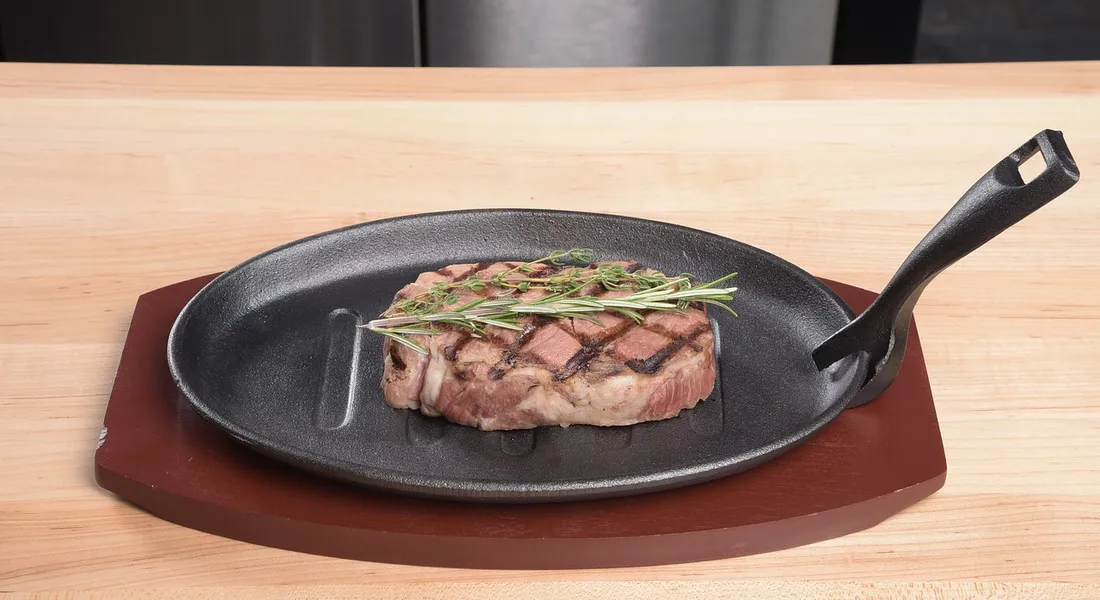
Fajitas are a fantastic workout for your skillet, but the process matters as much for your pan as for your meal. I always cook the meat first. This allows you to get a powerful sear at high heat, which builds flavor and strengthens your seasoning by polymerizing a thin layer of oil. Cooking the veggies second lets you use the flavorful fond left behind and prevents the vegetables from releasing too much water and steaming your meat.
A proper sear creates a non-stick surface on your food that lifts away cleanly, protecting the polymerized oil layer on your pan. If you see your food steaming in its own juices, the pan is too crowded or not hot enough.
You might search for “how long to cook beef fajitas on cast iron skillet,” but timing is less important than visual cues. A good sear depends on the heat of your pan and the thickness of your meat, not a timer. Place your seasoned meat in the hot, oiled skillet and let it be. It’s ready to flip when it releases easily with a gentle nudge. For a perfect steak in a cast-iron skillet, see our complete guide on temperatures, times, and techniques. It ties together searing, resting, and heat management for consistently great results.
Common mistakes that can hurt your seasoning are easy to avoid.
- Overcrowding the pan: This drops the temperature and causes food to steam and stick.
- Using acidic marinades in the pan: Cook marinated meat directly, but don’t pour extra marinade into the hot skillet. The acid can break down your seasoning layer.
- Scraping aggressively with metal tools: This isn’t a metal problem, it’s a technique problem. A thin metal spatula used correctly is a great tool.
Achieving the Perfect Sear Without Damage
The secret is patience. When you first lay your meat in the hot pan, leave it completely alone. You are waiting for the Maillard reaction to create a browned crust. This crust acts like a natural non-stick barrier between the food and your pan’s seasoning. When it’s ready, the food will release on its own with little resistance.
Think of using a metal spatula like using a paint scraper on a window; you use the thin edge to gently lift and release, not to chisel and gouge. A firm, thin-edged metal spatula is my tool of choice because it gets under the sear cleanly. The damage comes from frantic scraping or using thick, dull utensils that pry at the food and your pan’s surface.
After the Feast: Cleaning and Maintenance
Your pan will be screaming hot. Never shock it with cold water. Let it cool on the stovetop until it’s just warm to the touch. This protects the iron from thermal stress and makes handling safer.
For post-fajita cleaning, deglazing is your best friend. Pour a little warm water into the warm pan. Those delicious browned bits will loosen immediately. Use a stiff brush or a chainmail scrubber to gently scrub the surface. The chainmail is excellent for this; it knocks off food residue without harming the hard, smooth seasoning.
Thorough drying is non-negotiable; any leftover moisture is an invitation for rust. Dry the pan completely with a towel, then place it on a low burner for a minute to evaporate any hidden water. While it’s still slightly warm from the burner, apply a micro-thin layer of oil with a paper towel, then buff it off like you’re trying to remove all the oil. This is how you maintain the finish. Clean and maintain your cast iron skillet after cooking to keep the seasoning intact and rust at bay. A quick post-cook wipe and light oil will seal the finish for the next use.
This routine after a high-heat, flavorful cook like fajitas does more than just clean. It resets your pan, ensuring the seasoning is protected, hydrated, and ready for its next task.
Handling Stubborn Residue
If some bits are stuck fast after deglazing, don’t force them. Sprinkle a handful of coarse salt into the pan and use a damp paper towel or cloth to scrub in a circular motion. The salt acts as a gentle, abrasive paste that lifts residue without being harsh like steel wool.
If needed, a small amount of mild, modern dish soap is perfectly safe for a well-seasoned pan. The old rule about avoiding soap applied to lye-based soaps, which would strip seasoning. Today’s gentle soaps will not harm your polymerized oil layer. This topic naturally raises the question: does soap really ruin cast iron seasoning? We’ll debunk this long-standing myth as we explore the evidence.
Common Questions
Won’t the acidic marinade ruin my pan’s seasoning?
It can, if you’re not careful. Always pat your marinated meat dry before it hits the hot skillet, and never pour leftover acidic marinade into the pan to cook. The high heat of a proper sear minimizes contact time, protecting your seasoning during the cook.
Is it safe to use metal utensils on my cast iron skillet?
Yes, when used correctly. A thin, flexible metal spatula is ideal for cleanly releasing a good sear. The damage comes from prying or aggressive scraping-use the tool to gently lift, not to chisel food from the surface.
How do I know if my skillet is too hot and damaging the seasoning?
Your pan is too hot if the oil smokes violently upon contact or the surface looks dry, ashy, or chalky. Immediately remove it from the heat to cool. A damaged, burned layer will feel rough and must be reseasoned.
Your Skillet After the Sizzle
Right after serving those fajitas, while your skillet is still warm, give it a gentle clean and apply a whisper-thin layer of oil. This simple, immediate habit is the single best thing you can do to maintain a durable, non-stick surface ready for your next meal. It turns a moment of maintenance into an investment in your cookware’s future performance. That same routine is how you create and maintain a non-stick surface on cast iron cookware. Our upcoming guides will walk you through seasoning and upkeep in detail. For more on building and fixing that surface, our guides on seasoning and rust removal are a great next step.
Joseph Gerald
A material science expert by profession, Joseph is also an avid cook. He combines his 10+ years expertise in material science and metallurgy with his passion for cast iron cookware to bring you best hands on advice. His expertise ranges from types of cast iron cookware to best seasoning tips as well as restoration of vintage cast iron utensils. Joe is here to help you solve all your cast iron cookware queries and questions.