
Can You Use Cast Iron on Glass, Ceramic, and Smooth-Top Stoves?
If you’re nervous about scratching your sleek stovetop with a heavy cast iron pan, you’re in good company. I use my own vintage skillets on a glass top every week, and with the right approach, it’s completely safe and effective.
- The exact way to lift, place, and slide your pan to prevent any scratches.
- How to control heat properly to avoid damaging your stove or your pan’s seasoning.
- Simple cleaning steps for your cooktop after using cast iron.
- Why the condition of your pan’s bottom is more critical than you might realize.
The Short Answer: Is Cast Iron Safe on a Glass Cooktop?
Yes, you can absolutely use your cast iron on a glass, ceramic, or smooth-top electric stove. I use mine this way every day.
The main risk isn’t the intense heat. Your cast iron and your cooktop are both designed to handle high temperatures. The real concerns are physical scratching and a sudden, extreme temperature change called thermal shock.
With a smooth pan bottom and careful handling, you can enjoy all the benefits of cast iron without fearing a damaged stovetop. This is why our complete guide on why use a cast iron skillet highlights its benefits and advantages. It covers durability, heat retention, and versatile cooking that make it a kitchen staple.
Your First and Most Important Step: The Bottom Check
Before you even think about turning on the burner, flip your pan over. Lay it flat on your counter and run your fingertips over the entire cooking surface that will touch the glass.
A stove-ready bottom should feel like a smooth, machined piece of metal. It might have concentric circles from the factory grinding. What you don’t want to feel are bumps, grit, or a crusty, flaky texture. This is often old, baked-on food carbon or rust.
A rough bottom acts like fine sandpaper on your glass cooktop; every time you slide the pan, it makes microscopic scratches that cloud the surface over time.
If your pan feels gritty, the fix is simple. You don’t need power tools. I use a palm sander with 80-grit sandpaper, but you can do this by hand. Scrub the bare metal bottom with sandpaper, a stainless steel scrubber, or even the flat edge of a metal paint scraper until it’s uniformly smooth to the touch. Wipe away all the metal dust, give it a quick wash, dry it immediately, and apply a thin layer of oil to prevent rust. Your cooktop will thank you.
How to Preheat Cast Iron on an Electric Stove (Without Warping It)
Preheating on an electric or glass top stove is a different game than on gas. A gas flame licks up and around the bottom of the pan, heating it more evenly. An electric coil or smooth-top element heats in a tight, concentrated circle. If you start too hot, you create a severe temperature difference between the super hot spot directly over the coil and the cooler outer edges of the pan.
This uneven heating is what causes thermal stress. Think of your skillet like a piece of hard candy. Heat one spot intensely and the surrounding area stays cool, and that spot wants to expand but can’t. Something has to give. In cast iron, that “give” is a warp a bulge in the center or a permanent hot spot that makes everything cook unevenly forever, unlike quality cast iron that retains and distributes heat evenly.
The Golden Rule: Start Low and Slow
Your number one job is to spread the heat gently. I always place my pan on a cold burner set to low or medium low. For my daily 10 inch skillet, I set it to a firm “3” out of 10 and let it sit for a full 8 to 10 minutes. This gives the entire mass of iron time to warm up uniformly from the center out to the edges. Properly preheating sets the stage for even seasoning and perfect results. A well-preheated pan makes for consistent heat and a smoother finish.
Patience here is not just a virtue, it’s the technique that protects your pan from permanent damage.
How to Know When Your Pan is Ready
You need a reliable cue, because the pan won’t look hot. After about 8 minutes on low heat, perform the water test. Flick a few droplets of water onto the cooking surface.
- If the water sizzles and evaporates immediately, the pan is still too cold. Give it a few more minutes.
- If the water beads up into tight, fast moving balls that skitter and dance across the surface, the pan is perfectly preheated. This is your signal to add your oil or fat and begin cooking.
The skittering water test is your green light, telling you the entire cooking surface has reached an even, effective temperature.
The High Heat Blast is Your Enemy
It’s tempting to crank the dial to high to speed things up. Resist that urge. A high heat blast is the fastest way to ruin a good pan. The intense, localized heat can’t transfer into the thick iron fast enough. This creates massive stress at the point of contact.
The result is often a subtle warp you might not see, but you’ll definitely feel. Your pan will spin or rock on the flat glass top. Worse, that spot can become permanently altered, heating faster than the rest of the pan and leading to scorched centers and undercooked edges in every meal you make.
Once a cast iron pan warps, it cannot be fixed. Preventing it is your only option, and it starts with a low preheat.
The Daily Dance: Using and Moving Your Pan Safely
Your glass cooktop and your cast iron pan can be best friends, but their relationship requires a bit of finesse. The number one rule is simple, but it’s the most important one for protecting your stove. When you compare cast iron to nonstick pans for home cooking, the winner depends on what you cook and how you care for it. That trade-off becomes clear as you weigh heat retention, maintenance, and versatility.
You must treat the cooktop surface like glass, because it is. Never slide or drag your pan. Always lift it straight up, move it through the air, and set it straight down. Even a small grit of salt or a tiny burr on the pan’s bottom can act like sandpaper, leaving permanent, cloudy scratches in the glass ceramic surface.
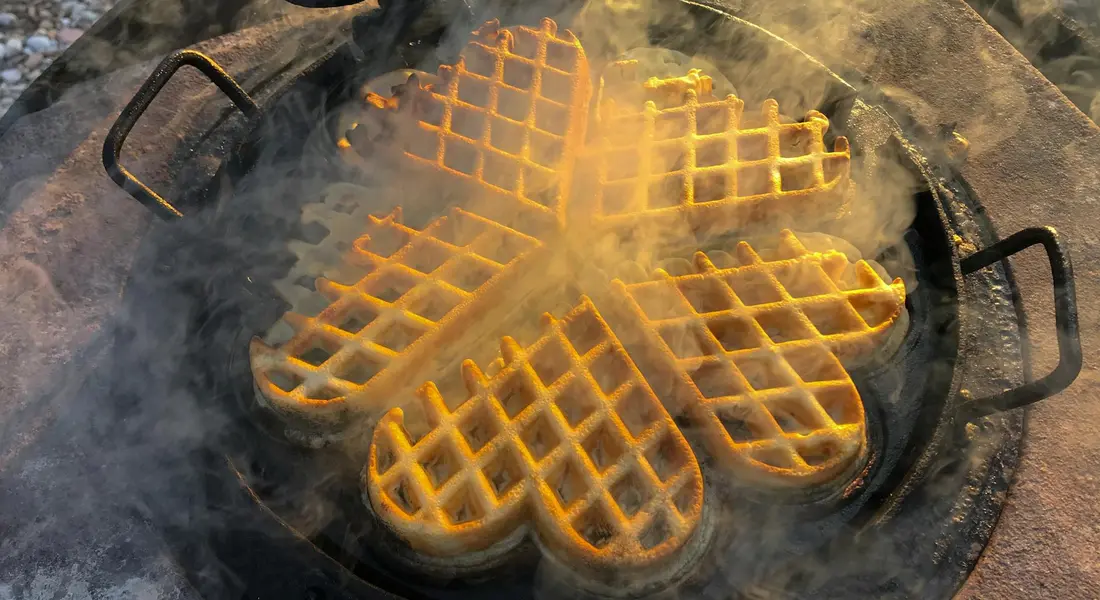
Ensuring Stability for Specialty Items
Some cast iron pieces are inherently less stable. A stovetop cast iron waffle maker, for instance, has a tall, heavy hinge on one side. This can make it want to tip if you’re not careful. The same goes for any pan with a long handle or an uneven weight distribution.
Here is how I handle my waffle iron:
- I always center it perfectly over the burner.
- I treat it with two hands-one on the main handle and one supporting the opposite side-whenever I need to open or move it.
- I make sure the kitchen isn’t a high-traffic zone while it’s in use, to avoid accidental bumps.
This extra caution prevents a costly accident and keeps your vintage or new piece from hitting the floor.
Managing a Large Griddle or Grill Pan
A stove top cast iron griddle that spans two burners is a powerhouse for big breakfasts. It also presents a unique heating challenge. The area directly over the burners will get much hotter than the middle section between them.
The key is to preheat slowly and use your burners to create distinct cooking zones. I turn my front burner to medium and my rear burner to medium-low. This creates a primary hot zone and a secondary warm zone for keeping finished items warm without overcooking. You learn to shuffle items around the griddle surface, much like on an outdoor grill.
When moving it, you must lift it cleanly with two hands. Dragging it to reposition it is a sure way to scratch your stove and potentially warp the griddle over time if one side catches on the grate.
Handling Heavy, Loaded Pieces
The real test comes with a large, stove top cast iron Dutch oven full of braise or stew. It’s incredibly heavy and a spill would be disastrous. My method is all about preparation and proper tools.
- Clear your landing zone before you even start cooking. Move away any other pots, utensil crocks, or clutter from the counter next to the stove.
- Use a thick, dry potholder or a dedicated moving rag. A wet or damp cloth can lead to a steam burn if it meets the hot pot.
- Plant your feet, get a firm two-handed grip on the helper handles (never just the main handle on a full pot), and lift straight up. Pivot your body, don’t twist your wrists, and set it down gently.
I keep a sturdy trivet or a folded kitchen towel on the counter as a pre-set spot for the hot pot. This protects your counter and gives you a clear target. It turns a risky maneuver into a simple, safe routine.
Special Considerations for Different Cast Iron Pieces
Your favorite pan might be a trusty skillet, but every piece in your collection has its own personality and needs. Let’s look at how to handle specific items on your smooth-top stove.
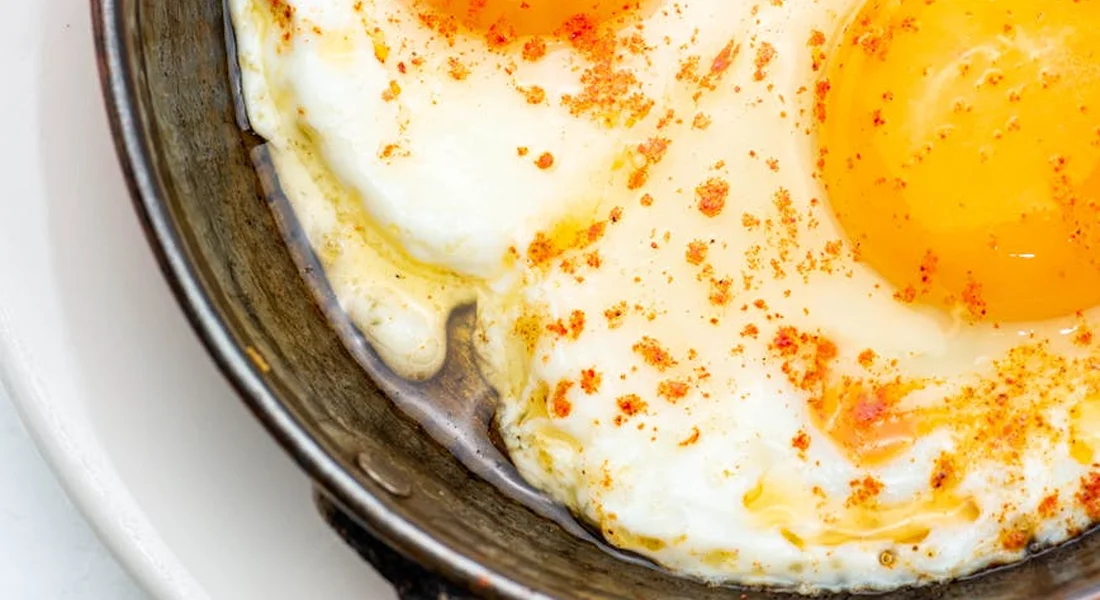
Stovetop Cast Iron Steak Searing
Searing a steak requires intense, direct heat, which can be a test for your stove and your seasoning. The goal is to get that perfect crust without filling your kitchen with smoke or harming your cooktop.
Start by preheating your pan slowly over medium-low heat for about five minutes, then gradually increase to medium-high. This gives the iron time to expand evenly and prevents thermal shock to the glass surface. A proper preheat is your best defense against warping your pan and creating hot spots that can damage your stove.
You will get some smoke. It’s unavoidable. To manage it, ensure your kitchen is well-ventilated. Use an oil with a high smoke point, like avocado or refined safflower oil. When you add the steak, don’t move it. Let it sear undisturbed for a few minutes to develop a crust that releases easily. If you try to lift it too soon, it will stick.
Cooking Frozen Burgers or Stovetop Cast Iron Potatoes
These foods are notorious for sticking, especially straight from the freezer. The two non-negotiable rules here are a thorough preheat and enough cooking fat.
For frozen burgers, place your cold pan on a cold burner. Set the heat to low and let it warm up for a full 8-10 minutes. You want the entire cooking surface to be uniformly hot. Add a tablespoon of a neutral oil just before the patties. The sizzle when they hit the pan should be steady, not explosive. Starting with a cold pan and a low, slow preheat prevents the drastic temperature change that makes frozen foods seize onto the iron.
The same logic applies to potatoes. Parboiling them first helps, but if you’re cooking them raw, give your pan that long preheat. Use more fat than you think you need-a couple of tablespoons of oil or a mix of oil and butter. Let the potatoes form a golden layer on the bottom before you try to stir or flip them.
Handling Specialty Items: Teapots and Skillet Pizzas
Not all cast iron is a flat skillet. Pieces like stovetop teapots or deep pizza pans require extra attention to how you handle their weight, especially compared to other types of cast iron pans.
My small cast iron teapot is wonderful for boiling water for tea, but it’s top-heavy. Always lift and place these items straight up and down. Do not slide them across the glass cooktop. The grit from your seasoning can act like sandpaper and scratch the surface. For any piece with a small base or uneven weight, gentle placement and lifting is mandatory to protect your stove’s finish. These tips tie into safety best practices for using cast iron on glass-top stoves. Following them helps protect both the cookware and the stove surface.
For a skillet pizza, the challenge is even heating. A pizza pan or deep skillet has a large surface area. Preheat it slowly in the oven first, then transfer it carefully to the stovetop on low heat to finish the bottom crust—following proper preheating techniques. This method uses the oven’s ambient heat to warm the entire piece evenly, avoiding a scorching-hot center and a cold outer ring on your stove.
A Note on Stovetop Cast Iron Grill Pans
If you use a grill pan with raised ridges, you know the grates are a blessing for marks and a curse for cleaning. The key is dealing with it while the pan is still warm. It is especially important if you are working with cast iron grill grates and stove components.
After cooking, while the pan is hot but manageable, pour in a cup of water. It will sizzle and steam, loosening the stuck-on bits in the grooves. Use a stiff brush, like a nylon-bristle grill brush, to scrub along the grooves. Dump out the water, dry the pan on the warm stove, and apply a super-thin coat of oil. Cleaning the grates immediately after cooking, using steam and a brush, prevents carbonized food from becoming a permanent, crusty fixture. This quick routine also suits clean cast iron grates, grill grates, and stove-top grates. Keeping them residue-free helps maintain seasoning and makes future cooking easier.
Cleaning Up: For Your Pan and Your Stove
A well-maintained skillet is your best friend on a glass top stove. The secret to easy cleanup on both surfaces is a tough, slick layer of seasoning on your pan. When food doesn’t bond to the cooking surface, you won’t need to scrub aggressively, which protects your pan’s finish and prevents you from accidentally sliding a rough pan across the delicate stove.
Cleaning Your Cast Iron After Stovetop Use
Your goal is to remove food bits without stripping the hard-earned seasoning. I clean my daily driver right on the cooling burner.
- While the pan is still warm (not scalding), add a cup of water and use a stiff nylon brush or scraper to loosen any stuck-on bits.
- For stubborn residue, sprinkle in a handful of coarse salt and use a folded paper towel to scrub. The salt acts as a gentle, abrasive cleaner.
- Rinse with hot water and immediately dry the pan completely with a towel.
- Place the dry pan back on the warm (not hot) burner for a minute to evaporate any last moisture. A quick, thin wipe with oil while it’s warm is a good habit.
This method gets the pan clean while actively maintaining and even building its non-stick surface over time. Avoid using soap for everyday cleaning unless you’ve cooked something particularly pungent.
Cleaning Your Glass or Ceramic Cooktop
This is where many people get nervous. With the right technique, it’s simple.
- Let the cooktop cool completely. Never spray a cleaner on a hot surface.
- Use a cleaner specifically made for glass cooktops. These are formulated to cut grease without scratching. I keep a bottle of the Weiman brand cream by my stove.
- Apply the cleaner, then use the recommended non-abrasive scrubbing pad or a fresh, soft cloth to gently wipe the surface. Don’t use old sponges that might harbor grit.
- For any faint, stubborn marks from the pan’s bottom, apply a little extra cleaner and let it sit for a minute before gently wiping again.
That Hazy Mark is (Probably) Not a Scratch
After wiping, you might see a faint, cloudy ring or smear where the pan sat. Don’t panic. This haze is almost always a thin film of polymerized oil residue from your pan’s bottom, not a scratch in the glass. It happens to my stove all the time. Apply a little more cooktop cleaner and buff firmly with a dry microfiber cloth. The haze should disappear, revealing the pristine surface underneath. It’s just proof your pan’s seasoning is doing its job.
Common Mistakes and How to Avoid Them

I’ve restored hundreds of pans and used them on every type of stove. These are the slip-ups I see most often on smooth-top ranges. Avoiding them protects your expensive stove and builds your skillet’s seasoning.
Mistake: Cranking the Heat to High Immediately
It’s tempting to turn the dial straight to high, especially when you’re in a hurry. Cast iron heats slowly, and on a glass or ceramic cooktop, high heat blasts the bottom of the pan very quickly. This creates a massive temperature difference between the center and the edges.
The result is two problems: your food will scorch right in the middle, and the thermal shock can stress the metal, potentially leading to warping over time.
The correction is the low-and-slow preheat every time.
- Place your dry pan on a cold burner.
- Set the burner to low or medium-low.
- Let the pan warm up for a full 5 to 8 minutes. You should just start to feel warmth when you hold your hand over the cooking surface.
- Then, and only then, increase the heat to your desired cooking temperature. You’ll get perfectly even heating.
Mistake: Sliding a Hot Pan to a Different Burner
Glass cooktops are incredibly scratch-sensitive. A tiny grain of hardened carbon or grit stuck to your pan’s bottom acts like sandpaper. Sliding a 10-pound hot skillet across that surface is a surefire way to leave permanent, ugly scratches.
You must develop the habit of lifting the pan completely off the surface before moving it.
It feels awkward at first, but it becomes second nature. Always lift, move, then set down gently. This simple act is the single best thing you can do to keep your stovetop looking new.
Mistake: Letting a Dirty Pan Bottom Contact the Stove
After cooking, we focus on cleaning the *inside* of the pan. The bottom gets ignored. That baked-on grease and food spatter hardens into a rough, abrasive layer. Putting that dirty pan back on the stove next time grinds that gunk into the glass.
Make wiping the pan’s bottom the final, non-negotiable step of your cleaning routine.
- While the pan is still warm (not scorching hot), wipe the exterior and bottom with a damp paper towel or dishcloth.
- For stubborn spots, use a dab of soap and a non-scratch scrubber (like a Dobie Pad).
- Dry it immediately. A clean, dry bottom ensures perfect contact with the burner and prevents staining.
Mistake: Using a Warped Pan
A warped pan-one that rocks or spins on a flat surface-is a nightmare for smooth-top stoves. The pan only contacts the burner in a few spots, leading to awful hot spots where food burns. It also wastes energy and can make a unsettling clicking sound as the metal expands and contracts.
Checking for a warp is easy. Place your pan on a perfectly flat countertop or your (cool, clean) glass cooktop. Press on the rim. If it rocks or spins freely, it’s warped.
A warped pan will not heat evenly on your flat electric burner, and no amount of preheating will fix it.
It can sometimes be fixed through careful re-heating and flattening, but often, a severely warped modern skillet is a candidate for replacement. My vintage Wagner sits perfectly flat, which is why it’s my go-to for my glass top.
Mistake: Ignoring the Stove Manufacturer’s Guidelines
Your stove’s manual isn’t just for the installers. It contains specific safety and maintenance instructions for the cooktop surface. Some manufacturers state maximum weight limits for burners, which a large, full Dutch oven could approach.
Others warn against using certain materials or specifically mention cast iron. These guidelines are about protecting the glass ceramic from thermal shock or physical damage.
Take five minutes to find your stove manual online or dig it out of the drawer. Look for the cooktop care section.
Following the maker’s advice protects your warranty and your appliance. If the manual says to avoid sliding *any* cookware, you now know to be extra vigilant about lifting your cast iron.
Quick Answers
How do I care for a stovetop cast iron waffle maker or grill pan?
Clean it while it’s still warm. Pour a little water into the hot pan to steam-loosen residue, then scrub the plates or grates with a stiff brush. Dry it thoroughly on the warm burner and apply a whisper-thin coat of oil before storing.
Does searing a steak or cooking frozen burgers ruin my pan’s seasoning?
Not if you manage the heat correctly. Always preheat slowly to avoid thermal shock, which can crack seasoning. After cooking, clean gently without soap and apply a fresh, thin layer of oil to the cooking surface to maintain the seasoning’s integrity.
What’s the best way to maintain a smooth pan bottom?
Make it the last step of your cleaning ritual. While the pan is warm, wipe the bottom with a damp cloth to remove any carbonized grease or grit. A clean, smooth bottom is non-negotiable for protecting your glass cooktop from scratches.
Final Thoughts on Cast Iron and Modern Stoves
The single most important rule is to let your pan preheat gently and to always lift it to move it, never slide it. This simple habit protects your stove’s surface and allows your cast iron to perform at its best. For more on maintaining that perfect cooking surface, our guides on seasoning maintenance and using cast iron in the oven offer helpful next steps.
Citations and Authoritative Sources
- Can You Use Cast Iron on Induction Cooktops? | Whirlpool
- Does Enameled Cast Iron Work on Induction Stoves? – Made In
- How to Use Cast Iron Over Any Heat Source – Lodge Cast Iron
- Cast Iron on Induction- Using Cast Iron Cookware on Induction Tops | Stahl – Stahl Kitchens
- Can You Put Cast Iron on a Glass-Top Stove or Cooktop? | Maytag
- How to Cook With Cast Iron on Any Type of Stove | Taste of Home
A material science expert by profession, Joseph is also an avid cook. He combines his 10+ years expertise in material science and metallurgy with his passion for cast iron cookware to bring you best hands on advice. His expertise ranges from types of cast iron cookware to best seasoning tips as well as restoration of vintage cast iron utensils. Joe is here to help you solve all your cast iron cookware queries and questions.