Should You Grease a Cast Iron Skillet Before Baking?
That quick question before you pour in batter or dough is more common than you think. Greasing your skillet before baking isn’t just about preventing stuck food; it’s a direct investment in your pan’s long-term seasoning health.
Let’s clear up the confusion with straight talk from the workshop. This article covers:
- Why a thin layer of fat protects your seasoning from dry oven heat better than cooking on the stovetop.
- How to tell if your pan’s seasoning is robust enough that you might skip greasing for some bakes.
- Which fats and oils I always reach for, and the one type I avoid because it can gum up.
- My simple, no-fuss method for greasing that I use for everything from cornbread to fruit crisps.
The Short Answer: Greasing is for Food, Not the Pan
This question trips up a lot of folks because we use the word “seasoning” for two different things. Let’s clear that up first.
Your pan’s seasoning is the hard, polymerized layer of oil baked onto the iron. It’s a permanent part of the pan’s surface that protects it from rust and creates a semi-non-stick foundation. Greasing, or oiling, before you cook is a temporary layer of fat you add for that specific meal to prevent your food from bonding directly to the iron.
Think of it this way: the seasoning is like the durable, non-stick paint on a high-quality baking sheet. The grease or butter you add before making cookies is the cooking spray or parchment paper you still use. One protects the pan, the other protects the food.
The core principle is simple. You should almost always grease or oil your cast iron skillet before baking to create a reliable release layer for your food. Your beautifully seasoned pan still needs this help, especially when using it for baking breads, cobblers, or pizza.
What Happens If You Skip the Grease?
You risk a frustrating mess. Even on my best black-as-midnight skillets, skipping grease often leads to sticking.
Baked goods are the biggest offenders. Cornbread, biscuits, and cakes contain sugars and proteins that can fuse to the hot iron surface as they cook. When food sticks, your gentle cleanup turns into a scraping session that can gouge and weaken your hard-earned seasoning. You’re forced to choose between stuck-on food and your pan’s finish.
This addresses a common myth I hear often: “My pan is well-seasoned, so it’s completely non-stick.” For stovetop cooking with enough fat, that can feel true. Baking is different. Cast iron’s “non-stick” quality is relative, and the dry, prolonged heat of an oven usually demands that extra fat barrier for safety compared to traditional bakeware. It’s cheap insurance.
Do you have to grease a cast iron skillet for cornbread?
Yes, you almost always do. In fact, greasing is part of the classic technique for the perfect crust.
The traditional method involves putting your fat (butter, oil, or bacon grease) into the cold skillet, then placing the skillet in the oven as it preheats. You pour your batter into the sizzling-hot, greased pan. This immediately starts crisping the exterior. Preheating the greased skillet is what gives you that incredible, crunchy golden crust everyone loves. To nail the timing, many bakers rely on a tested preheat-and-bake rhythm for cast-iron skillets. We’ll share practical times and tips in the next steps to optimize your crust.
Could you skip it? Maybe, if your recipe is extremely high in fat. But why test it? A thin coat of grease guarantees a clean release and protects your seasoning. I always grease mine.
What about other baked goods like muffins or bread?
The same rule applies. Use the same logic you would for any other pan material.
If a recipe instructs you to grease a metal muffin tin or a glass loaf dish, you should definitely grease your cast iron muffin pan or Dutch oven. Greasing ensures a uniform release, preserves the shape of your baked good, and makes cleanup trivial-often just a quick wipe.
For artisan breads baked in a Dutch oven, the rules shift slightly. Here, you often use parchment paper instead of grease to handle the very wet dough, but the principle of a barrier between food and iron remains the same. That same cast iron Dutch oven helps you bake perfect bread, delivering steady heat and trapped steam for a crisp crust.
How to Grease Your Skillet the Right Way
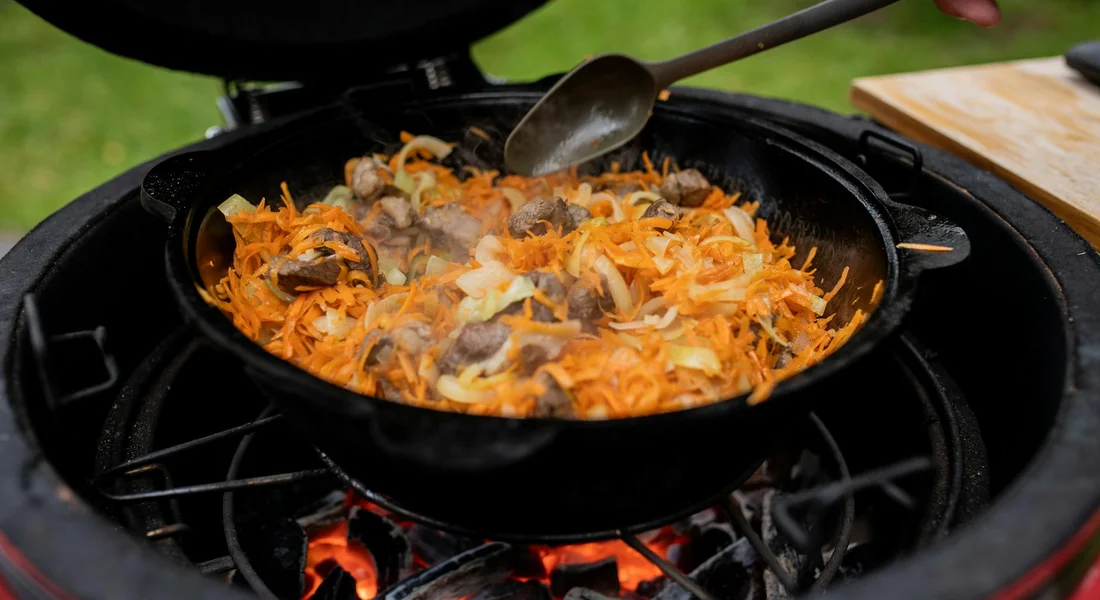
The process is straightforward. Follow these steps every time you bake.
- Start with a clean, dry skillet. Any leftover food or moisture can interfere.
- Choose your fat (more on that next) and put a small amount, about a teaspoon, in the pan.
- Use a folded paper towel or pastry brush to spread it over the entire cooking surface, including the sides.
- Take a clean, dry paper towel and buff the entire interior. You want the surface to look satiny, not wet.
- Your pan is now ready for batter or dough.
This consistent method works for any baked good, from a deep-dish pizza to a fruit cobbler.
Choosing Your Fat
You have good options. Your goal is release and flavor, not to build polymerized seasoning.
- Neutral Oils: Canola, grapeseed, or vegetable oil are my default. They have high smoke points and don’t impart flavor.
- Shortening: It’s solid at room temp, which makes it easy to control. It gives a classic, even browning.
- Butter: It adds wonderful flavor for items like cornbread or biscuits. Use it carefully.
Butter can burn at typical baking temperatures (around 350°F to 425°F), sometimes leaving a faint, dark residue on your pan. I save butter for bakes at 375°F or lower, where its flavor shines without risk. For a high-heat bake, like a 450°F focaccia, I always use oil.
Remember, this is a culinary step. Use the fat that suits your food, not one you think is best for your pan’s seasoning.
The “Wipe It Like You’re Trying to Take It Off” Method
This old saying is the golden rule. After you spread your oil or fat, you must wipe the pan again with a clean towel.
Buff it until the surface looks nearly dry to the touch. You should see only a faint sheen. If your paper towel is still soaking up obvious oil, you need to keep wiping.
This step prevents excess oil from pooling during the bake, which is the main cause of a greasy, fried layer on the bottom of your bread or cake.
That pooled oil can also bake onto the pan as a sticky, gummy film, which is a hassle to clean and doesn’t help your seasoning.
What Helped Me: The Pre-Heat Trick
For certain bakes, I use a method that never fails. My favorite cornbread skillet is a perfect example.
I place my dry, empty skillet directly into the oven as it preheats. When the oven hits temperature, I use a thick mitt to pull the blazing hot skillet out. I add my fat (it sizzles dramatically), swirl it to coat, and immediately pour in the batter. It hits the hot surface with a satisfying hiss. This method is especially handy when baking pies or brownies in cast iron.
This trick creates an instant, incredibly crisp crust that releases perfectly every single time.
Just handle the hot pan with extreme care.
Common Mistakes and How to Avoid Them
Seeing where others get tripped up can save you a lot of frustration and messy cleanups.
Using Too Much Oil
This is the most frequent error. It comes from a good place, wanting to ensure nothing sticks. But cast iron doesn’t need a pool of oil.
Too much fat won’t bake off. It will fry the bottom of your batter, giving you a soggy, oily layer instead of a crisp crust. Revisit the “wipe it out” technique; it is your best defense against an oily mess.
Not Greasing Because the Pan is “Non-Stick”
This is the mistake that leads directly to tragedy. A well-seasoned skillet is relatively non-stick for cooking eggs or searing a steak, but baking is a different beast.
Batters and doughs contain sugars and proteins that bond tightly to the metal as they caramelize and set. Without that thin, protective grease layer, you are almost guaranteed a stuck-on disaster.
Greasing before you bake is a non-negotiable act of care, both for your meal and for your pan’s finish.
It keeps your food intact and saves you from a difficult, abrasive scrubbing session that can damage your hard-earned seasoning.
Confusing Greasing with Re-seasoning
Don’t think of the grease you add for baking as a way to maintain your pan’s base seasoning. The two processes are unrelated.
The thin layer of butter or oil for baking is either absorbed by your food, evaporates, or gets washed off when you clean the pan. The heat and duration of baking are not sufficient to polymerize the fat into a durable, new seasoning layer.
True seasoning maintenance requires a dedicated, high-heat process in a very hot oven or on a grill for an hour or more.
The grease you use for your cornbread is just for the cornbread. Keep your seasoning rituals separate.
Common Questions
Can I use the leftover grease in the pan after baking to help re-season it?
No, do not attempt this. The fats used for baking release are not applied or heated with the specific intent of polymerization. Simply leaving used cooking grease in a warm pan creates a sticky, varnish-like film, not durable seasoning. Proper seasoning requires a thin, fresh coat of oil baked at a high, sustained heat. This relies on the chemistry of cast iron seasoning: the oil polymerizes to form a durable non-stick surface. Understanding that polymerization helps explain why temperature and oil choice matter.
What if my baked good still sticks despite greasing properly?
This usually indicates your base seasoning layer is too thin or weak. The food is bonding to the iron itself, not the protective polymerized layer. Focus on building a stronger foundational seasoning through several rounds of oven seasoning before relying on it for baking.
Should I use a different oil for greasing than I use for seasoning?
Yes, and base your choice on the bake, not the pan. Use a fat with a flavor and smoke point suited to your recipe, like butter for cornbread or a neutral oil for high-heat bread. Your seasoning oil (like flaxseed or grapeseed) is chosen for its polymerizing properties, which are irrelevant for this temporary release layer.
Final Thoughts on Preparing Your Pan
For successful baking, always apply a light layer of oil to your cast iron skillet before it goes into the oven. This simple act protects your seasoning and guarantees easy food release, which I rely on with my own bakeware. You can learn more about building and maintaining that essential surface in our articles on initial seasoning and routine cleaning.
Sources and Additional Information
- dealing with cast iron skillet grease (cooking forum at permies)
- Seasoning Cast Iron | Non-Stick Pans in 5 Easy Steps!
- How to Clean a Cast Iron Skillet (And Season It, Too) | Epicurious
- How do people season a cast iron skillet with bacon grease? – Quora
Joseph Gerald
A material science expert by profession, Joseph is also an avid cook. He combines his 10+ years expertise in material science and metallurgy with his passion for cast iron cookware to bring you best hands on advice. His expertise ranges from types of cast iron cookware to best seasoning tips as well as restoration of vintage cast iron utensils. Joe is here to help you solve all your cast iron cookware queries and questions.