
How Can You Bake Perfectly with Cast Iron Skillets and Dutch Ovens?
You love your cast iron for searing and frying, but baking bread or pizza might seem like a sure way to ruin your seasoning. I bake in my own skillets and Dutch oven weekly, and with a few simple techniques, you can achieve perfect, non-stick results every time.
This guide will walk you through the cast iron-specific steps that make baking successful, focusing on care rather than recipes. Here’s what we’ll cover:
- How to preheat your cast iron properly to prevent sticking and protect the seasoning.
- The best oils to use for baking that reinforce your pan’s non-stick surface.
- Why a Dutch oven’s design is ideal for creating steam and a perfect bread crust.
- Simple post-bake cleaning that maintains your pan’s performance for years.
Why is Cast Iron a Secret Weapon for Bakers?
Think of your cast iron skillet or Dutch oven like a thermal battery. It absorbs heat slowly and releases it steadily. This is the opposite of a thin metal pan, which heats and cools in quick flashes.
When you bake, that steady, radiant heat does two magical things. First, it promotes incredible browning and caramelization on the bottom and sides of your food, giving you a deep golden, crispy crust that’s hard to achieve elsewhere. Second, it provides a consistent environment, so your bread rises evenly and your cobbler bubbles uniformly.
The Cast Iron Difference: A Sensory Comparison
You can see and taste this thermal mass in action. A pizza baked on a preheated cast iron skillet will have a shatteringly crisp, spotted crust underneath, while one on a standard baking sheet might be pale and soft. A fruit cobbler in a glass dish often has a soggy bottom; the same cobbler in cast iron will have a firm, caramelized base that holds its shape when served.
The result isn’t just cooked food; it’s food with superior texture and deeper, more complex flavor from that expert-level browning.
Beyond Skillets: Baking Sheets and Trays
This same principle makes a cast iron baking sheet or grill pan a game-changer for certain tasks. Its incredible thermal mass is perfect for foods you want to start with a blast of heat. Think crispy roasted potatoes, chicken wings with crackling skin, or cookies with firm edges and chewy centers.
A lightweight aluminum sheet pan can warp or create hot spots. A cast iron pan stays put and delivers that heat evenly, batch after batch.
Your Seasoning is the Secret Sauce
For bakers, a well-maintained seasoning layer is your built-in, natural non-stick system. It’s a polymerized layer of oil that becomes part of the pan’s surface. This isn’t a coating that can peel off; it’s a hard, slick finish that improves with use. From a chemistry standpoint, the seasoning forms through the polymerization of oil onto the cast iron. That bonded film is what gives the pan its inherent non-stick quality.
A pan with good seasoning creates a smooth barrier that prevents sticking and makes cleanup after baking a simple wipe-out affair, not a scrubbing battle. It’s the foundation that makes all the other benefits possible.
How Do You Prep Your Pan for a No-Stick Bake?
Proper preparation is the single most important step for baking success in cast iron. It’s all about managing heat and creating a reliable release barrier. One of the key steps is to season the cast iron properly before using it.
To Pre-Heat or Not to Pre-Heat?
Your starting temperature depends on what you’re making.
- Start in a Cold Oven: Do this for wet batters (like cornbread or cake) or doughs that need a gentle, rising heat. Putting cold batter into a scorching hot pan can cause it to seize or burn on contact. Let the pan and its contents heat up together for an even rise.
- Start with a Blazing Hot Pan: Do this for foods where you want an instant sear and crisp crust. Pizza and artisan bread are perfect examples. Place your empty skillet or Dutch oven in the oven as it preheats. When it’s screaming hot, carefully add your dough. You’ll hear the glorious sizzle that promises a perfect crust.
Step-by-Step: Greasing Your Pan
Never skip this step, even with a well-seasoned pan. Here’s how to do it right.
- Ensure your pan is clean and dry.
- Choose your fat (see comparison below). Using a folded paper towel, apply a very thin, even layer to the entire cooking surface and up the sides about half an inch.
- This is the critical part: take a second, clean paper towel and thoroughly wipe the pan. It should look almost dry, with just a faint sheen. You are leaving behind a microscopic layer of fat, not a puddle; excess oil will bake on as a sticky residue.
- Proceed with your cold-start or hot-start method as your bake requires.
Butter, Oil, or Parchment? Choosing Your Release Agent
Your choice here affects flavor, browning, and ease of release.
- Butter: Provides unmatched flavor and promotes beautiful browning. Ideal for sweets like cobblers, cakes, and biscuits. Be aware it has a lower smoke point and can brown quickly, which is usually a delicious plus.
- Neutral Oil (like vegetable or canola): A reliable, high-smoke point choice with minimal flavor. My go-to for savory bakes like cornbread or frittatas, or when I want the pan’s seasoning to shine through.
- Parchment Paper: The ultimate insurance policy for delicate cakes or super-sticky fillings. It guarantees a perfect release. Simply cut a round to fit the bottom of the pan after greasing. It doesn’t contribute to seasoning, but it saves your bake.
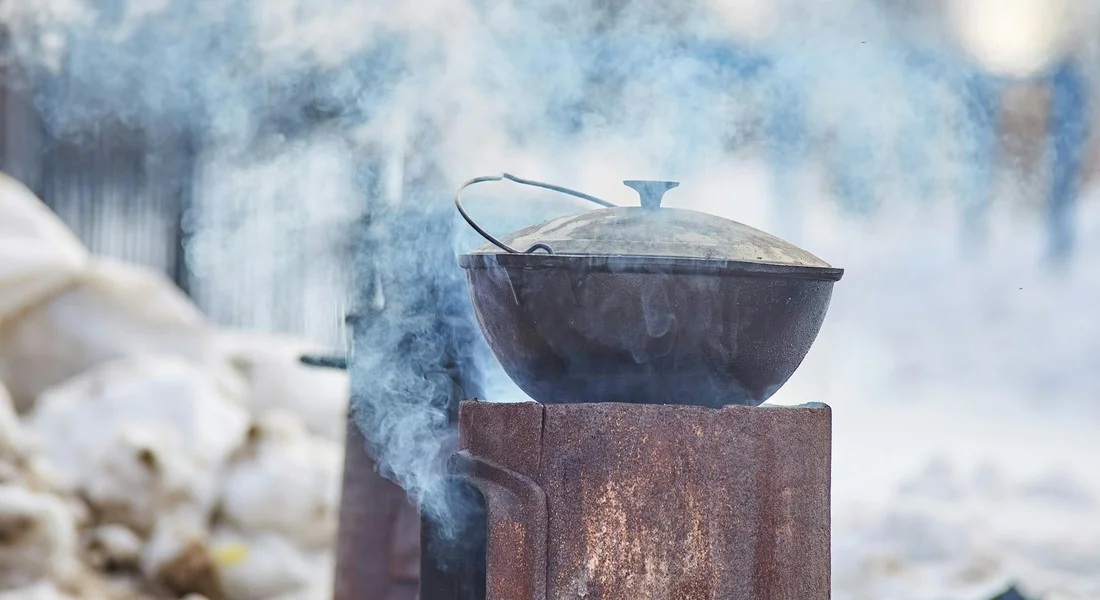
The Power of the Lid: Trapping Steam for Perfect Bread
This is where a Dutch oven or a skillet with a lid becomes indispensable for bread baking. During the first 20-30 minutes of baking, you want a steamy environment. This moisture keeps the dough’s surface soft and elastic, allowing for a dramatic, professional “oven spring” or rise.
By baking your bread inside a preheated, lidded cast iron vessel, you create your own perfect, miniature steam-injected oven. The lid traps the bread’s natural evaporating moisture. After this initial phase, you remove the lid to let the crust dry, harden, and develop that deep, burnished color.
Skillet or Dutch Oven: Which Should You Use?
Think of your cast iron pieces as having distinct baking personalities. Choosing the right one isn’t about quality; it’s about shape and what that shape does to the heat and moisture around your food. Cast iron bakes differently from traditional bakeware, with heat that stays put and browns food more evenly. That difference is why choosing the right pan shape matters.
My 10-inch skillet is my go-to for anything that benefits from a crisp, all-around crust. Its sloped sides make it easy to slide a spatula underneath. The large, open surface lets moisture escape quickly.
Use your skillet for pizza, cornbread, and shallow fruit cobblers where you want a golden-brown top and bottom. The heat radiates evenly from the bottom and up the sides, giving you that coveted crispy edge on your cornbread.
My Dutch oven, on the other hand, is a sealed environment. Its heavy lid and straight, high walls trap steam. For artisan bread, this is the secret. The trapped steam creates a humid micro-oven, which gives the dough time to spring up before forming a crust, leading to that crackly, professional-quality loaf.
A Dutch oven is ideal for deep-dish casseroles, braised meats, and any bread recipe that calls for a steamy bake. It’s like having a mini commercial steam oven on your kitchen rack.
Beyond these two classics, consider other shapes. A cast iron baking dish or a square skillet is perfect for casseroles, brownies, or focaccia. The square corners maximize surface area for more serving pieces. For fun, individual cast iron baking molds or “mini skillets” are great for personal-sized desserts or pot pies. They heat quickly and make for a charming presentation. This fits into a complete cast iron pan guide—covering foods, dishes, and techniques.
Your Pre-Bake Cast Iron Checklist
Baking success starts before you even preheat the oven. Running through these simple steps prevents sticking and protects your seasoning.
- Check Your Seasoning
Look at the cooking surface. It should be dark, smooth, and slick. If you see dry, matte, or rusty patches, your pan needs a re-seasoning session before a major bake. A weak spot in your seasoning is where food will fuse.
- Ensure It’s Bone Dry
After washing, always dry your pan completely. I put mine on a low stovetop burner for two minutes to evaporate every last drop of water. Starting with a wet pan encourages surface rust and can make oil pool unevenly.
- Grease the Pan Properly
Even a well-seasoned pan usually needs a light grease for baking. Use a high-smoke-point oil or a thin coat of shortening. Wipe it on with a paper towel, then use a clean towel to buff the surface until it looks almost dry. This leaves a microscopic, even layer that prevents fusion.
- Verify Oven Safety
Look at the handles. Modern pans sometimes have silicone or plastic grips that are not oven-safe. If your pan has them, remove them before baking. Most classic cast iron with metal handles or phenolic knobs is safe to at least 500°F, but you should check the manufacturer’s guidelines to ensure safety.
- Position Your Oven Rack
Place your rack in the center of the oven. This ensures even ambient heat around your pan, especially critical for a Dutch oven with its lid on. Avoid the top rack, as it can lead to over-browning.
- Leave Room for Heat to Breathe
Once the pan is in the oven, make sure it’s not touching the oven walls or another rack. Cast iron radiates intense heat, and it needs space for air to circulate. Crowding will create hot spots and affect your bake. Cast iron holds heat very well, so giving it space helps even cooking. Its strong heat retention can keep cooking after you’ve removed it, so crowding hurts the final result.
Following this checklist turns baking from a hopeful experiment into a predictable, successful routine. It’s the maintenance work that guarantees a perfect release every time.
What Are the Most Common Baking Problems and Fixes?
Baking in cast iron is mostly foolproof, but a few common snags can pop up. The good news is they’re almost never about your recipe and almost always about your pan’s condition or how you heated it—such as whether you greased the cast iron skillet properly before baking.
Tackling a Sticking Situation
Your bread or pizza should release, not rip. Sticking usually happens for one of three reasons: a cold pan, a patchy seasoning layer, or not enough fat. Think of your pan’s seasoning like a non-stick coat of paint. If that coat is thin or damaged, wet dough will grab onto the bare iron.
Your fix starts before the food goes in. Always preheat your pan. For bread or pizza, I put my empty skillet or Dutch oven in the cold oven and let it heat up fully with the oven. This gives you a searing-hot surface that sets the crust instantly. If food is sticking regularly, your pan is telling you it’s hungry. It needs a fresh layer of seasoning. A single round of oven seasoning can rebuild that protective polymerized oil layer.
A sticky bake is a maintenance issue, not a cooking failure, and it’s fixed with proper preheating and a resilient seasoning.
Banishing Soggy Bottoms
A wet, undercooked bottom crust on a fruit cobbler is a letdown. This happens when the pan itself isn’t hot enough to transfer adequate heat up into the food before the oven’s ambient heat cooks the top. The solution is, again, preheating. For bakes like cobblers, preheat your skillet on the stovetop for a few minutes before adding your batter or fruit.
For an even bigger boost, especially with bread bakes, place your preheated Dutch oven or skillet on a preheated baking steel or pizza stone already in the oven. This acts like a thermal battery underneath, ensuring intense bottom heat from the moment you load the pan.
Solving Uneven Browning
If one side of your cornbread is darker, you’re meeting your oven’s hot spots. All ovens have them. The beauty of cast iron is its incredible heat retention, which actually helps fight this. The mass of iron wants to even out the temperature across its entire surface.
To maximize this effect, make sure your pan is properly preheated. Give it extra time in the oven, at least 30 minutes. This allows the entire vessel-sides and bottom-to reach a steady, uniform temperature. The iron will then hold that even heat, giving you a consistent bake despite the oven’s quirks.
Cast iron’s weight is its secret weapon against uneven ovens; a fully preheated pan bakes like a steady, level thermal plate.
Addressing Off-Tastes or Discoloration
A metallic taste or greyish streaks in your bake have nothing to do with your ingredients. This is your seasoning talking. It means the polymerized oil layer has broken down, often from prolonged contact with something acidic like tomato sauce or a fruit filling high in citric acid.
The iron itself is now reacting with the food. It’s not dangerous, but it’s not ideal for flavor or for your pan’s finish. This is a clear sign the affected area needs to be re-seasoned. For bakes with acidic components, a very robust, well-built-up seasoning is your best defense.
How Do You Care for Your Pan After Baking?
Post-bake care is different than after searing a steak. You’re often dealing with sticky sugars or moist doughs, but the goal is the same: preserve your seasoning and stop rust.
Cleaning Off the Sweet and Sticky Stuff
Always, always let the pan cool until it’s just warm to the touch. Plunging a scorching-hot pan into water is the fastest way to warp it. For crumbly cornbread or a dry pizza, a simple wipe with a paper towel or soft brush might be all you need.
For cobblers or fruit pies with baked-on sugary glaze, you’ll need a gentle wash. Use warm water and a soft brush or non-abrasive scrubber. A small drop of mild dish soap is perfectly fine here to cut the sugar. Avoid harsh scouring, which can scrub away your seasoning along with the jam.
Cool the pan first, then use water and a soft brush to dissolve sugary residues without attacking your hard-earned seasoning.
Drying is Not Optional
This is the most critical step. Towel-drying is not enough. Any leftover moisture in the pores of the iron or around the rim will cause flash rust. After washing and towel-drying, place the pan on a stovetop burner over low to medium heat for 2-3 minutes. Swirl it around occasionally. You want to see it become completely, bone-dry. When all traces of water are gone, take it off the heat and let it cool.
The Quick Touch-Up Season
Baking, especially with sugary or acidic foods, can be taxing on your seasoning. After the stovetop dry, I almost always do a quick maintenance coat. While the pan is still warm (not piping hot), put a tiny drop of oil on a paper towel-think half a teaspoon for a large skillet.
Wipe the oil over the entire interior surface, then, with a fresh clean paper towel, buff it aggressively as if you’re trying to remove all the oil. You want the thinnest, most invisible film possible. Place the pan back on the warm stove or in a warm oven for 10-15 minutes to let that micro-layer polymerize. This takes two minutes and fortifies your pan against the next bake.
A post-bake stovetop dry followed by a whisper-thin oil buff is the best routine to keep your baking pan in perfect, rust-free condition.
Common Questions
How do I maintain my seasoning when baking frequently?
Frequent baking, especially with sugars or acids, can thin your seasoning. After each use and a proper stovetop dry, apply a microscopic coat of oil and heat the pan briefly to polymerize it. This quick touch-up reinforces the non-stick layer without a full re-seasoning oven session.
What’s the key difference between using a cast iron baking sheet and a Dutch oven?
A baking sheet excels at dry, radiant heat for crispness on foods like wings or cookies. A Dutch oven traps steam with its lid, creating a humid environment essential for bread’s oven spring. Choose based on whether you need maximum browning or controlled steam.
My baking dish has a sticky spot after fruit cobbler. What happened?
Acidic fruits can degrade seasoning on contact, leaving a bare, sticky patch where the polymerized oil broke down. Gently clean the area, dry thoroughly, and apply a few focused layers of seasoning to rebuild that spot. For future bakes, ensure your seasoning is robust before exposing it to high-acid fills. If the surface remains sticky or flaky, repairing the cast iron seasoning can help solve sticky, flaky, damaged surfaces. A follow-up guide on fixing cast iron seasoning will walk you through restoring the coating for long-lasting bake performance.
The Last Layer: Cast Iron Baking as Care
The best thing you can do for your pan is to clean it while it’s still warm from the oven. A quick wipe and a light oiling after baking does more for your seasoning than any elaborate ritual. Think of each loaf of bread or fruit cobbler as adding another protective, non-stick layer to your cookware’s story. For more on maintaining that hard-earned finish, our guides on daily cleaning and fixing a sticky surface are great next stops.
Relevant Resources for Further Exploration
- Tips & Tricks for Baking in Cast Iron – Lodge Cast Iron
- r/LeCreuset on Reddit: Baking in Cast Iron
- 5 Tips for Baking in Cast Iron, According to a Pro at Lodge | The Kitchn
- Cast iron cooking | King Arthur Baking
- Recipe – Tagged “Baking” – Lodge Cast Iron
A material science expert by profession, Joseph is also an avid cook. He combines his 10+ years expertise in material science and metallurgy with his passion for cast iron cookware to bring you best hands on advice. His expertise ranges from types of cast iron cookware to best seasoning tips as well as restoration of vintage cast iron utensils. Joe is here to help you solve all your cast iron cookware queries and questions.