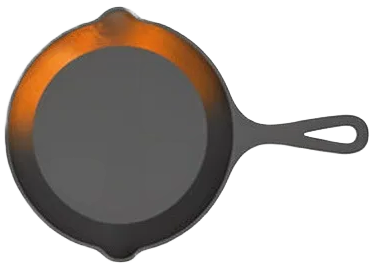
How Do You Remove Rust From a Cast Iron Pan (And When Is It Too Far Gone)?
Finding rust in your favorite skillet can feel like a betrayal. That reddish-brown fuzz isn’t a death sentence; it’s a common fixable problem for any well-used piece of cast iron.
This guide will walk you through the process, from a simple scrub to a full restoration. You’ll learn:
- A safe, step-by-step method to remove rust without damaging your pan.
- How to tell the difference between surface rust and deep, structural damage.
- The clear signs that a pan is beyond saving and should be recycled.
- How to re-season your pan to make it better than ever after rust removal.
First, Figure Out What You’re Dealing With
Before you grab any tools, take a close look at your pan. Is it rust or just old, discolored seasoning? This is a common point of confusion.
True rust is a specific problem. It feels gritty and looks like orange or reddish-brown dust or flakes. Discoloration from old seasoning and carbon buildup looks different. It can be black, gray, or even rainbow-hued, but it sits flush with the metal and feels smooth.
Think of it like dirt on a painted wall versus a patch of peeling paint. You clean the dirt, but you have to scrape and repaint the damaged spot.
Once you confirm it’s rust, assess how bad it is.
- Light Surface Rust: This looks like a faint, dusty orange film. You can often wipe some of it off with your finger. It hasn’t eaten into the metal.
- Moderate Flaking Rust: The rust has formed a thicker layer that may be flaking off in small patches. The surface feels rough and uneven.
- Heavy/Pitted Rust: This is severe. The rust has created visible pits and holes in the iron. The metal itself is compromised and feels cratered.
Identifying the level of rust tells you exactly how much work is ahead and which removal method will be most effective.
And take a breath. Finding rust can feel like a failure, but it’s almost always just a temporary setback. I’ve brought pans back from states that looked truly apocalyptic. With the right care, rusty cast iron can be revived. I’ll walk you through how to fix and prevent rust on cast-iron cookware.
Quick Snapshot: Rust Severity Guide
| Rust Level | What It Looks Like | Recommended Removal Approach |
|---|---|---|
| Light | A thin, dusty orange film. Wipes off partly with a finger. | Scrub with oil & salt or a gentle chainmail scrubber. |
| Moderate | Thicker, flaky patches. Rough, uneven texture. | A controlled soak in diluted white vinegar, followed by scrubbing. |
| Heavy / Pitted | Visible holes or pits in the metal. Surface is cratered. | Abrasive tools like a rust eraser or fine sandpaper, using manual pressure. |
How to Derust Your Cast Iron Pan, Step by Step
Think of this as a choose-your-own-adventure based on your rust assessment above. Pick the path that matches your pan’s condition.
For Light, ‘Dusty’ Rust
You might not even need to break out the vinegar. For a simple dusty coat, a dry abrasive scrub often does the trick.
My go-to method is a paste made from coarse kosher salt and a small amount of any cooking oil. The salt acts as a gentle abrasive, and the oil gives it just enough grip to lift the rust without being too messy. It’s a great step when you’re aiming to remove rust from cast iron and restore it to like-new condition. That prep makes the pan ready for seasoning and full restoration.
Scrub in small circles with the salt-oil paste using a folded paper towel or cloth. For a bit more power, a chainmail scrubber used dry works wonders on this light surface rust. The goal here is to abrade the rust away without removing any good seasoning that might be left around it. These same techniques also work for removing rust from cast iron stoves and other surfaces around the home. They help restore metal without stripping the finish or seasoning.
For Moderate, Flaking Rust
When rust has taken a stronger hold, you need to chemically loosen it. This is where the classic white vinegar bath comes in.
Use a 50/50 mix of white vinegar and water in a container large enough to submerge the rusty areas. Submerge the pan for no more than 30 minutes at a time. This time limit is critical when <a href=”https://ironpatina.com/how-to-remove-rust-from-cast-iron-cookware-complete-guide-proven-techniques”>removing rust from cookware</a>.
Vinegar is an acid, and leaving cast iron in it for too long can etch the metal, making the surface rough. After the soak, take the pan out and scrub the loosened rust with a stiff brush or scrubbing pad. You may need to repeat the 30-minute soak and scrub cycle once or twice for stubborn spots. Be sure to follow proper cleaning and restoration methods to avoid damaging your cast iron.
For Heavy Rust and Pitting
Deep, pitted rust requires mechanical removal. A dedicated rust eraser, which is like a dense abrasive block, is perfect for this job. Fine-grit sandpaper (around 120-grit) also works.
The key is to use your hands, not power tools. A drill-mounted wire wheel is overkill and can gouge the iron, making the surface uneven. Manual scrubbing gives you the control to remove rust from the pits without damaging the surrounding good iron. It’s a workout, but it’s the safest way.
No matter which method you use, the final step is universal and cannot be skipped. You must dry the pan immediately and utterly thoroughly. Wet, bare iron will develop “flash rust”-a new, light layer of rust-in minutes.
Dry it with towels, then place it on a stovetop burner over low heat or in a warm oven for 5-10 minutes. Heat drives out every bit of moisture. Your pan should be warm to the touch and completely dry before you even think about the next step, which is re-seasoning.
The Essential Derusting Checklist
- Assess: Confirm it’s rust (gritty, orange) and determine the severity (light, moderate, or heavy).
- Choose Your Method: Light rust gets a salt/oil or dry chainmail scrub. Moderate rust gets a diluted vinegar soak (50/50, 30-minute max). Heavy rust gets a manual rust eraser or sandpaper.
- Scrub: After your chosen treatment, scrub away all loose rust and residue with a brush or scrubber.
- Rinse & Inspect: Rinse with clean water. If rust remains, repeat the appropriate treatment step.
- Dry Completely: Towel dry immediately, then apply gentle heat (stovetop or oven) until the pan is bone-dry and warm.
Your pan is now a blank, gray canvas of bare iron, ready for its fresh, new layers of seasoning.
What Helped Me: The Vinegar Patience Trick
I learned this the hard way on an old, crusty Dutch oven lid. I was impatient. I’d give it a quick 10-minute vinegar soak, scrub frantically, see some rust left, and repeat. After three cycles, the rust was gone, but the metal felt oddly rough-etched by the repeated acid exposure.
The next time, on a similar piece, I did one full 30-minute soak. The rust wiped off with dramatically less scrubbing, and the metal surface stayed much smoother. A single, full 30-minute soak is almost always more effective and less damaging than multiple short, aggressive sessions. Let the vinegar do its work, then you do yours.
Bringing Your Pan Back to Life: The Reseasoning Process
You have bare, clean iron now. Think of it like a piece of raw, unprotected steel. It will flash-rust almost instantly, so you need to get a protective layer on it right away. This is where the magic of seasoning happens.
The goal is to coat the pan in a thin layer of oil and bake it so the oil polymerizes. That’s a fancy word for turning into a hard, slick plastic-like coating. This coating stops rust and creates your non-stick surface.
The basic process is simple:
- Warm your completely dry pan. A warm pan helps oil spread thinly.
- Apply a tiny amount of high-smoke-point oil (like flaxseed, grapeseed, or Crisco) with a paper towel.
- Then, perform the most critical step: wipe it all off. Use a fresh paper towel and wipe like you made a mistake and are trying to remove every last drop of oil. The thinnest possible film is what you want.
- Bake the pan upside-down in a preheated oven (typically 450-500°F) for one hour. Let it cool in the oven.
You’ll want to repeat this oil-wipe-bake cycle at least three times for a solid base. For a truly deep dive into oils, temperatures, and techniques, our complete guide to seasoning cast iron has you covered.
Do not be alarmed if your first new seasoning layers look dull, spotty, or bronze-colored instead of glossy black. This is completely normal. Polymerized oil builds in layers, not in one perfect coat. It’s like applying several thin coats of varnish instead of one thick, sticky one.
After a few oven rounds, the best way to build a durable, kitchen-tested seasoning is to use it. Cook foods with natural fats for those first few uses. Bacon, sausage, or frying potatoes in oil are perfect. This cooking process continues to bond the seasoning to the iron. Properly cleaned and maintained cast iron can look patchy initially, just like my own daily skillet, which looked patchy for weeks before it evened out into a beautiful black mirror simply from regular use.
When to Dispose of a Cast Iron Pan: The Point of No Return
My heart always wants to save every piece. But part of being a good steward of cast iron is knowing when a pan is past saving. It’s a tough but necessary call. While surface rust is almost always a fixer-upper, structural damage is a different story.
Look for these clear signs that a pan has reached its end of life:
- A visible crack, especially one that runs from the cooking surface up the sidewall. This is a critical failure. It will expand with heat and can cause the pan to split apart.
- Severe pitting that has rusted completely through the metal, creating an actual hole. This is often called “rust through.”
- Extreme thinning of the iron, often from decades of aggressive scrubbing or erosion. The pan may feel dangerously light, warp on a flat burner, or have a brittle, papery feel.
If your pan has a structural flaw like a crack or a hole, it is no longer safe or practical to cook with. It cannot heat evenly, may break during use, and cannot hold a seasoning. This is the point of no return.
How to Dispose of Cast Iron Responsibly
So you have a pan that’s truly done. Please don’t just throw it in the kitchen trash. Cast iron is heavy and can damage equipment, and it’s a recyclable material. Here’s what to do instead. After cooking, you’ll want a quick post-use clean-up guide for your cast iron pan to keep it seasoned and long-lasting. We’ll walk through those steps in the next section.
First, check with your local scrapyard or metal recycling facility. Many will take cast iron cookware. It’s worth a quick phone call to confirm. If your goal is to salvage the pan, you may want to explore restoring and reseasoning neglected cast iron cookware.
If the pan isn’t a food safety hazard (like a cracked but otherwise intact piece), consider offering it for free to a local artist, metalworker, or even a school shop class. Cast iron can be welded, ground, and repurposed into all sorts of art or tools. I’ve seen old pans become garden ornaments or part of furniture.
The goal is to keep it out of the landfill and let the iron live on in another form, if it can’t live on in your kitchen.
Common Questions
Is soaking in vinegar safe for my pan?
Yes, but only with precise control. Use a 50/50 mix with water and limit soaks to 30 minutes. Exceeding this time allows the acid to etch the bare iron, creating a rough surface that is difficult to season properly.
How can I be sure it’s rust and not just old seasoning?
Use the touch test. Rust feels gritty and dusty, like sandpaper, and is orange-red. Old seasoning or carbon buildup will feel smooth and be black or dark in color, sitting flush with the metal.
When should I use a rust eraser versus other methods?
Reserve a rust eraser or sandpaper for heavy, pitted rust that vinegar cannot lift. For light surface film or moderate flaking, gentler methods like a salt scrub or vinegar soak are safer and prevent unnecessary wear on the iron.
Stewarding Your Cast Iron Through Rust and Repair
When rust appears, act quickly by soaking the pan in a 50/50 vinegar and water solution, then scrubbing it clean with steel wool. Always follow this by thoroughly drying the pan and applying a fresh, thin coat of oil to re-season it, which is your best defense against future corrosion. A well-seasoned pan benefits from regular use to maintain its protective patina. Keep using it regularly to deter rust and make future upkeep easier. To build on this foundation, our resources on proper storage and routine maintenance offer practical next steps.
Relevant Resources for Further Exploration
- r/castiron on Reddit: The rust never comes off completely
- How to Restore and Season a Rusty Cast Iron Skillet – Lodge Cast Iron
- What methods have worked best for removing rust from …
- How to remove rust from an old cast iron skillet that has been sitting unused for years – Quora
- Rust Removal from Precision Cast Iron Surfaces in 2020: techniques and when to stop | Sawmill Creek Woodworking Community
Joseph Gerald
A material science expert by profession, Joseph is also an avid cook. He combines his 10+ years expertise in material science and metallurgy with his passion for cast iron cookware to bring you best hands on advice. His expertise ranges from types of cast iron cookware to best seasoning tips as well as restoration of vintage cast iron utensils. Joe is here to help you solve all your cast iron cookware queries and questions.