
What Can You Really Cook in a Cast Iron Pan?
If you’ve ever looked at your beautifully seasoned skillet and wondered if a certain dish might strip it bare or ruin it forever, you’re not alone. The fear of damaging that hard-earned patia is what holds most people back from using their cast iron to its full potential.
This isn’t a list of recipes, but a guide to the logic of the pan itself. By the end, you’ll know exactly what to reach for and what to avoid, so you can cook with confidence. We’ll cover:
- How to use your pan’s heat for different jobs, from a gentle simmer to a screaming-hot sear.
- The best (and most surprising) foods to build your seasoning stronger with every use.
- A few dishes that require a little extra care to keep your pan in top shape.
- Simple techniques that make cast iron the most versatile tool in your kitchen.
How Your Cast Iron Handles Different Foods (And What That Means for Care)
Think of your pan’s seasoning not as a fragile coating, but as a living, changing layer that reacts to what you cook. Different foods interact with that layer in different ways. Some meals build it up, while others test its strength. A well-maintained pan is incredibly versatile, but your cleanup method should adapt based on what you just cooked.
High-heat searing with fats is like giving your seasoning a workout that makes it stronger. Long-simmered acidic dishes, on the other hand, can be a stress test for that same layer. Knowing how your cooking affects the pan is the key to keeping it in top shape for decades.
High-Heat Searing: Steaks, Chops, and Burgers
This is where cast iron truly shines, and your seasoning loves it. The high heat polymerizes the fats and oils you cook with, bonding them to the pan’s surface and reinforcing your seasoning layer.
The cleanup here is about handling the fond, the tasty browned bits stuck to the pan. Scraping them off immediately with metal can take your seasoning with it. Let the pan cool for a few minutes until it’s warm, not screaming hot.
Pour a little warm water into the warm pan to deglaze it; the fond will release easily, and you can wipe it out with a soft brush or sponge. This gentle method preserves your hard-earned seasoning while getting the pan clean.
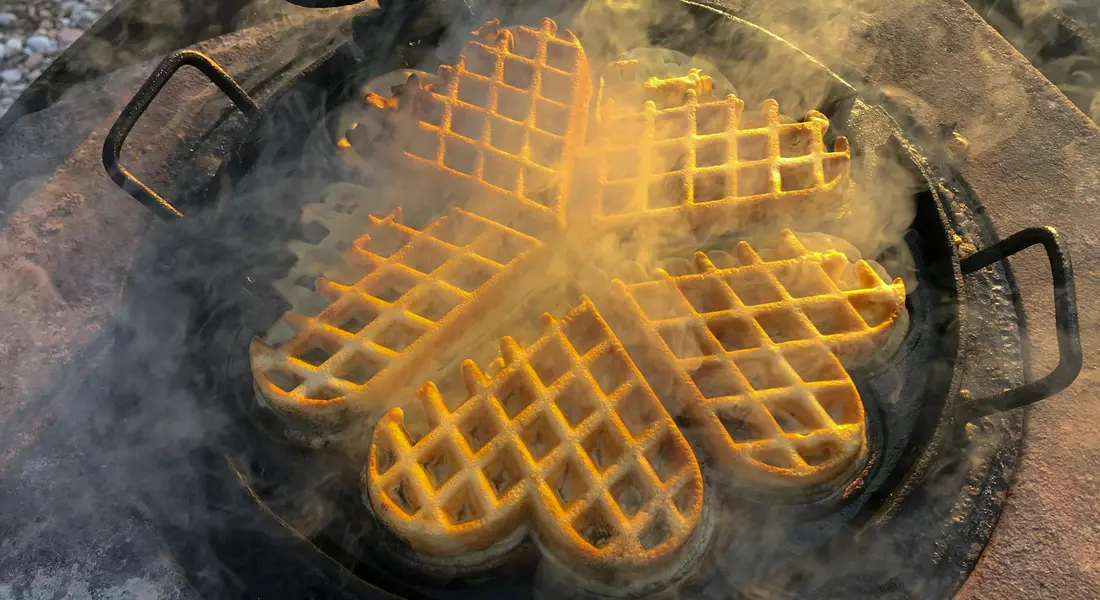
Baking in Cast Iron: Bread, Cakes, and Desserts
Yes, you can absolutely bake bread in a cast iron skillet or bake a cake in a cast iron pan. The even, radiant heat gives you fantastic crusts and consistent bakes.
The critical maintenance step happens before the food even goes in. You must grease the pan thoroughly with butter, oil, or a baking spray. This isn’t just for non-stick performance; it’s a protective step for your pan. That layer of fat bakes onto the surface, often helping to polymerize and maintain your seasoning.
The dry, consistent heat of an oven is actually a gentle environment for your pan’s seasoning, similar to the seasoning process itself. For crusty bread, a Dutch oven with a lid traps steam better than an open skillet, but both work beautifully with proper greasing.
Cooking Vegetables and Eggs
Sticking is the common complaint here, especially with eggs or starchy potatoes. This is almost never the pan’s fault. It’s usually about heat control or a seasoning layer that’s still maturing. Choosing the right pans and cookware helps prevent this. A proper preheat and a light coating of oil can prevent food from sticking.
For non-stick success, preheat your pan on low to medium heat for a full five minutes. Add your fat, let it get hot, then add your food. If your eggs are sticking, your pan likely wasn’t hot enough before you added them, or you need a bit more fat. For eggs, you can apply cast-iron non-stick techniques to keep them from sticking. These methods pair well with proper seasoning and patient heat.
Cleanup is simple. For eggs cooked with enough fat, a quick rinse and wipe often does it. For sticky roasted potatoes, let the pan soak with some warm water for ten minutes to loosen any residue before a gentle scrub.
Simmering Sauces, Chili, and Braises
Let’s tackle the big question: acidic foods. A thin tomato sauce or a quick deglaze with wine is fine for a well-seasoned pan. The problem starts with long, slow simmers. Acids can slowly break down the polymerized oil layer over time.
The practical rule is simple. Don’t store your chili or marinara in the pan overnight. Transfer leftovers to a container and wash the pan soon after dinner. If you ever get a metallic taste, it’s a signal your seasoning is thin in spots and needs to be built up with a few rounds of oven seasoning, not that your pan is ruined.
Essential Techniques That Protect Your Pan
How you cook is just as important as what you cook. These techniques are about preserving your pan’s seasoning and its physical integrity for the long haul.
How to Preheat Without Cracking Your Seasoning
Patience is your best tool here. Always start on low to medium-low heat. Give the pan at least five minutes to warm up evenly before turning up the heat. This prevents thermal shock and eliminates hot spots that cause food to stick in one place.
Heating cast iron is nothing like heating a non-stick pan; rushing this step is the root cause of most sticking and can stress the seasoning layer. Let the pan come to temperature gradually.
Moving From Stovetop to Oven Safely
This technique is a cast iron superpower, but safety first. Always double-check that your skillet’s handle is oven-safe (most classic cast iron is, but some modern pans have composite handles that are not).
Assume every part of the pan is hot. Use dry, high-quality oven mitts that cover your forearm. A damp kitchen towel will not protect you from a 400-degree handle. I keep a dedicated, dry oven mitt right by the stove just for handling my hot cast iron.
Cleaning After High-Heat Frying or Searing
When you’ve just seared a steak, you’ll be left with a crusty, baked-on fond. Your instinct might be to attack it with a scrubber. Don’t. This is how you accidentally strip seasoning.
Here is the better way:
- Let the pan cool from scorching hot to just warm.
- Place it back on a warm burner and add about half an inch of water.
- Use a wooden spatula to gently scrape the bottom as the water simmers and loosens the fond.
- Pour out the water and debris, then wash normally with a little soap.
Deglazing with water uses chemistry and heat to clean for you, saving your seasoning from abrasive force. It turns a tough job into an easy one.
What Should You Avoid Cooking in Cast Iron?
This isn’t about fear, it’s about preservation. You’ve put work into building your pan’s seasoning. A few smart choices keep that hard-earned patina in top shape for decades.
The list of true “don’ts” is very short. It comes down to one core principle: avoid prolonged, aggressive chemical contact with your seasoning.
Prolonged Cooking of Highly Acidic Foods
A little tomato sauce for a quick pasta is fine. Simmering a highly acidic wine reduction for three hours is a different story. Extended contact with strong acids can slowly break down the polymerized oil layer we call seasoning.
Think of your seasoning like many thin coats of tough paint. A quick wipe with a mild cleaner is fine, but letting a powerful solvent sit on it for hours will eventually soften it. Acids like vinegar, wine, tomatoes, and citrus juice act similarly on the molecular bonds in your seasoning over many hours of simmering.
If you do cook an acidic dish for a long time, just give your pan a gentle cleaning and a quick stovetop seasoning afterward to replenish the surface. My favorite vintage skillet has made countless chili and tomato-based dishes. A little immediate care is all it needs.
Storing Food in the Pan
This is the bigger, more common threat than acidic food. Never put your cooked meal away in the refrigerator with the pan. Salt and moisture from the food can create a corrosive environment against the iron, leading to rust and damaging the seasoning.
Always transfer leftovers to a proper storage container. Then, wash and dry your pan completely. This one simple habit prevents most seasoning headaches.
Your cast iron is a cooking tool, not a storage container. Cleaning and drying it right after use is the single best thing you can do for its longevity. Proper cleaning and maintenance are essential.
Troubleshooting Common Post-Cooking Issues
Even with the best techniques, things don’t always go perfectly. A little sticking, some odd colors, or a strange taste can make you question your pan’s health. Let’s fix that. These aren’t failures, they’re just your pan communicating.
Food Stuck to the Pan? Don’t Panic.
You preheated, you used oil, but a crispy potato skin or a bit of cheese is now welded to the surface. This happens to everyone, including me. Your seasoning isn’t ruined.
For a gentle fix, fill the pan with about an inch of water and bring it to a simmer on the stove for 5-10 minutes. The steam and hot water will loosen almost anything. Let it cool slightly, then pour out the water.
Use a chainmail scrubber or a stiff nylon brush under warm water to wipe away the loosened bits. Avoid metal scrapers or abrasive pads; they can dig into your seasoning. Dry the pan completely and give it a quick stovetop seasoning with a tiny bit of oil. It will be good as new.
Noticed a Metallic Taste or Dark Specks?
If your food has a faint metallic taste or you see little black flakes, it’s almost never the iron of the pan itself. Cast iron is very stable. What you’re experiencing is carbon buildup or a patch of weak seasoning that has flaked off.
This means your pan’s polymerized oil layer needs attention. A thorough cleaning is step one. Scrub the pan well to remove any loose, carbonized material. Rinse and dry it perfectly.
The solution is to apply a fresh, thin layer of seasoning to seal and strengthen the cooking surface. Bake on a single, proper coat of oil. This bonds to the existing seasoning and fills in any microscopic gaps, creating a smooth, inert barrier again.
Dealing with Sticky Spots or Discoloration After Cooking
Sticky patches or rainbow-like discoloration are classic signs of oil residue. This happens when you use a bit too much oil during cooking or don’t clean the pan well enough afterward. The excess oil didn’t polymerize; it just got gummy.
You need to remove this residue to get back to a smooth, hard finish. My go-to method is a coarse salt and oil scrub. Put a tablespoon of coarse kosher salt in the pan with a teaspoon of neutral oil.
Use a paper towel or a cloth to grind the salt into the pan’s surface. The salt acts as a gentle abrasive. It will scrub away the sticky oil without harming your good seasoning underneath. Wipe it all out, then wash with a tiny bit of soap and water, dry, and you’re done. This salt scrub is like a targeted exfoliation for your pan, removing the gunk but leaving the healthy skin intact.
Recommended Tools for Versatile Cast Iron Cooking

The right tools do not just make cooking easier. They protect your pan’s hard-earned seasoning, letting you confidently switch from searing steaks to baking cornbread. Think of them as an extension of good cast iron care.
Utensils That Are Kind to Your Seasoning
Many people are scared to use metal on their cast iron. I used to be one of them. A good, flat-edged metal spatula is actually your seasoning’s best friend. The thin, straight edge slides perfectly under a seared crust without gouging the surface. It efficiently lifts food, preventing you from scraping and scrubbing stuck-on bits later. It’s a common myth that metal damages cast iron.
A proper metal spatula maintains your pan by preventing food from bonding to the seasoning in the first place.
For tasks where you need to gently push or stir, like scrambling eggs in a newer pan, reach for wood or stiff silicone. These materials are forgiving and won’t risk marring a delicate, still-developing seasoning layer. I keep a wooden spoon and a metal spatula right by my stove for this reason.
Cleaning Tools for Every Mess
You need a small arsenal for cleanup. Matching the tool to the mess keeps cleaning quick and prevents damage.
- Stiff Nylon Brush: This is your daily driver. After cooking, while the pan is still warm, hot water and this brush remove 90% of food residue with minimal effort. It’s perfect for non-stick surfaces and gentle on the seasoning.
- Chainmail Scrubber: For the tough 10%. When you have stubborn, baked-on bits from a sear or a baked dish, the chainmail is a lifesaver. It breaks up carbonized food without removing your polymerized seasoning, which is much harder. It works like sand on ice, scouring off the gunk but leaving the base layer intact.
- Dedicated Pan Scraper (sometimes called a Lodge scraper): This is for the worst jobs, like cleaning up after a sticky glaze or burnt cheese. Its rigid, angled edge acts like a putty knife for your pan, mechanically lifting off major debris before you scrub. I use this first on a disaster, then follow with the chainmail.
Start with the gentlest tool that works, and only escalate to the chainmail or scraper when you need to.
Helpful Accessories
These items aren’t for cooking, but they are vital for safety and maintaining your routine.
A thick, high-quality oven mitt is non-negotiable. Cast iron handles get as hot as the cooking surface, and a flimsy pot holder is a recipe for a burn. I prefer a mitt that covers most of my forearm.
Always use a trivet or a dedicated handle cover when you set a hot pan down. Placing a scorching handle directly on your countertop or table can cause damage, and it warns others that the pan is hot.
Keep one small, lint-free towel (like an old cotton t-shirt) solely for applying a whisper-thin coat of oil after you dry your pan. This prevents cross-contamination from laundry scents or fibers and makes the maintenance step fast and consistent. Mine lives in a drawer with my bottle of seasoning oil.
When to Seek Professional Help or Step Back
Taking care of your cast iron is rewarding. Most of the time, you can handle it yourself. But some problems are bigger than soap and oil. Knowing when a project is beyond your tools or knowledge protects your safety and saves a cherished piece.
There is no shame in calling in a professional for a job that requires specialized tools or poses a real safety risk. My own rule is simple: if my standard methods fail twice, or if I have a serious doubt about safety, I stop and consider my options.
Signs Your Pan Might Need Professional Restoration
Not every flaw can be fixed at your kitchen sink. Here are three clear signs your skillet needs an expert’s touch.
- Deep, pitted rust that doesn’t come off with vinegar soaks and scrubbing. Surface rust is normal. Pitted rust is different. If a 50/50 vinegar and water soak for 30-60 minutes, followed by a rigorous scrub with steel wool, doesn’t expose bare metal, the damage is severe. Repeated home treatments can actually thin the metal around the pits, making the problem worse.
- A warped cooking surface (spins on a flat stove). Place your dry pan on a perfectly flat glass stovetop or a known-flat counter. Give it a gentle spin. If it rotates freely, the bottom is warped. This happens from extreme, rapid temperature changes. You cannot fix this at home. A professional with a heavy press might, but often, a warped pan becomes a dedicated campfire or oven piece.
- A cracked pan. This is the toughest news. A crack in cast iron is almost always a terminal diagnosis. The thermal stress that caused it means the structural integrity is gone. Cooking with it is unsafe, as it could fail completely under heat. It’s time to retire it with honor.
Concerns About Old or Vintage Iron
Finding a vintage skillet is exciting. It also requires extra caution. These pieces have a history you might not know.
My first question about any unmarked, old pan is about its past life. For any completely unmarked vintage skillet from an unknown source, testing cast iron for lead is a non-negotiable first step. Before you even think about seasoning, buy an EPA-recognized lead test kit from a hardware store. Cast iron was (and sadly, sometimes still is) used for melting lead for fishing weights or bullets. It’s a simple test that prevents catastrophic poisoning. That said, cast iron with an unknown history should be treated with extra caution. A quick lead test ensures the pan is safe for food use before you proceed to seasoning.
Some vintage finds are buried under decades of crud-a thick, uneven mix of carbon, rust, and old food. You can chip away for weeks with a putty knife and oven cleaner. Or, you can seek a professional with the right equipment.
- Sandblasting: A shop using a gentle media like walnut shells can strip a pan to bare metal in minutes without damaging the surface. This is ideal for pieces with heavy, uniform buildup.
- Electrolysis: This is the gold standard for restoration. It uses a low-voltage current in a water bath to literally pull rust and carbon off the iron. It’s incredibly effective on complex pieces like waffle irons or deeply pitted items. Setting up a safe electrolysis tank at home is a project in itself, so outsourcing makes sense for a one-time restoration.
Investing in professional restoration for a family heirloom or a rare find is often worth it. They can do in an afternoon what might take you a month of frustrating work, and they do it without risking the pan’s integrity.
Quick Answers
I cook a lot of chicken and vegetables. How do I maintain my pan with such frequent use?
Frequent, high-heat cooking with fats like chicken thighs or roasted vegetables is excellent for your seasoning-it builds the patina. The key is consistent, gentle cleaning. After each use, scrub with hot water and a stiff brush while the pan is still warm, dry it thoroughly on the stove, and apply a micro-thin coat of oil. This routine turns cooking into maintenance.
What’s the best way to clean my pan after making a sticky dessert or a cheesy camping dish?
For sticky sugars or melted cheese, let the pan cool to warm, then add an inch of water and simmer on the stove for 5-10 minutes to loosen the residue. Pour out the water and use a chainmail scrubber under running water to remove any remaining bits without damaging the seasoning. Dry completely and apply a light coat of oil before storing.
How do I prevent rust on my cast iron when using it for camping, where it might sit damp?
Rust prevention is about absolute dryness. Before packing, ensure your pan is bone-dry by heating it over your campfire or stove after washing. Once cool, give it a very light oil coating. Store it in a breathable bag, not sealed in plastic where moisture can get trapped, and check it when you unpack at home. Proper storage techniques are essential to prevent rust and damage.
Your Cast Iron Pan is a Tool for a Lifetime
The best thing you can cook in your cast iron pan is your next meal. Frequent, varied use is the secret to developing a durable, non-stick seasoning that gets better with every dish. Mastering essential techniques—seasoning, heating, searing, and timing—sets you up for perfect results with every cast iron dish. For more on maintaining that perfect finish, explore our guides on cleaning and storing your cookware.
Relevant Resources for Further Exploration
- Cast Iron – Smithey Ironware
- FINEX Cast Iron Cookware Co.
- The Absolute Dummy’s Guide to Cast Iron Skillets | The Kitchn
- Cast Iron Skillets | Lancaster Cast Iron
- r/castiron on Reddit: How to cook with cast iron
- Lodge Cast Iron | USA Made Cookware, Bakeware, Pans & More
A material science expert by profession, Joseph is also an avid cook. He combines his 10+ years expertise in material science and metallurgy with his passion for cast iron cookware to bring you best hands on advice. His expertise ranges from types of cast iron cookware to best seasoning tips as well as restoration of vintage cast iron utensils. Joe is here to help you solve all your cast iron cookware queries and questions.