
How Do You Cook Eggs Without Sticking in Cast Iron and Non-Stick Pans?
Scraping stuck eggs from your skillet can turn a simple breakfast into a frustrating chore. The secret isn’t a magic pan, but a series of small, intentional steps you control.
This article walks you through the practical methods for both cast iron and non-stick pans, focusing on technique over recipes. Here’s what we’ll cover:
- Why precise heat management is the most important factor for preventing sticking.
- How to choose and apply cooking fats for the best release on any surface.
- The simple steps for cleaning and drying that preserve your pan’s performance.
- How a well-maintained cast iron seasoning compares to a factory non-stick coating.
Key Points to Remember
Getting eggs to release cleanly is more about your technique than the pan itself. These principles apply everywhere, but they are non-negotiable for cast iron success.
-
Preheat Low and Slow. This is the number one rule. Put your cold pan on low to medium-low heat and give it a solid 3 to 5 minutes to warm up evenly. A drop of water should sizzle and dance, not violently explode. I test my own #8 skillet by holding my hand a few inches above the surface, I want to feel a consistent, gentle heat radiating up.
-
Use Enough of the Right Fat. For cast iron, you need a fat with a high smoke point. A thin, even coat of avocado oil, refined coconut oil, or even clarified butter (ghee) works perfectly. The fat should shimmer and easily coat the bottom of the pan before you add your eggs. That same fat layer also helps when cooking stickier foods, like eggs, lifting them cleanly from the pan. Don’t be shy here, a proper layer of fat is what creates the barrier between the delicate egg protein and the metal. A well-oiled surface means fewer stubborn residues and quicker cleanup.
-
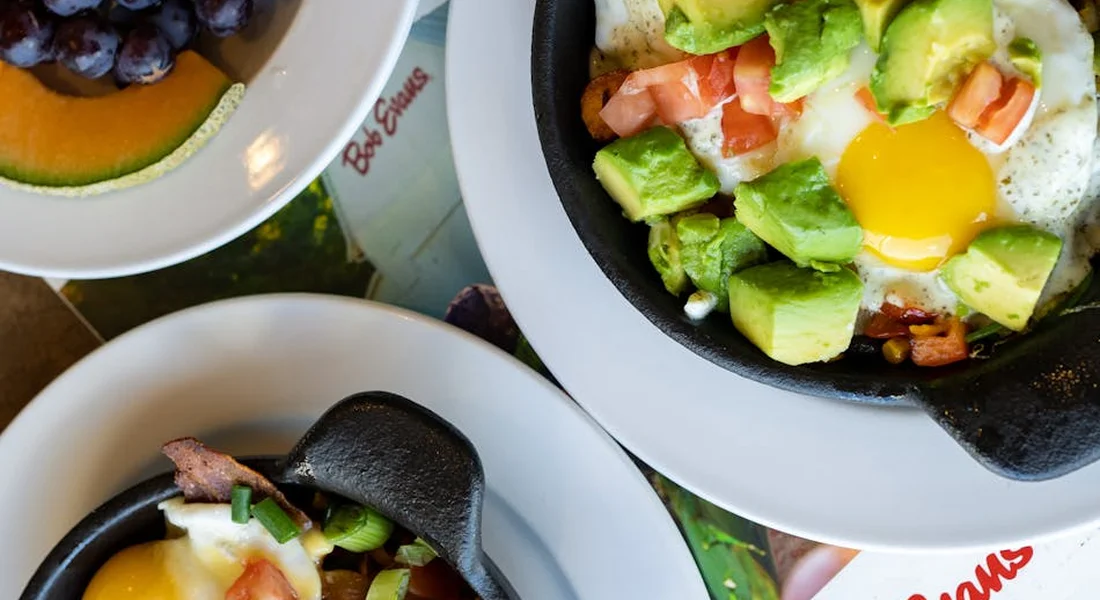
Let the Eggs Set Before Moving. Patience pays off. Pour in your beaten eggs or crack in your whole eggs and then just leave them alone. Wait for the edges to look fully cooked and the whites to become opaque. If you try to scramble or flip too early, you’ll tear the egg and it will fuse to the pan. A well-maintained, properly heated cast iron skillet can be just as non-stick for eggs as any specialty pan. Whether you’re frying, scrambling, or trying other egg techniques, a cast iron skillet handles them with steady heat. Keep it seasoned and hot to unlock more egg-cooking options.
-
Clean Gently Right After Cooking. This is part of the cooking process for cast iron. Once you plate your eggs, let the pan cool for a minute, then add some warm water and use a soft brush or cloth to wipe it out. Stuck on bits? A quick, gentle scrub with a chainmail scrubber under warm water will lift them without hurting your seasoning. Dry it immediately and thoroughly. Proper cleaning after use is crucial, especially for eggs which can be a bit tricky.
Cast Iron vs. Other Pans for Eggs: A Quick Snapshot
| Pan Type | Best For Eggs When… | Maintenance Consideration |
|---|---|---|
| Cast Iron | You preheat properly and have a good seasoning layer. It delivers a superb sear for fried egg edges and even heating for scrambles. | Requires regular seasoning and specific cleaning to maintain its non-stick surface. It’s a long-term relationship, not a one-time purchase. |
| Traditional Non-Stick | You want absolute ease with minimal fat and zero fuss. It’s forgiving if your heat is a bit off. | The synthetic coating degrades over time (a few years) and cannot be restored. High heat and metal utensils will ruin it quickly. |
| Carbon Steel | You like cast iron’s performance but want something lighter and with slightly faster heat response. | Maintenance is identical to cast iron (seasoning, gentle cleaning, thorough drying). It builds a similar polymerized seasoning layer. |
| Stainless Steel | You master temperature control and use ample fat. It’s excellent for high-heat omelets or when you want to make a pan sauce afterward. | No seasoning needed, but eggs can stick easily if technique is off. It often requires a bit more fat or a specific preheating method (like the water droplet test). |
Can You Really Cook Eggs in Cast Iron Without Sticking?
Yes, absolutely.
I cook eggs in my cast iron skillets several times a week. A perfectly released sunny-side-up egg or a soft scramble sliding onto a plate is a regular, achievable event in my kitchen. If your eggs are sticking, it’s not a flaw in the material. It’s a sign to check your tools and your method, including how to prevent food from sticking to cast iron cookware.
Success hinges entirely on two factors: the quality of your pan’s seasoning and the precision of your cooking technique. Think of it like driving a manual transmission car. You need a well-tuned clutch (your seasoning) and you need to know how to work the pedals (your technique). Both have to be right for a smooth ride.
The Foundation: Your Pan’s Seasoning
Seasoning is not a layer of grease. It’s a hard, polymerized coating of oil baked onto the iron. This is your built-in, natural non-stick surface. A good season feels smooth and looks dark, almost glossy. The chemistry behind it is fascinating.
If your pan feels rough, gritty, or looks patchy, it needs attention. Sticky spots or a dull, matte finish mean the seasoning is weak or there’s leftover, unpolymerized oil. You can’t expect eggs to glide over that.
A skillet with a strong, smooth season provides the primary release surface that stops food from bonding directly to the iron. Before you worry about your cooking method, run your fingers over the cooking surface. If it’s not slick, focus on building that base layer first.
The Execution: Your Cooking Technique
Even the best-seasoned pan will fail if your technique is off. This is where most people get tripped up. Cast iron heats differently than thin, aluminum non-stick pans. You must manage two things: heat and fat. Proper technique is crucial for achieving perfect results with cast iron.
First, heat. Never start with high heat. I preheat my pan on a low to medium-low setting for a good five minutes. You want an even, gentle warmth. A drop of water should skitter and evaporate slowly, not instantly vanish in a violent sizzle. Too much heat burns the seasoning and causes proteins in the egg to instantly seize and weld to the metal.
Second, fat. You need enough of the right kind. Once the pan is properly preheated, add your cooking fat-butter, oil, or bacon grease-and let it get hot, too. The fat should shimmer but not smoke. This hot fat creates a secondary barrier between the egg and the pan, helping it lift away cleanly. I keep a dedicated bottle of avocado oil (high smoke point) next to the stove just for this.
So, Why Did Your Eggs Stick?
When someone asks, “do eggs stick to cast iron pans?” the answer is: they will if something is wrong. Consider it useful feedback from your cookware.
Here are the most common reasons:
- The pan wasn’t preheated long enough or evenly.
- The heat was too high, shocking the egg.
- There wasn’t enough fat in the pan.
- The egg was added before the fat was properly hot.
- The pan’s seasoning is thin, sticky, or damaged.
- You tried to move the egg too soon before it had set a crust.
If your eggs stuck, don’t blame the pan. One of these conditions wasn’t met. Adjust your process, check your seasoning, and try again. With the right foundation and technique, a sticking egg becomes a thing of the past.
The Foundation: Is Your Cast Iron Skillet Ready for Eggs?
You need a solid base to build on before you try cooking something as delicate as eggs. Think of your pan’s seasoning like the surface of a well-used wooden cutting board. It should be smooth, intact, and cured from use, not fresh and sticky.
Start with a simple check. Heat your clean, dry pan over medium heat for about two minutes. Then, flick a few drops of water onto the cooking surface. Watch what happens.
- If the water sizzles and evaporates instantly, your pan is too dry or the seasoning is incomplete. Eggs will likely stick.
- If the water beads up and dances around the pan like little mercury marbles, you have a good, polymerized layer of seasoning. This is what you want.
Visually, a non-stick ready pan is dark, often black, with a semi-glossy sheen that feels smooth to the touch, not gritty or oily. This isn’t about being spotless. It’s about having a durable, cooked-on patina.
Many people write to me confused, saying their cast iron eggs are sticking right after they seasoned it. This is very common. A fresh layer of oil baked on in the oven is just the first step. It’s like a new coat of paint. It needs to be hardened and smoothed through the heat and fats of actual cooking. That oven layer alone is often still a bit porous and sticky. A true non-stick surface develops over several cooking sessions, where fats bond to that initial layer, filling in microscopic gaps and creating a slicker finish.
How to Fix a Pan Where Cast Iron Eggs Keep Sticking
If your eggs are sticking, don’t strip the pan and start over. That’s almost never necessary. Instead, follow this streamlined maintenance routine to build up its performance.
First, give the pan a gentle reset. Clean it with warm water and a mild scrub brush. Avoid soap if you can, but a tiny drop won’t ruin your work. Scrub off any egg residue or sticky spots. Dry it completely on the stovetop over low heat.
The fastest way to improve your pan is with a stovetop seasoning refresh, which applies direct, controlled heat exactly where you cook. Here’s how I do it on my own daily driver skillet.
- Place the clean, dry pan over medium-low heat for one minute.
- Add about half a teaspoon of a high-smoke-point oil (like grapeseed or avocado) to the pan.
- Use a folded paper towel and tongs to wipe the oil over the entire cooking surface, including the sides.
- Then, take a clean, dry paper towel and thoroughly wipe out all the visible oil. It should look almost dry.
- Keep the pan on the heat for another 5-10 minutes. You’ll see it start to smoke slightly and the finish will darken. Once it stops smoking, turn off the heat and let it cool.
Finally, give your pan a “break-in” cook. Cook something fatty and forgiving. Bacon is the classic choice, but pan-fried potatoes or onions in a good amount of oil work great too. This final step bakes that refreshed stovetop layer into a more durable, slick surface. After this meal, clean the pan gently, dry it, and give it a super light oil wipe. It will be much more ready for eggs.
Remember, a single round of oven seasoning is a great start, but it’s rarely the complete solution for non-stick eggs. The combination of gentle cleaning, targeted stovetop maintenance, and a fatty break-in cook is what builds the reliable patina you’re after.
The Preheating Principle: Your Secret Weapon
If your eggs are sticking, the problem is almost always heat management, not your pan’s seasoning. Proper preheating is the single most important step for a perfectly released egg, whether you’re using cast iron, carbon steel, or a non-stick pan.
Think of your skillet like an oven. You wouldn’t blast a cold oven to 450°F and immediately throw in a cake. You let it heat gradually so the temperature is even. Your pan needs the same courtesy.
How to Preheat Correctly: The Low-and-Slow Method
Rushing this step is the most common mistake I see. Here is the tactile method I use every morning.
- Place your dry pan on a cold burner.
- Set the burner to low or medium-low heat. On my stove, that’s a 3 out of 10.
- Let the pan sit for at least 5 full minutes. For thicker cast iron, give it 7 or 8.
You are waiting for the entire cooking surface-the center and all the way up the sides-to become uniformly hot. You can test this by carefully flicking a few drops of water onto the surface. They should dance and evaporate quickly, not just sit and sizzle.
Do Cold Eggs Stick to a Hot Pan?
This is a great question. The short answer is no, if your pan is properly preheated. A cold egg hitting a properly hot, oiled surface will start to cook and set immediately, forming a barrier that prevents it from bonding to the metal.
Sticking happens when the pan is too cold or unevenly heated. The egg proteins have time to slowly fuse with the microscopic pores in the metal before they coagulate. That’s what creates that frustrating, sticky mess. A uniformly hot pan stops that fusion in its tracks. That’s why many cooks preheat and oil the pan to prevent sticking. Using the right cookware and keeping it well-seasoned helps meals release cleanly.
Choosing and Using Your Cooking Fat
Think of your cooking fat as the temporary, non-stick coating for your meal. The right one makes all the difference.
You have options, and each behaves a little differently.
Butter, Oil, or Bacon Grease?
Butter tastes great. It browns beautifully. But its milk solids can burn at a lower temperature than you might think, which can lead to sticking and a messy pan. For lower-heat cooking, like sunny-side-up eggs, butter is fine if you watch it closely. For higher heat, clarify it first or choose a different fat.
Neutral oils like avocado, grapeseed, or refined coconut oil have high smoke points. This means they can handle more heat before breaking down and creating a sticky surface. They are my go-to for a reliable, slick layer.
Bacon grease is a classic for a reason. It’s flavorful and, if rendered cleanly, has a decently high smoke point. Just know that any leftover bits from the bacon itself can become points where your eggs might grab hold. I strain my bacon grease through a coffee filter before storing it for this exact purpose.
The Golden Rule: Use Enough Fat
“Enough” is not a tiny dot in the center of the pan. It’s also not a swimming pool.
Here is the visual cue that never fails me: after adding your fat and letting it warm for a moment, tilt the pan. The entire cooking surface should be coated with a thin, shimmering layer. It should move like liquid glass. If you see dry spots, add a little more fat and swirl again. This thin, even layer is what creates a barrier between your food and the pan’s surface.
What Happens When You Get It Wrong
Let’s compare the two common mistakes.
Using no fat, or far too little, is a direct ticket to a stuck-on mess. The proteins in the egg will bond chemically with the metal of the pan. You will spend the next ten minutes soaking and scrubbing. Your seasoning might even suffer.
Using too much fat has a different, subtler problem. Instead of frying crisply, the egg can almost poach in the excess oil, leaving you with a greasy, sometimes gummy texture. Too much fat won’t ruin your pan, but it will ruin your eggs and leave a residue that’s tedious to clean.
That shimmering, complete coat is your target. It’s the sweet spot for a perfect release. In my workshop skillet, I use about a teaspoon of avocado oil for two eggs, swirled to cover every inch.
The Step-by-Step Technique for Non-Stick Eggs
This isn’t a recipe. Think of it as a maintenance routine for your pan’s surface. Following these steps builds your skill and protects your seasoning.
1. Start with an Assessed and Preheated Pan
Before you even turn on the heat, look at your pan. The surface should be smooth, not gritty. Run your fingers over it. If you feel carbon buildup or old food, give it a quick scrub and dry it fully. A clean start is non-negotiable.
Now, preheat. For cast iron, put your dry pan over low to medium-low heat for a full five minutes. You want the entire cooking surface to be evenly, gently hot. I test mine by flicking a few drops of water onto the surface; they should skitter and dance, not sizzle violently. With a well-seasoned cast iron pan, this preheat step helps ensure even heat and a flawless finish. When you combine proper preheating with good seasoning, you set yourself up for perfect results. For a non-stick pan, a medium heat for two to three minutes is sufficient.
Proper preheating is what allows the fat to form an effective barrier and the eggs to cook evenly from the moment they hit the surface.
2. Add Your Fat and Let It Heat
Add your oil or butter. About a teaspoon is plenty for a couple of eggs. Swirl it to coat the pan’s bottom. Now, here’s the part everyone rushes: wait. Let the fat heat in the hot pan for a good 30 seconds.
You’ll see it thin out and move more freely. This brief wait ensures the fat itself is hot, which instantly begins the cooking process on the egg’s underside. A cold fat on a hot pan just doesn’t work the same way.
3. Add Your Eggs
Crack your eggs into the hot, fat-coated pan. Don’t worry about egg temperature. Room temperature or straight from the fridge, it works if your pan is properly heated. The immediate sizzle tells you the pan is ready.
This is where patience pays. Do not touch them. Do not swirl the pan. Let the magic happen.
4. Let Them Set Completely
Watch the edges of the egg whites. They will turn from clear to opaque white and start to look firm. Wait until this transformation is complete across the entire bottom of the egg. For a sunny-side-up egg, this means the white is fully set. For an over-easy egg, it’s ready to flip.
Attempting to move an egg before it has created its own cooked release layer is the number one reason for sticking and torn yolks.
5. Use the Right Tool to Release
For cast iron, I always use a thin, flexible metal spatula. Some folks call them “cast iron egg spoons” or fish turners. The thin front edge can slide perfectly under the set egg white. Gently work it under the edges to release any hold, then lift.
For a non-stick pan, a silicone tool is fine to protect the coating, but the principle is the same: a thin, flexible edge that can get underneath without force.
Why Letting Eggs Set Creates a Natural Release
Think of a raw egg white like glue. When it hits a hot surface, the proteins begin to cook and solidify. If you disturb it too early, those semi-cooked, sticky proteins bond directly to the microscopic pores in your cast iron or the surface of your non-stick pan.
Letting it set completely allows a thin, fully cooked layer to form between the egg and the pan. This cooked layer acts as its own non-stick barrier. The egg essentially releases from itself. When you slide your spatula under, you’re separating this cohesive, cooked disk from the pan’s surface, not prying up raw egg that’s fused to it.
In my own kitchen, the difference between a rushed egg and a patient one is clear. The patient one slides out cleanly, leaving a nearly spotless pan that’s easy to clean. The rushed one leaves behind a frustrating, stuck-on mess that tests your seasoning. Trust the process.
Troubleshooting Sticky Situations
You can have the best technique and still end up with a stuck-on mess. Let’s break down common issues and how to fix them, right now.
Why Did My Eggs Stick This Time?
Think of this as a diagnostic checklist. Run through these points the next time your eggs bond with the pan.
- Heat was too high. High heat causes proteins to seize and fuse to the metal instantly. Medium-low is your friend for eggs.
- Pan wasn’t preheated long enough. A properly hot pan makes the fat shimmer and creates an immediate barrier. If your oil or butter just sits there, the pan is too cold.
- Seasoning is thin or uneven. A single layer of seasoning is just a base coat. It needs reinforcement through regular cooking to become truly resilient.
- You moved the eggs too soon. Patience is a virtue. Let the egg set and release naturally. If you force it, you’ll tear the delicate protein.
- You used a damaged or warped metal spatula. A sharp, squared-off corner can scrape away your seasoning layer, exposing bare iron. I keep a dedicated, smooth-edged metal spatula just for my egg pans.
My Pan is Seasoned But Eggs Still Stick
This is the most common frustration. It usually means there’s a difference between a pan that is technically seasoned and one that is cooking-ready.
That initial layer of oil you baked on is polymerized. It’s bonded to the iron. But it’s often thin and glassy. What you need is a thicker, more practical patina built from cooking fats. Think of it like this: the oven seasoning is the primer. Cooking is where you apply the durable topcoat.
The solution is to build your pan’s confidence with some easy, low-risk cooking missions. Choose foods with plenty of fat that don’t have delicate, sticky proteins.
Before you attempt eggs again, run your pan through this short series:
- Sauté sliced onions or bell peppers in a generous tablespoon of oil.
- Pan-fry potato slices or home fries.
- Cook some bacon (though wipe the pan gently after, as sugar can be disruptive).
- Shallow-fry a piece of chicken or make a grilled cheese sandwich.
Each session will deposit more carbon and polymerized fat onto that initial layer. You’ll feel the surface become slicker. My daily driver skillet went through this process, and now it slides eggs like a dream. It just needed to earn its stripes first.
Cleaning Up After Eggs Without Harming Your Seasoning
This step is just as important as the cooking. A scrambled egg or a fried egg leaves behind delicate proteins and fats that can bake onto the surface if you let the pan sit. Cleaning it right away is the best way to protect your hard-earned seasoning.
Think of this process as gentle maintenance, not a harsh scrub-down.
The Best Post-Egg Cleaning Method
Your goal is to remove the food, not the polymerized oil layer you’ve built up. Here is my reliable routine, which I use on my own daily driver skillet.
- Let the pan cool slightly until it’s warm, not scorching hot.
- Rinse it under very hot tap water. The heat helps dissolve the fats.
- Use a mild scrubber, like a nylon brush or a dedicated chainmail scrubber for cast iron, to gently dislodge any bits. For most egg dishes, this is all you need.
- If a bit of egg is stubborn, sprinkle some coarse salt in the pan and use it as a gentle abrasive with a paper towel or cloth.
Soap is a tool, not an enemy, but you often don’t need it for a simple egg cleanup. Modern dish soaps are mild and won’t strip a proper seasoning. I use a drop if there’s noticeable, cooked-on residue. For just a light film of oil, hot water and a scrub is perfect.
The Non-Negotiable Final Steps: Dry & Protect
This is where people get into trouble. Water is the real threat to cast iron, not soap.
- Dry it immediately and thoroughly. Wipe it out with a dry towel right after rinsing.
- Then, place the pan on a stovetop burner over low heat for 2-3 minutes. This drives off every last molecule of water you can’t see.
- Once the pan is completely dry and slightly warm, apply the tiniest amount of oil-a half-teaspoon is plenty-with a paper towel. Wipe the entire cooking surface, then use a clean towel to buff off all the excess until it looks dry.
This quick oil rub after drying is what keeps your pan from rusting and preps the surface for your next cook. It’s the secret to keeping a cast iron pan in egg-ready condition, day after day.
Building Your Egg Skillet’s Patina
When you follow this clean-dry-oil routine after every use, something wonderful happens. That skillet becomes specialized. The repeated, gentle cooking of eggs and fats, followed by careful maintenance, builds a dedicated, glass-slick patina that is incredibly non-stick.
My own favorite egg skillet has this kind of patina. It wasn’t built in a day, but through consistent, correct care. The surface is dark, smooth, and absolutely reliable. A well-cared-for cast iron egg skillet develops a personality and performance all its own, making breakfast simpler every time you use it.
Common Questions
My eggs stuck right after I seasoned the pan. Did I ruin the seasoning?
No, your seasoning is fine. A fresh oven seasoning is a base layer; it’s often still slightly porous and needs to be fortified. This is normal. Cook fatty, forgiving foods like bacon or potatoes a few times to smooth and harden that new layer before attempting eggs again.
My cast iron eggs keep sticking, even though I follow the steps. What’s my pan trying to tell me?
This is almost always a heat issue. Your pan is telling you it’s not getting evenly or correctly preheated. The “low and slow” method is non-negotiable. Try the hand test: hold your palm a few inches above the surface after 5 minutes; you should feel a consistent, gentle radiant heat, not aggressive, spotty warmth.
Should I have a skillet dedicated just to eggs?
It’s not necessary, but it is a smart practice. A skillet used exclusively for eggs and gentle cooking develops a specialized, glass-slick patina faster. Consistent use of the right fats and proper post-meal maintenance-gentle clean, thorough dry, light oil-builds a uniquely non-stick surface tailored to that single task.
Cast Iron Stewardship for Perfect Eggs
For flawless eggs, your cast iron skillet needs a good seasoning and a patient preheat. Apply a thin layer of oil once the pan is warm, and let it heat until it shimmers before your eggs hit the surface. Your journey with cast iron continues with learning about routine seasoning upkeep and gentle cleaning methods (How to Clean, Season, and Maintain Your Cast Iron Skillet).
Research and Related Sources
- Can You Cook Eggs in Cast Iron? Yes! Here’s How, According to Chefs and an Egg Expert
- r/castiron on Reddit: Why do my eggs keep sticking to my lodge pan?
- The Best Way To Prevent Eggs From Sticking To A Cast Iron Skillet – Tasting Table
A material science expert by profession, Joseph is also an avid cook. He combines his 10+ years expertise in material science and metallurgy with his passion for cast iron cookware to bring you best hands on advice. His expertise ranges from types of cast iron cookware to best seasoning tips as well as restoration of vintage cast iron utensils. Joe is here to help you solve all your cast iron cookware queries and questions.