
Cast Iron vs. Carbon Steel: Which Pan is Easier to Clean?
If you love your cast iron but worry carbon steel might be simpler to care for, you’re not alone. Having used both for years, I can tell you that ease of maintenance depends more on your routine than the material.
To help you choose, this article will give you a straightforward look at the realities of upkeep for each pan.
- How the initial seasoning and its long-term care compare between the two.
- The fastest, most effective cleaning methods for everyday use.
- What to do when you encounter rust or a sticky surface.
- My personal verdict on which one requires less daily effort.
Why We Compare These Two Workhorses
You see them side-by-side on the store shelf. You read about them in the same breath online. A carbon steel skillet and a cast iron skillet look like cousins, and in many ways, they are. Both require that initial layer of polymerized oil we call seasoning. Both are celebrated for being nearly indestructible heirlooms. This similarity is precisely what creates a fog of confusion for home cooks trying to choose.
This article has one job: to wipe away that fog and compare the actual, hands-on effort of keeping each pan in fighting shape. We are not talking about which one is “better.” We are talking about which one might fit more smoothly into the rhythm of *your* kitchen and cleaning routine.
The truth is, which pan is easier to clean and maintain depends less on the metal and more on your personal habits.
The Foundation: How Their Cleaning & Care Are Actually the Same
Before we highlight the differences, let’s cement what makes them siblings. The core philosophy for both pans is identical. You are not cleaning bare metal. You are caring for a cultivated, non-stick surface that you built and maintain.
Think of the seasoning on both pans like layers of tough, flexible paint. Your job is to protect that finish. The universal rules apply to both:
- Avoid letting them soak in the sink for hours. Water is the enemy of the bare metal underneath.
- Using a little modern dish soap is perfectly fine. The old myth about soap stripping seasoning is just that, a myth.
- Dry them completely, every single time. A towel dry is not enough. A quick pass over a warm stove burner guarantees it.
- After drying, a microscopic wipe with a drop of oil keeps the surface nourished. This is the basic maintenance coat.
If you can care for a cast iron skillet, you already possess 90% of the knowledge needed for carbon steel, and vice versa.
What Helped Me: The Single Most Important Habit
I learned this lesson the hard way with a beloved carbon steel wok. I made a sticky stir-fry, got distracted by a phone call, and left the wok on the stove for an hour. The cleanup was a thirty-minute battle of scraping and re-seasoning. That never happens anymore.
My single rule, for both my cast iron griddle and my carbon steel pans, is immediate attention. As soon as the food hits the plate, I deal with the pan. I add some hot water while the pan is still warm (not scalding hot), and any stuck bits loosen with a gentle brush in seconds. This habit prevents food from cementing itself onto the seasoning. It turns a potential chore into a thirty-second task.
Cleaning your pan right after cooking prevents 90% of maintenance headaches, making the choice between cast iron and carbon steel much less dramatic.
Cast Iron Maintenance: A Steady, Forgiving Rhythm
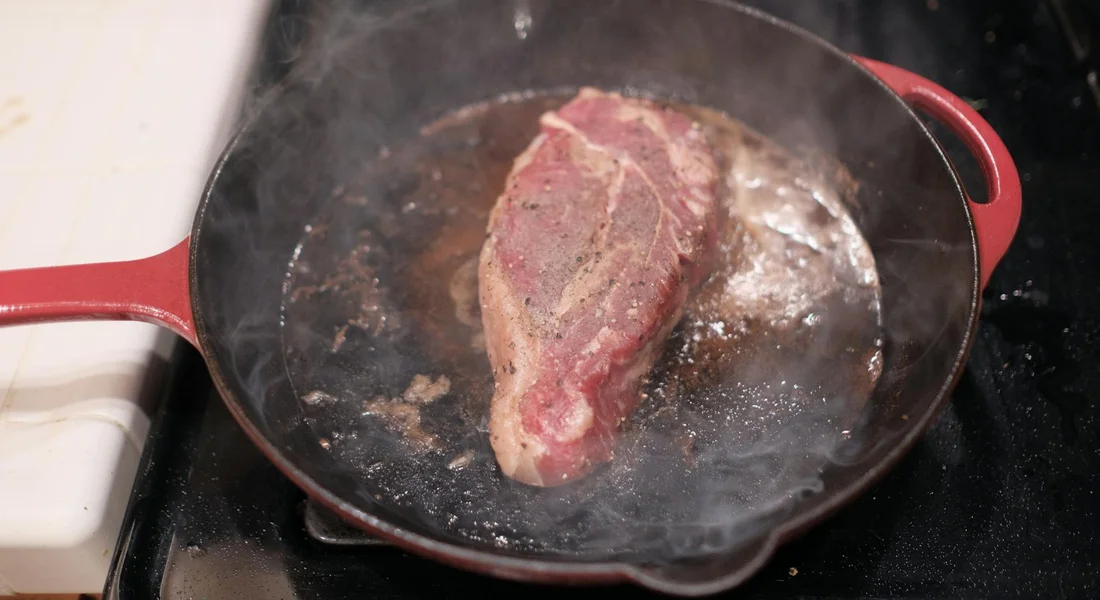
Think of your cast iron skillet like a durable, patient cousin. It’s built to last for generations, and its character deepens with every use. That thick, heavy iron heats slowly and evenly, which makes it forgiving. It won’t panic if you leave a bit of food in it overnight. The surface texture, especially on vintage or unpolished modern pieces, gives the seasoning layers something solid to grab onto. This creates a foundation that gets stronger over time.
Cleaning cast iron has a certain feel. It’s weighty in your hands. You scrub a textured surface that holds onto its polymerized oil coating. This texture is what makes cast iron so resilient; it can take a good scrubbing without losing its non-stick properties. Proper care and maintenance ensure that this surface remains reliable over time. My oldest pan, a bumpy 10-inch skillet, has seen hundreds of washes and its seasoning is still rock solid.
Your Daily Cast Iron Cleaning Checklist
Follow this simple routine after cooking to keep your pan in top shape. It takes just a few minutes.
- Let the pan cool until it’s warm, but not dangerously hot to the touch.
- Rinse it under hot water. Use a stiff brush or a chainmail scrubber for stuck-on bits. A drop of modern dish soap is perfectly fine and will not hurt your seasoning.
- Dry it immediately and thoroughly with a towel.
- Place the pan on a stovetop burner over low-medium heat for 2-3 minutes to evaporate any last hidden moisture.
- After heating, apply a microscopic coat of oil (like canola or grapeseed) with a paper towel, then buff it all off as if you made a mistake. You should not see any wet oil.
If you do this consistently, you may never need to fully re-season your pan. A good daily habit prevents 95% of major maintenance problems.
Troubleshooting Common Cast Iron Issues
Even with good care, issues can pop up. Here’s how to handle them.
For surface rust, make a 50/50 solution of white vinegar and water. Soak the rusty area for no more than an hour, then scrub with a brush or mild abrasive pad. Rinse, dry completely on the stove, and apply a fresh layer of seasoning. For a complete guide with proven techniques on removing rust from cast iron cookware, see our full article. It walks you through the full process and prevention tips.
Save steel wool or a pumice stone for stripping an entire pan back to bare metal. Do not use harsh abrasives for daily cleaning, as they can unnecessarily scratch your well-earned seasoning.
Do you need to oil it after every single use? Not strictly always, but doing so is the best practice. That quick heat-and-oil step is the best defense against rust and keeps the surface slick for next time.
For specific pieces: a Dutch oven requires the same care, but pay extra attention to drying the lid and the exterior. A cast iron wok needs a very robust seasoning layer due to high-heat cooking; the maintenance steps are identical, just performed more frequently. For a consolidated reference, see our complete guide on seasoning cast iron pans, including Dutch ovens. It ties these care steps together and covers the nuances of different pieces.
Carbon Steel Maintenance: A Quicker, More Reactive Dance
Carbon steel is like cast iron’s lighter, more athletic sibling. It shares the same need for seasoning but reacts much faster to heat, moisture, and mistakes. It heats up quickly and can develop a fantastic non-stick coating faster than cast iron. That speed comes with a need for a bit more attention. It’s less forgiving of lapses in your drying routine.
The cleaning feel is different. A carbon steel pan is noticeably lighter and smoother. Its silky surface is less textured, so the seasoning bonds differently and can be more susceptible to water spots and flash rust if left wet. You must be swift and thorough with your drying towel.
Your Daily Carbon Steel Cleaning Checklist
The steps are similar to cast iron, but with heightened urgency around moisture.
- Let the pan cool slightly after cooking.
- Clean it while it’s still warm with hot water and a brush or sponge. Use a dab of soap if needed.
- Dry it instantly and obsessively with a dry towel. Every single drop of water must be gone.
- Place it on the burner over medium heat for 1-2 minutes to ensure it’s bone-dry. You’ll often see it fully dry faster than cast iron due to its thinner, lighter build.
- Apply the thinnest possible layer of oil with a paper towel, then buff it to a dry shine.
Many new carbon steel pans come with a factory coating that must be washed off. You then “blue” the pan by heating it until the metal changes color. This blueing process creates a protective magnetite layer that gives your first seasoning a better foundation to stick to. After blueing, you season it just like cast iron.
Troubleshooting Common Carbon Steel Issues
Carbon steel has its own unique quirks to manage.
You might see sticky, silver-looking patches. This means your seasoning layer was too thick and didn’t fully polymerize. You can fix this by scrubbing the sticky spot with coarse salt and a paper towel to remove the gunk, then re-seasoning the area on the stovetop.
Expect to do spot-seasoning or full re-seasoning more often in the first few months of a carbon steel pan’s life. The initial seasoning layers are building on that smooth surface, so they need more reinforcement before becoming bulletproof.
Flash rust is its most common party trick. If you see a fine orange haze appear minutes after washing, you didn’t dry it well enough. Don’t panic. Just give it a light scrub with a brush and water, dry it perfectly on the heat, and apply oil immediately. It’s a setback, not a disaster.
Side-by-Side: Where the Maintenance Effort Really Differs
Forget the specs. Let’s talk about what it feels like to care for these pans at your sink.
Weight and Handling During Cleaning
This is the most obvious difference. Cast iron is heavier than carbon steel, so a 12-inch cast iron skillet is a serious arm workout. A carbon steel pan of the same size feels like a feather in comparison.
That weight affects your cleaning routine. A heavy cast iron pan is awkward to hold under running water and scrub. Many people prefer to clean it on the stovetop or in the sink with minimal lifting. The lighter carbon steel pan is easy to pick up, swirl, and scrub with one hand.
The lighter weight of carbon steel makes the physical act of scrubbing and rinsing much easier on a daily basis.
Drying Speed and Rust Prevention
Both metals rust if left wet, but they dry at different speeds. Carbon steel is thinner. It heats up incredibly fast on a burner, flashing off moisture in under a minute.
Cast iron is a heat battery. It holds a lot of thermal mass, but that also means it takes longer to warm up for drying. You need to leave it on a medium flame for two to three minutes to be sure all the water, especially around the rim and handle, has evaporated.
Carbon steel wins on pure drying speed, but a patient two-minute stove-top dry works perfectly for cast iron every time.
Building a Resilient Seasoning Layer
Seasoning is polymerized oil, a hard, slick coating. Think of it like building up layers of a tough plastic paint, but it is essential to understand the chemistry behind it.
Carbon steel pans often have a smoother, machined surface. Oil bonds to this smooth surface easily, and you can build a visually impressive, dark layer relatively quickly. I’ve had carbon steel pans look jet-black after just a few uses.
Cast iron has a naturally porous, textured surface from the casting process. That texture gives the seasoning something to mechanically grip onto—much like the inherent qualities of cast iron make it ideal for building layers of seasoning. The initial layers might look splotchy, but they form a deeply anchored foundation. A well-loved cast iron skillet’s seasoning is like a century-old patina on a wooden beam—it’s in there for the long haul.
Carbon steel seasons faster for a beautiful look, while cast iron builds a more deeply rooted, forgiving foundation over time. This sets the stage for comparing the cast iron vs carbon steel key differences and best uses. See how each choice aligns with cooking style and care.
Reactivity to Acidic Foods
This directly impacts how you clean. Both pans can react with acidic foods like tomatoes, wine, or vinegar, which can strip seasoning.
New or thin seasoning on either pan is vulnerable. The difference is in the recovery. Because carbon steel’s seasoning can be applied so quickly and evenly, a quick stovetop seasoning after cooking something acidic is often enough to repair it.
With cast iron, a reaction with acid might require a more deliberate touch-up. You might need to apply a thin oil layer and bake it to fully restore the polymerized layer. That said, a thick, established cast iron seasoning can handle a brief tomato sauce simmer with little issue.
Cooking acidic foods demands more attention with both pans, but carbon steel’s ease of re-seasoning can make the fix feel quicker.
Common Mistakes and How to Avoid Them
We’ve all been here. Avoiding these pitfalls saves you time and frustration.
- Letting cast iron cool with food stuck on. Those stuck bits cement themselves as the pan cools. Fix: Add a little water to the warm (not screaming hot) pan and use a flat-edged metal spatula to deglaze. Cleaning is instant.
- Putting a wet carbon steel pan away. Its thinness means it cools fast, trapping moisture. You’ll find flash rust by morning. Fix: Make the stove-top dry your non-negotiable last step. One minute is all it takes.
- Using coarse salt and potato scrub on carbon steel. This common cast iron trick can be too abrasive for carbon steel’s smoother surface and potentially scratch a young seasoning. Fix: Use a gentle chainmail scrubber or a nylon brush with hot water for carbon steel.
- Soaking either pan. Just don’t. It’s the fastest route to rust. Fix: If you have stubborn food, boil a little water in the pan for a few minutes to loosen it, then scrub.
- Using high heat to dry or season an empty pan. Extreme, dry heat can damage the seasoning bond on both materials, causing it to crack or flake. Fix: Use medium heat for drying and follow recommended oven temperatures for seasoning.
So, Which is Actually Easier to Maintain?
It’s not a simple answer. “Easier” depends on what you value in your daily routine.
Choose cast iron if you want forgiveness and a “set-it-and-forget-it” mentality. Its heft is a trade-off for incredible durability. Once you build a good seasoning base, it requires less frequent touch-ups. You can be a little less precise with your cleaning, and its performance remains stellar. It’s the low-frequency, high-trust workhorse.
Choose carbon steel if you prioritize quick, light handling and fast results. Its daily ease-lightweight cleaning, rapid drying, quick seasoning-is unmatched. It responds instantly to your care. This makes it perfect for someone who cooks daily and doesn’t mind a quick stove-top oil rub to keep it in top shape.
The real truth? With the proper technique, both become remarkably low-maintenance. The initial learning curve is the biggest hurdle. Once you know how to dry them properly and understand how to build seasoning, maintaining either pan becomes a simple, almost automatic part of your cooking ritual. The joy comes from using a tool that improves with your care.
Building Your Maintenance Kit for Either Material
Whether you pick cast iron or carbon steel, your daily care routine will be nearly identical. This means you can build one simple, effective kit that works for both. Maintenance differences exist between the two. In the next steps, we’ll compare which offers easier upkeep. Forget complicated gadgets. You likely own most of these items already.
The Essential Tools for Cleaning
Your goal is to remove food without damaging the seasoning. These tools do exactly that.
- A Stiff Nylon or Natural Bristle Brush: This is your first line of defense for stuck-on bits. The stiff bristles provide good scrubbing power without being harsh like steel wool, which can scratch your hard-earned patina.
- A Chainmail Scrubber: Don’t let the name intimidate you. Think of it as a super-powered wad of aluminum foil. It’s fantastic for scraping off truly stubborn, baked-on food without harming the underlying polymerized oil layer. I keep one hanging by my sink for my daily-driver skillet.
- Coarse Salt (for occasional deep cleans): Kosher or coarse sea salt acts as a gentle abrasive. For a sticky mess, sprinkle some in the warm pan with a drop of oil and scrub with a paper towel. It’s a cheap, effective reset button.
The Essential Tools for Seasoning & Protection
After cleaning, a tiny bit of care prevents rust and builds your pan’s non-stick surface.
- Lint-Free Cloths: Old t-shirt rags, flour sack towels, or paper towels (if they don’t leave lint) are perfect. You need them to apply a whisper-thin layer of oil. Any visible cloth lint will just burn onto the pan in the next step.
- A High-Smoke-Point Oil: Grapeseed, avocado, and refined coconut oil are my top choices. They polymerize well at high heat, creating a durable layer. The bottle in your pantry is fine; you don’t need a special “cast iron” branded oil.
The real “kit” is just a mindset of gentle cleaning and a protective oil wipe, not a drawer full of specialized products.
The Truth About “Maintenance Kits” vs. What You Actually Need
You’ll see fancy kits for sale with special brushes, branded oils, and instructions. They’re not necessary. Your maintenance kit is already in your kitchen. A cheap nylon brush from the hardware store works just as well as a $25 one. The chainmail scrubber is the only item you might need to buy specifically, and it’s a one-time purchase that lasts for years.
I’ve restored dozens of pans in my workshop, and I use the same simple rag and bottle of grapeseed oil for all of them. The goal is to build a habit, not a product collection.
Smart Storage to Make Maintenance Easier
Most rust happens in storage, not in use. A few simple habits cut your cleaning and re-seasoning work in half.
- Always Dry Thoroughly on the Stove: After washing and towel-drying, place the pan on a low burner for 2-3 minutes until all traces of moisture vanish. This guarantees it’s bone-dry.
- Apply a Micro-Thin Oil Coat for Storage: While the pan is still warm from drying, use your cloth to apply the tiniest amount of oil. Then, take a clean section of the cloth and wipe it out again, as if you made a mistake. This leaves a protective molecular layer, not a greasy film.
- Store in a Dry Place with Airflow: Don’t stack pans while they are still damp or trap them in a closed, humid cabinet. If you must stack them, place a paper towel or a cloth between them. A pot rack or open shelf is ideal.
Storing your pan correctly is the single best way to prevent the maintenance headaches of rust and sticky, gummy oil buildup.
Common Questions
Do I really need a special “maintenance kit” for my cast iron?
No. Your essential kit is a stiff brush, a chainmail scrubber for stubborn bits, a lint-free cloth, and a high-smoke-point oil. Fancy kits are unnecessary; effective care relies on technique, not specialized products.
How do I care for a rough-surface Lodge skillet versus a smooth vintage one?
The process is identical. The rough texture of a modern Lodge holds seasoning well but may require more initial layers to feel slick. Clean and dry both the same way; the seasoning will build and smooth out with consistent use.
My cast iron wok needs constant attention. Is this normal?
Yes. Woks endure extreme heat, which can stress seasoning. Maintain it with the same routine-clean, dry thoroughly, apply a thin oil coat-but be prepared to do this oiling step more frequently to bolster the seasoning against high-heat cooking.
Your Cast Iron, Simplified
The easiest way to clean and maintain cast iron is to trust its seasoned surface and avoid overcomplicating the process. I keep my own skillets in top shape with a quick scrub, a thorough dry on the burner, and a whisper-thin wipe of oil after every use. You can find more on building that initial seasoning layer or reviving a rusty find in our other guides.
Related Guides and Information
- Cast Iron Vs Steel | Differences, Properties, Advantages, & Disadvantages
- r/Cooking on Reddit: Cast iron vs carbon steel vs stainless steel
- Cast Iron vs. Steel: A Complete Comparison Guide – Tuling
- Difference Between Steel, Cast Iron and Wrought Iron
- r/Blacksmith on Reddit: Is cast iron harder than steel?
- What are the differences between iron and steel? | Essentra Components US
A material science expert by profession, Joseph is also an avid cook. He combines his 10+ years expertise in material science and metallurgy with his passion for cast iron cookware to bring you best hands on advice. His expertise ranges from types of cast iron cookware to best seasoning tips as well as restoration of vintage cast iron utensils. Joe is here to help you solve all your cast iron cookware queries and questions.