
How Do You Use Cast Iron at a Campsite Without Ruining the Seasoning?
You’ve packed your favorite skillet, ready for campfire cooking, but a little voice is asking: will the flames, ash, and improvised cleaning wreck the hard-earned seasoning you’ve built at home? You can absolutely use your cast iron over an open fire, and it won’t ruin your pan if you follow a few key principles.
This guide covers the practical steps to keep your cookware in top shape, from the fire pit back to your kitchen rack. You’ll learn:
- The right way to manage heat over unpredictable campfire coals to prevent thermal shock and damage.
- A simple, water-free method for cleaning your pan at the campsite that protects your seasoning.
- How to do a quick post-trip maintenance season to keep your iron ready for the next adventure.
Is Cast Iron Really a Good Idea for Camping?
Yes, absolutely. My favorite camping skillet is a 10-inch vintage piece that has cooked over more fires than I can count. Cast iron thrives in the rugged environment of a campsite because of its core strengths.
It handles the intense, direct heat of coals and open flames without warping. Once hot, it stays hot, which is perfect for cooking when the air temperature drops. You can sear steaks, fry breakfast, and even bake bread in a Dutch oven nestled in the embers.
That durability comes with a few real challenges you need to plan for.
- Soot and Ash: Your pan will get blackened on the bottom and sides. This is just cosmetic, but it can transfer to other gear.
- Variable Heat: A campfire isn’t a calibrated stove burner. You’ll need to manage heat by moving the pan to different spots in the fire pit.
- Cleaning Logistics: You won’t have a sink with running hot water. Your cleaning method needs to be simple, effective, and portable.
- Weight and Transport: It’s heavy. A 12-inch skillet can feel like a luxury item on a long hike, but it’s often worth it for car camping.
Many people worry about camping cast iron care, thinking it’s too complicated, but a straightforward three-step routine after cooking makes it very manageable, especially when you know how to season and maintain cast iron for camping and outdoor adventures. The trade-off is simple: you accept a little extra weight and a specific cleaning method for unmatched cooking performance and durability in the wild.
What to Pack in Your Camping Cast Iron Kit
Packing the right tools turns a potential hassle into a smooth experience. Think of this as a specialized kit, separate from your home kitchen drawer.
For handling and cooking, you need three things:
- Heat-Resistant Gloves or Mitts: Leather welding gloves are my top choice. They offer superior protection from flames and hot handles.
- A Sturdy Lid: This is for a Dutch oven, or to use as a griddle or plate for a skillet. It controls heat and keeps ashes out of your food.
- A Short-Handled Grill Brush or Stiff Brush: A brush with metal bristles is best for scraping off food bits while the pan is still warm over the fire.
Your cleaning supplies are minimal but critical:
- Coarse Kosher Salt: This is your abrasive scrubber. It won’t melt and is easy to find.
- A Small Bottle of High-Heat Oil: Avocado, grapeseed, or plain vegetable oil in a travel-sized bottle.
- A Dedicated Rag or Paper Towels: Pack a few old towels in a zip-top bag. They’re for wiping, oiling, and handling the warm pan.
Quick Snapshot: Your Camp Kitchen vs. Home Kitchen
The goal isn’t to say one setup is better, but to show the smart adaptations for different environments.
| Task | Camp Kitchen Method | Home Kitchen Method |
| Heat Source | Campfire, Coals, Portable Grill | Gas/Electric Stove, Oven |
| Cleaning Agent | Coarse Salt, Hot Water | Mild Soap, Chainmail Scrubber |
| Drying Method | Fire Heat | Towel, Stovetop Flame |
| Storage Post-Clean | Light Oil Coat, Packed Away | Light Oil Coat, Stored in Cabinet |
Transporting Your Skillet Without Damage
Being a good camp cook also means being a good gear strategist. You need to protect your pan and everything else in your pack.
The simplest method is to wrap the cooled, dry skillet in an old towel or a dedicated cloth bag. This cushions it, contains any soot, and prevents it from scratching other cookware or gear. For a Dutch oven, place a folded towel inside before putting the lid on to prevent clanging and chipping during transport.
Whether you’re carrying it in a backpack or a car trunk, make sure it’s secured and won’t slide around. That constant rattling can chip the seasoning or, in rare cases, the iron itself. A snug fit is a safe fit.
How to Cook Safely Over a Campfire or Coals
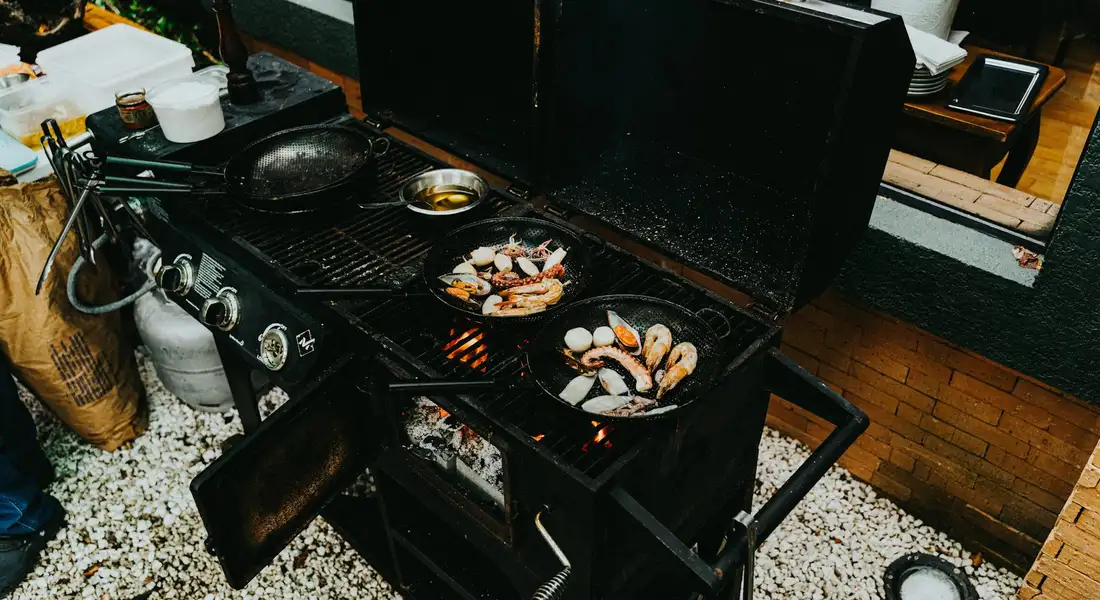
Before you even think about your food, think about your fire setup. A stable base prevents tipping disasters. Use an established fire ring if you can. If you’re building a new pit, surround it with rocks to keep your cooking area contained and your pan level.
Your main enemy is the open, licking flame. It creates intense, uneven hot spots that can warp a pan or crack it from thermal shock. It also creates soot that gunks up your seasoning. Your best friend is a bed of hot coals. Coals provide steady, radiant heat you can manage.
Always preheat your pan gradually by setting it near, not directly on, the hottest part of the fire, letting it warm up for a good five minutes before moving it over the coals. This gentle warm-up is like letting your muscles stretch before a run, preventing the thermal stress that leads to cracks.
Handles get dangerously hot. A good pair of long, heat-resistant gloves is a camping essential. No gloves? Improvise. Use a thick, dry dish towel folded many times, or even a leather welding glove from your gear bag. I keep a dedicated handle sleeve in my camp kit just for this.
Being a heat strategist outdoors means controlling your cooking zones. For even heat, spread a uniform bed of coals under the pan. For “indirect heat” when you need to simmer or keep food warm without burning, push most of the coals to one side, creating a cooler zone. It’s like having two burners on your campfire.
Managing Different Types of Fires
A fresh, flaming fire is for ambiance and marshmallows, not for cooking with cast iron. Wait for the logs to burn down to a glowing red and white coal bed. This is your prime cooking surface. The heat is consistent and free of those charring flames. Ready to take it further? The use cast iron cookware campfire complete guide walks you through setup, seasoning, and cooking techniques.
If your campsite has a grill grate over the fire pit, use it. It gives you more control, letting you lift and shift the pan easily. It also keeps the pan out of the ash, making cleanup a bit simpler. Just remember, the grate gets hot too, so use your gloves when moving it.
Your Step-by-Step Guide to Cleaning After the Meal
Don’t let a dirty pan go cold. Let it cool just enough that it’s safe to touch, but is still warm. Food residue softens and becomes much easier to remove when the pan is warm, not hot and not cold.
Start by scraping out any large bits with a metal spatula or a dedicated camp scrub brush. For gentle, stuck-on bits, nature provides a great cleaner: ash. Once the ash in your fire pit is completely cool, sprinkle some into the warm pan with a little warm water. Use a paper towel or cloth to scrub. The fine ash acts as a mild abrasive that won’t hurt your seasoning.
For the notorious “camping cast iron cake” of baked-on residue, the salt scrub is your best tool. Pour a handful of coarse salt (like kosher salt) into the pan. Add a tiny splash of water to make a pasty scrub. Use a cloth or stiff brush to work this abrasive paste over the stuck spots. The salt will dislodge the food without harming the iron. This method also works well for stubborn, burnt-on food stuck to cast iron. In the next steps, you’ll see more tips for lifting burnt residue while protecting your seasoning.
The On-Site Cleaning Checklist
- Cool the pan slightly. Wait until the handle is comfortable to hold with a bare hand.
- Scrape it out. Use a brush or spatula to remove all loose food and grease.
- Use a salt or ash scrub if needed. For stuck bits, apply your chosen natural abrasive and scrub.
- Rinse with minimal warm water. A splash is often enough. If you have biodegradable soap, a drop is fine. The goal is to remove debris, not strip seasoning.
- Dry thoroughly over the fire. Place the rinsed pan back over the warm coals or next to the fire until all moisture sizzles away and the pan is completely dry to the touch.
- Apply a thin oil coat. Once dry but still warm, put a few drops of oil on a paper towel and wipe the entire pan inside and out.
Soap is optional out here. If you have it and feel you need it, use it. The real key is what comes after: getting the pan completely, utterly dry.
Drying and Oiling Before Storage
Never air-dry your cast iron at camp. The humidity and cool night air will invite rust faster than you can say “s’mores.” The residual heat from your fire is your drying tool especially when you are camping or in a high-humidity environment.
Place your clean, rinsed pan over the dying coals or on the warm grill grate. Let the heat chase off every bit of water. You’ll see it steam and evaporate. Once it feels dry, keep it there for another minute. Touch the cooking surface to be sure.
This final oil coat is a “mini seasoning” that protects the iron from moisture in the air until your next cookout. With the pan warm from drying, add a tiny bit of your cooking oil (canola, vegetable, etc.) to a rag. Wipe the entire pan, then use a clean part of the rag to buff off any excess, leaving only a microscopic, protective layer. Store it in a dry bag or bin, and it will be ready for breakfast or any meal.
Keeping the Seasoning Strong Trip After Trip

Campfire cooking is one of the best things you can do for your pan’s seasoning. The intense, consistent heat from hardwood coals and the fats from your food work together perfectly. Think of it like baking a cake in an extremely hot oven. That sizzling bacon is doing more than just cooking, it’s actively building and reinforcing your pan’s non-stick patina. It’s especially beneficial when you know how to season cast iron over an open flame.
The high heat helps the fats polymerize, creating a harder, more durable layer with every use.
Quick Fire-Side Re-seasoning
After you’ve cleaned your pan at the campsite, you might notice the finish looks a little dry or dull. This is normal. You can give it a quick refresh right over your fire. The key is using indirect heat.
- Place your clean, dry pan near the fire, not directly in roaring flames.
- Warm it until it’s hot to the touch but you can still hold your hand a few inches above it.
- Use a rag or paper towel to apply a microscopically thin layer of your camping oil.
- Let the pan sit in that indirect heat for 5-10 minutes. You’ll see the oil finish change from shiny to dry. Wipe it one more time to catch any excess.
- Let it cool completely before storing.
The Pre-Packaway Check
Before you slide the pan into your gear bag, give it a final once-over. Look for any new, light orange spots, especially around the rim or handle. Morning dew or a quick rinse can sometimes leave behind enough moisture to start surface rust. If you discover rust on a seasoned pan, make sure to address it promptly.
If you spot a tiny rust speck, a quick scrub with a handful of coarse salt and a drop of oil will take it right off, then just wipe it dry and apply a fresh, thin coat of oil. I do this with my old camping skillet every trip. It takes one minute and stops a small problem from becoming a big one when you unpack at home. Wiping off the rust early like this prevents any damage to the cast iron.
Between-Meal Care at the Campsite
How you store the pan between uses matters. Your goal is to keep it dry and protected.
- After your final wipe-down and oil, store it in a dry place. I often put mine in a large plastic bag and keep it under my car seat or in a tote, away from damp tent floors.
- Do not leave it outside in the cool night air where condensation can form.
- Avoid the temptation to just bury it in the ashes of your fire pit. Ashes hold moisture and are slightly abrasive, which can degrade your seasoning overnight.
Common Camping Cast Iron Mistakes and How to Avoid Them
We’ve all made a camping cast iron error. The good news is they’re easy to avoid once you know what to look for.
Plunging a Hot Pan into Cold Water
This is the fastest way to crack or warp your iron due to thermal shock. Iron heats and cools slowly. A sudden, extreme temperature change causes different parts of the metal to expand or contract too quickly, creating stress fractures. Always let your pan cool down significantly before washing. If you need to clean it while warm, use very warm water, not cold.
Using Harsh, Abrasive Cleaners Like Sand
It might seem natural to grab a handful of sand or gravel from the creek bed to scrub with. Don’t. These materials are too coarse and will scrape off your hard-earned seasoning. Salt is a perfect, natural abrasive that’s gentle on seasoning but tough on stuck-on food. Pack a small container of coarse kosher salt in your kit instead.
Letting Food Sit Overnight
Leaving beans or bacon grease in the pan until morning invites two problems: stubborn, cemented-on food and potential rust from acidic foods. Make a simple post-dinner clean-up part of your routine; it’s much easier to do right after eating while the pan is still warm.
Packing the Pan Away Damp
This is the most common cause of camping rust. Even a seemingly dry pan can have moisture trapped in the pour spouts or on the handle. Always do the final dry over your remaining fire coals or a low camp stove flame, then oil it. If you wouldn’t put a damp wool sock in your bag, don’t put a damp pan in there either. A quick cast iron camping guide can help you maintain and repair your cookware outdoors. It makes rust prevention a routine part of your trip.
Ignoring Soot Buildup
The bottom and sides of your pan will get coated in black soot from the fire. If you let it build up over several trips, it becomes a hard, messy layer. The fix is simple. Before it hardens, wipe the soot off with an oiled rag or paper towel while the pan is cooling down. The oil helps lift the soot, keeping your pan and your gear bag much cleaner.
Common Questions
What’s the best way to remove baked-on “camping cast iron cake”?
While the pan is still warm, use a coarse salt and a tiny splash of water to make an abrasive paste. Scrub firmly with a cloth or brush; the salt will lift the residue without harming the seasoning. Rinse with a splash of warm water and immediately dry the pan over your fire’s heat.
Do I need to fully re-season my pan after every camping trip?
No, a full oven re-seasoning is rarely necessary. Campfire cooking typically strengthens the seasoning. Your routine should be a thorough clean, a complete dry over heat, and a final wipe with a very thin protective coat of oil before storage.
Can I use soap to clean my cast iron at the campsite?
Yes, a small drop of mild, biodegradable soap is acceptable if your pan needs it. The modern rule against soap applies to harsh, lye-based soaps, not today’s gentle formulas. The critical step is always the same: rinse well and dry the pan completely over your fire before oiling.
Bringing Your Campfire Skillet Home Ready for Next Time
Your single most important job after cooking over a fire is to dry the pan completely with heat before it cools. I always follow that dry heat with a tiny bit of oil on a cloth, which stops rust and preserves your hard-earned seasoning. If your seasoning ever gets sticky, flaky, or damaged, a proper repair and reseason can restore the surface. For guidance on restoring a damaged finish or choosing the right oil for seasoning, you’ll find more useful tips throughout The Iron Patina.
Research and Related Sources
- How to Season Cast Iron Cookware So It Lasts Forever – Fresh Off The Grid
- How To Season Cast Iron Over An Open Campfire – Chowhound
- How to Season Coghlan’s Cast Iron Camp Cooker
- r/camping on Reddit: Seasoning Cast Iron
A material science expert by profession, Joseph is also an avid cook. He combines his 10+ years expertise in material science and metallurgy with his passion for cast iron cookware to bring you best hands on advice. His expertise ranges from types of cast iron cookware to best seasoning tips as well as restoration of vintage cast iron utensils. Joe is here to help you solve all your cast iron cookware queries and questions.