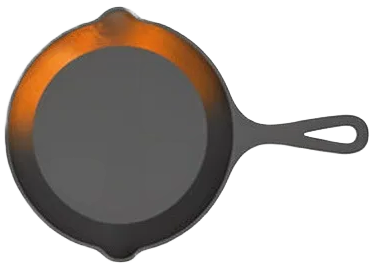
How to Hang Cast Iron Cookware as Kitchen Art?
You love your cast iron, but you might worry that hanging it up will lead to dust buildup or ruin the seasoning. Displaying your pans is a fantastic way to celebrate them, and with a little know-how, you can do it without any harm to their finish.
- Choosing the right hooks and racks that securely hold weight without scratching.
- Preparing your cookware for display to ensure it looks its best and stays protected.
- Simple, ongoing care to prevent rust and maintain the seasoning on your wall art.
- Creative layout ideas to turn your functional pieces into a striking visual statement.
Which Cast Iron Pieces Look Best on Display?
Not every piece in your collection needs to live in a cabinet. Choosing what to hang comes down to visual interest and story. I have a wall dedicated to pieces that make me smile every time I walk into my kitchen.
The best candidates often have strong shapes, unique details, or personal history, like a classic #8 skillet, an ornate trivet, a corn stick pan, or a piece passed down from a grandparent.
A key point to remember is that pieces destined for permanent display can be officially “retired” from active cooking. This changes their care routine in a good way, as they won’t face heat and food residue, letting you focus purely on preservation.
You have options. A perfectly smooth, black modern skillet from Lodge offers a clean, minimalist look. A pitted, slightly uneven vintage Griswold with a ghost of a logo tells a story of decades of use. Both are completely valid displays of cast iron art.
I advise against hanging any piece with active, flaky rust or an unstable, flaking seasoning layer. That rust can dust onto your wall, and the loose seasoning will eventually fall off, leaving a mess and a bare spot on the pan.
When thinking of display ideas, consider creating a theme. A “family heirlooms” grouping has deep personal meaning. A set of “daily drivers” shows off your workhorse tools. A collection of “unique shapes” like gem pans or a Dutch oven lid with a design turns your wall into a gallery of ironwork.
Skillets and Griddles: The Classic Canvas
The simple skillet is a masterpiece of form and function. For display, a progression of sizes creates a natural, visually pleasing arrangement. Think of hanging a 6-inch, an 8-inch, and a 10-inch skillet together in a row or a gentle curve.
The smooth cooking surface is the “face” of the piece, so orient them to show it off. The gentle slope of the walls and the iconic helper handle offer a silhouette that is instantly recognizable and deeply satisfying.
Decorative and Specialty Items
This is where you can have real fun. Look for pieces originally meant for the wall, like cast iron bottle openers or commemorative plaques with mounting holes. Ornate trivets are natural wall art. Intricate corn stick pans, muffin pans, or gem pans have fantastic depth and shadow play when lit from the side.
These items often have built-in holes or pronounced lips that make them much easier to hang securely than a smooth-sided skillet. Their decorative nature makes the display intention obvious and charming.
What About My Daily-Use Pans?
Absolutely, you can display the pans you use every day. Practicality is key. You need a hanging system that is sturdy and allows you to lift the pan off and on its mount with one hand, easily.
Be aware that a pan used frequently and hung in the open will need more frequent touch-up seasoning. Dust and ambient kitchen air (which can carry oils and humidity) will settle on the surface. A quick stovetop seasoning every month or so will keep it protected and looking its best.
How Do You Prepare Cast Iron for Display?
This is the most critical step. A pan put on the wall dirty or damp is a pan that will rust and spoil your display. Proper preparation ensures it stays beautiful for years.
Think of preparing a pan for display like putting a light coat of wax on a classic car before rolling it into a showroom. You’re not doing a full restoration, just applying a stable, protective layer. The core principle is simple: a displayed pan is not a forgotten pan. It still needs a baseline of care.
Step 1: The Final Clean and Dry
- Give the piece a thorough wash with warm water and a small drop of dish soap. Scrub it clean of all grease, dust, and fingerprints. Rinse well.
- Dry it immediately and completely with a towel.
- Place the clean pan on a stove burner over low heat for 3-5 minutes. This drives off every bit of unseen water. Let it cool completely to room temperature on the rack. No moisture can remain.
Step 2: Applying a Display Seasoning
This isn’t a full oven seasoning cycle. It’s a protective wipe-down. Using a cloth with a tiny amount of your preferred oil (like flaxseed, grapeseed, or Crisco), rub a thin coat over the entire piece, inside and out. For a full seasoning, follow the oven temperature and time guidelines.
Wipe it as if you’re trying to remove all the oil you just put on. You want only a microscopic layer left behind. This will polymerize slightly from the heat of your hands and the air, forming a hard, protective shield against dust and ambient humidity without becoming tacky.
Choosing the Right Spot on Your Wall
Location matters for preservation. Avoid hanging pieces directly above an active stove where grease and steam are constant, or directly above a sink with its splashes and humidity.
Look for a focal wall where they can be appreciated, or consider the space above your kitchen cabinets for a “found collection” look. A stable environment away from direct heat and water sources is the goal, letting your iron art remain just that-art.
What is the Best Hardware for Hanging Cast Iron?
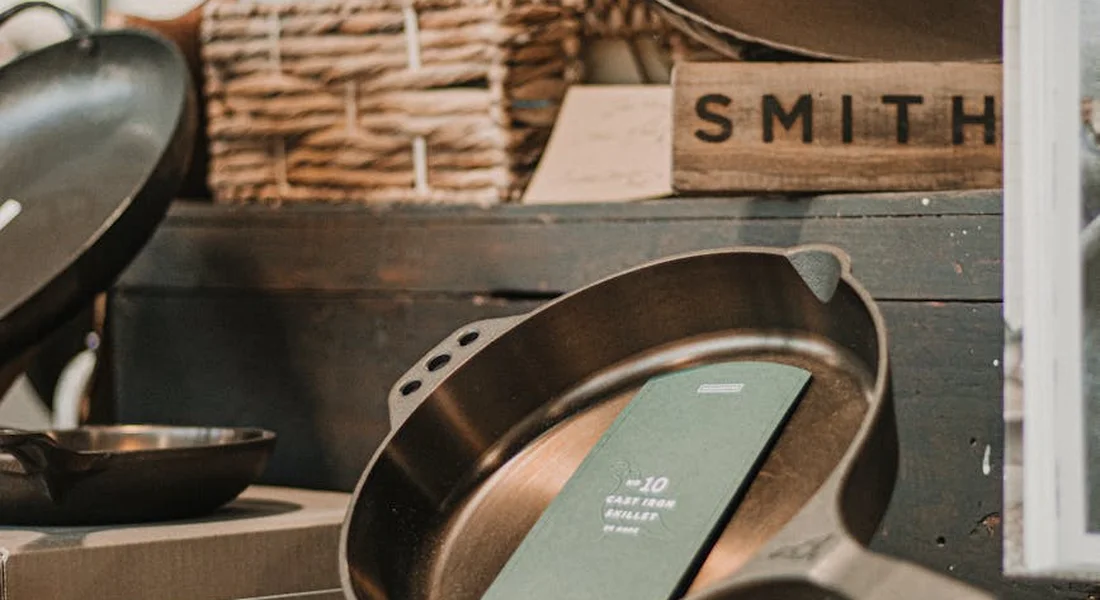
The most important factor is safety. A single 10-inch skillet can weigh over five pounds. A wall of them holds serious weight, so your hardware must be chosen and installed with that in mind.
Your goal is to protect your wall and your pans. The wrong hook or weak drywall anchor means a pan could come crashing down, damaging your floor, the pan, and potentially hurting someone.
The right hardware is non-negotiable for a safe and lasting cast iron display wall.
You have a few main options. Simple J-hooks work well for hanging a pan by its handle hole. Adjustable plate hangers grip the rim of skillets or griddles securely. For the heaviest pieces, like a large Dutch oven or a griddle, a custom-fabricated L-bracket that cradles it from below is the gold standard for safety.
No matter which method you pick, finding the wood studs in your wall is always the best practice. Use a stud finder. If you must hang between studs on drywall, you need heavy-duty toggle bolts, not plastic anchors. They spread the weight behind the wall.
Pre-made solutions like a cast iron skillet display stand or a Lodge cast iron display rack are great if you prefer an off-the-shelf product. Just double-check their weight ratings against your collection.
Heavy-Duty Hooks and Rails
Look for forged steel or heavy-gauge steel hooks. Avoid flimsy, thinly coated wire hooks. The package should list a weight rating. I only use hooks rated for at least 15-20 pounds, even for a lighter pan. This gives me a huge safety margin.
A pot rail or a repurposed, sturdy towel bar is a simple and clean option. You mount the rail into studs once, and then you can hang multiple pans by their handles. It lets you rearrange pieces easily without putting more holes in your wall.
Plate Hangers and Custom Brackets
Adjustable plate hangers are a clever solution for hanging a skillet face-out, like art. The spring-loaded wires grip the inner rim. To protect your seasoning, I wrap the tips of the wires with a soft material, like a bit of felt or silicone tubing. This prevents metal-on-metal scratching.
For very large, heavy, or oddly shaped pieces, a custom bracket is your best friend. Think of a simple L-shaped metal bracket that the pan sits on, secured from underneath. You can have these made at a local metal shop. It’s the safest way to display a massive griddle or a deep chicken fryer with confidence.
Pegboards and DIY Rack Systems
A heavy-duty pegboard system offers incredible versatility. You can move hooks around to create a perfect layout for a growing collection. It’s the solution I use in my own workshop for displaying restored pieces.
The critical step is mounting the pegboard itself properly. You must secure it directly into wall studs across its entire width. Relying on drywall anchors for the pegboard will lead to failure. Use spacers behind it so the hooks have room to lock in place securely.
How Do You Style and Maintain a Cast Iron Display?
Once your hardware is secure, the fun begins. This is where you make your cast iron display wall your own. Think of it as arranging functional art. It shouldn’t just be a straight line of identical pans (unless that’s your vibe). Aim for a balanced composition that feels intentional. Let this display spark ideas for what you’ll cook—think skillet favorites, searing mastery, and the techniques that make cast iron sing. When you’re ready to dive deeper, there’s a complete guide to cast-iron cooking—foods, dishes, and techniques to master.
Remember, this isn’t “set it and forget it.” Displayed cast iron still needs a little love. A simple, consistent maintenance routine keeps it looking its best and prevents problems. Seasoning is a key part of that routine. It builds a protective patina that guards against rust and improves food release over time.
Creating Visual Balance
Group pieces in a way that feels good to you. You might cluster a few small skillets together, or create a stepped pattern with sizes descending from a large pan down to a tiny single-egg skillet. I like to group by handle style sometimes, putting all my classic Lodge handles together.
Don’t be afraid to mix materials. Placing a beautiful wood cutting board or a piece of antique copper alongside your iron adds warmth and texture. The key is to leave some breathing room. Crowding pieces together makes the display look busy and can make it harder to perform the simple maintenance they need.
The Simple Maintenance Routine
About once a month, give your display a quick check. Run a clean, dry finger over a pan’s surface. Is there a fine layer of dust? Does the seasoning look dull or pale compared to its neighbors?
The care is simple. First, wipe every piece gently with a dry, soft cloth to remove dust. If the iron looks a little dry or faded, take a second cloth with a few drops of oil on it (I use the same flaxseed or grapeseed oil I cook with) and give it a barely-there wipe. Your goal is to leave no visible oil, just a microscopic layer. That fits the clean season—a time to maintain your cast iron skillet with simple, dry-wipe care. In the next steps, we’ll cover a quick seasoning so it stays protected and ready to cook.
This five-minute routine keeps your displayed collection from becoming a dust magnet and preserves the seasoning by replacing the thin protective layer of oil that can slowly evaporate.
When to Take a Piece Down for a Refresh
Even with good care, a displayed piece might need more attention. The most common sign is the seasoning taking on a dry, pale gray or whitish look. You might also see the very first hint of dusty red rust, often in the pour spouts or along the rim. If you spot rust, re-season the pan to restore the coating. Then use it regularly to keep the seasoning strong and rust-resistant.
This is normal. It’s just the iron telling you it’s thirsty. Don’t worry. When I see this on one of my wall pieces, I simply take it down, give it a light scrub, and put it through a single round of oven seasoning. It’s part of the lifecycle of cast iron, even when it’s serving as art. The piece goes right back on the wall, good as new and protected for another long stretch.
Common Questions
How do I keep the seasoning from getting dull or dusty on a displayed pan?
Seasoning on displayed iron needs a different kind of upkeep. Once a month, wipe pieces with a dry cloth, then apply a microscopic coat of oil with a second cloth and buff it completely dry. This replaces the protective layer that slowly dissipates in the open air, preventing a dry, pale finish without making surfaces tacky. It’s similar to how you season and maintain your cast iron cookware to keep it in good condition.
Can I hang a pan I still use for cooking?
Yes, but understand the trade-off. Frequent handling and kitchen atmospheres will demand more frequent maintenance. You must use a secure, easy-access hook and be prepared to perform a stovetop seasoning refresh every few weeks to counteract dust and airborne oils that settle on the surface.
What’s the safest way to hang a very heavy griddle or Dutch oven?
For heavy or odd-shaped pieces, a custom-fabricated L-bracket is the most reliable method. It cradles the weight from underneath and should be anchored directly into wall studs. Avoid relying on hooks or hangers not explicitly rated for the item’s full weight and center of gravity.
Displaying Cast Iron: Where Form Meets Function
The single most important rule for displaying your cast iron is to use a method that protects it, not one that risks damage. A decorative piece should still be a functional piece, ready to be taken down, used, and returned to its spot without harm to its finish. For your displayed cookware, this approach ties directly to its long-term care through proper rust prevention and seasoning maintenance.
Research and Related Sources
- Cast Iron Cookware in Pots & Pans – Walmart.com
- Cast Iron Skillets in Pots & Pans – Walmart.com
- Cast Iron Pans in Pots & Pans – Walmart.com
- Cast Iron Pots in Pots & Pans – Walmart.com
- Cast Iron Pots & Pans
Joseph Gerald
A material science expert by profession, Joseph is also an avid cook. He combines his 10+ years expertise in material science and metallurgy with his passion for cast iron cookware to bring you best hands on advice. His expertise ranges from types of cast iron cookware to best seasoning tips as well as restoration of vintage cast iron utensils. Joe is here to help you solve all your cast iron cookware queries and questions.