
How to Cook with Butter in Cast Iron and Keep Your Seasoning Intact
You’re right to be cautious about using butter on your cast iron-it can burn or leave residues if not handled properly. With the right technique, butter adds incredible flavor without harming your pan’s hard-earned seasoning.
- Why butter behaves differently than oils and what that means for your cookware.
- The precise stove-top temperature that keeps butter from burning or sticking.
- My simple method for cleaning your skillet after cooking with butter.
- Personal tricks I use to enjoy butter’s richness without any worry.
Butter and Cast Iron: A Quick Snapshot
Think of butter and your cast iron skillet like a great, but specific, partnership. They work beautifully together for certain tasks, but you wouldn’t ask butter to do the heavy lifting you’d trust to a high-heat oil.
To see why, this simple comparison tells the story.
| Butter | High-Heat Oil (e.g., Avocado) | |
|---|---|---|
| Smoke Point | Low (around 302°F / 150°C for salted) | Very High (over 500°F / 250°C) |
| Best For | Finishing, low-heat cooking, flavor | Searing, high-heat frying, building seasoning |
| Not Ideal For | High-heat searing, the oven seasoning process | Adding a buttery flavor to finished dishes |
| Effect on Seasoning | No meaningful benefit; can leave residue | Polymerizes to build the seasoning layer |
The golden rule is simple: butter is for flavoring your food, not for building your pan’s primary, protective seasoning. A good high-heat oil creates that hard, slick surface, while butter is the delicious guest you invite onto that surface.
Can You Use Butter on Cast Iron?
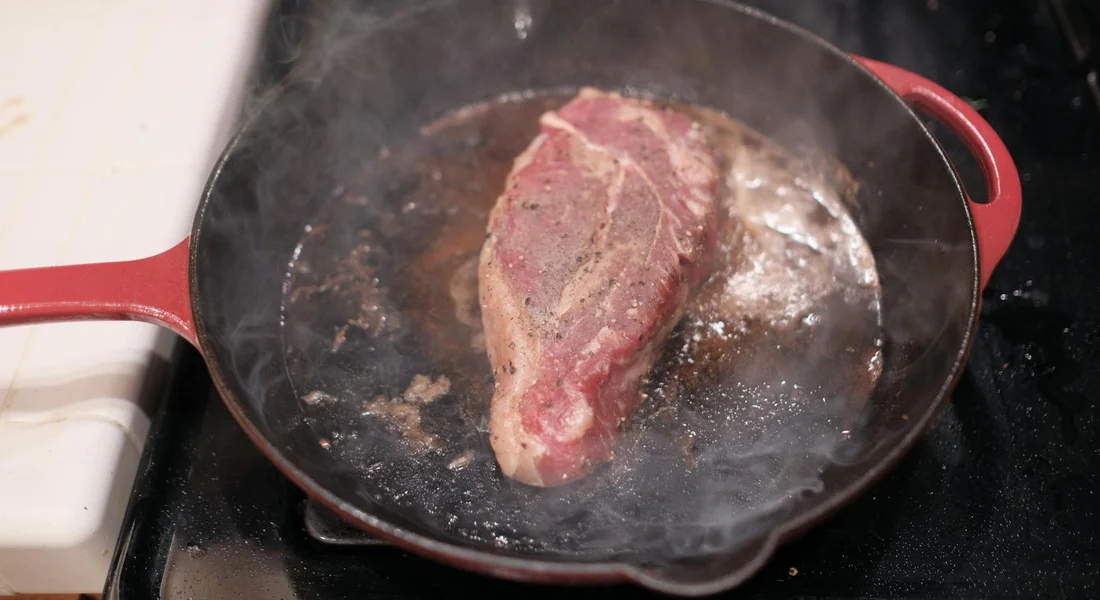
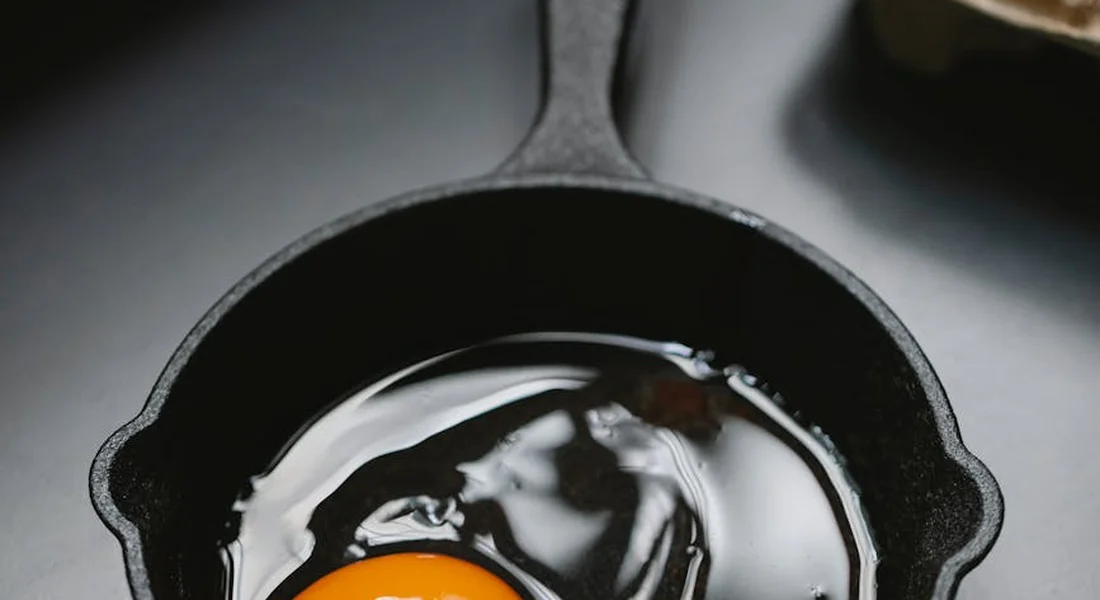
Yes, you can absolutely use butter in a cast iron skillet for cooking. I do it all the time. That rich, nutty flavor is part of what makes a cast iron steak or a simple batch of scrambled eggs so good.
The confusion often comes from mixing up “cooking with” and “seasoning with.” Seasoning is the process of baking on thin layers of oil to create a polymerized coating. Cooking is just, well, cooking.
Butter has two main limits you need to respect. First, its low smoke point means it will burn if your pan is too hot, leaving behind blackened milk solids. Second, those same milk solids (the proteins and sugars that make butter, well, butter) can stick to your seasoning and create a gummy film if you try to use butter for the oven-seasoning process.
So, for that perfect butter baste on a steak, go for it. Heat your pan with a high-heat oil first, sear the steak, then reduce the heat and add butter, garlic, and herbs to finish. The butter flavors the food without being asked to withstand searing temperatures on its own.
The Right Way to Cook with Butter in Your Skillet
Butter can turn a good meal into a great one. It can also turn your pan into a smoky, sticky mess if you don’t manage the heat. The goal is to use butter for its flavor without letting its milk solids burn and stick to your seasoning.
Master the Two-Step Fat Method
This is my non-negotiable rule for cooking with butter in cast iron. You use two fats: one with a high smoke point to protect the pan, and the butter for flavor. It’s part of essential techniques for perfect results.
- Preheat your skillet over medium or medium-low heat. Give it a few minutes to warm evenly.
- Add a small amount of a high-smoke point oil. I use a teaspoon of avocado or grapeseed oil. Swirl it to coat the cooking surface. This oil creates a stable barrier.
- Now, add your butter. It will melt into the existing oil. The oil raises the effective smoke point, so the butter’s solids are less likely to scorch.
This method lets the butter do its job-browning and adding rich flavor-without carbonizing onto your pan’s surface.
Why Do People Put Butter in Hot Cast Iron?
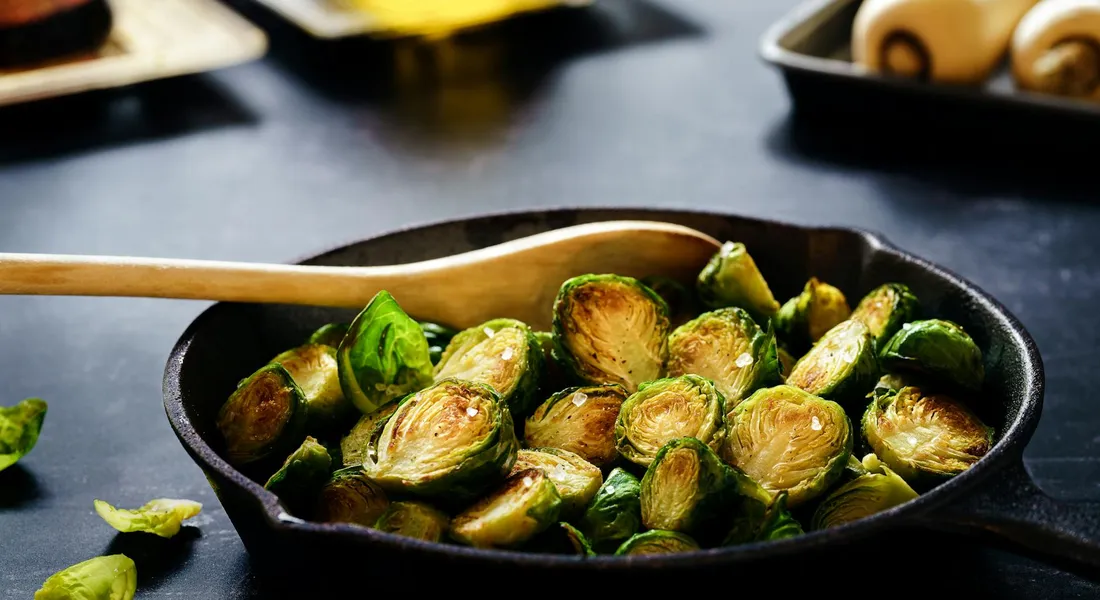
This is a common question. You don’t add butter to a hot pan primarily to lubricate it. A well-seasoned skillet with a bit of oil is already non-stick. You add butter for the Maillard reaction. That’s the scientific term for the complex browning that creates deep, savory flavor. Butter accelerates this beautifully on meats and vegetables. Think of it as a flavor catalyst, not a pan protector.
Techniques for Different Foods
How you use butter changes based on what you’re cooking. Here are the adjustments I make for my own skillets.
Searing a Steak
I sear my steak in the high-smoke point oil alone. Only when the steak is nearly done do I add butter, along with garlic and herbs, to the pan. I tilt the pan and spoon the foaming butter continuously over the meat for the last minute. This butter-basting finishes the steak without exposing the butter to the highest searing heat for too long.
Cooking Eggs
This requires patience. I preheat the pan on the lowest setting for a solid five minutes. I add my oil, then a small pat of butter. When the butter is just melted and foaming, I add the eggs. Low, even heat is the secret to using butter for eggs without them sticking or the butter burning, especially in cast iron pans.
Baking
In cornbread or biscuits, melted butter is mixed into the batter or dough. Here, it’s purely a flavor and texture component. Since it’s not exposed directly to the hot metal for a long time, it behaves well. Just make sure your pan is well-seasoned beforehand.
Should You Season Cast Iron with Butter?
I see this question all the time: “Can I season my cast iron with butter?” The short, firm answer is no. You should not use butter to build the polymerized seasoning layers on your cookware.
While you can cook with it, butter is a poor choice for seasoning. True seasoning is created when a fat is heated past its smoke point, breaking down and bonding to the iron to form a hard, slick polymer. Butter fails at this for two key reasons. That’s why cast iron seasoning is important: it builds a durable, nonstick patina that protects the iron and makes cooking easier over time. A well-seasoned pan heats more evenly and resists rust, underscoring the role of proper seasoning in cast iron care.
- Water Content: Butter is about 15-20% water. When you heat it in an oven for seasoning, that water turns to steam. This steam prevents a strong, even bond from forming between the oil molecules and the iron.
- Milk Solids: About 3% of butter is milk proteins and sugars. These solids burn and carbonize at relatively low temperatures. Instead of forming a smooth polymer, they create a weak, brittle, and often sticky layer.
Using butter for seasoning is like trying to paint a wall with a mixture of paint and crumbs; the result will be flaky and unsound.
The “Butter Flake-Off” Phenomenon
This is exactly what users describe on forums like Reddit when they ask about “butter on cast iron.” They report that after attempting to season with butter, the surface develops a dull, rough texture. Later, during cooking, black or brown flecks will come off into their food. That’s the carbonized milk solids and weak polymer flaking away. It’s not harmful, but it ruins the consistency of your seasoning and the presentation of your meal. I’ve had to strip and re-season pans that came to me with this issue. It’s a frustrating problem that’s easily avoided by using a proper seasoning oil like grapeseed, canola, or flaxseed.
Save the butter for finishing your steak. Use a stable oil to build your skillet’s foundational layers.
Choosing Your Butter: What Works Best in the Pan
Not all butter behaves the same in a hot cast iron pan. Think of your seasoning as a durable, non-stick paint job. Regular butter is like adding a thin, flavorful coat of paint that can start to bubble and scorch if the heat gets too high.
To choose wisely, you need to consider smoke point. This is the temperature at which the fats in the butter begin to break down, smoke, and burn. A higher smoke point gives you more control and less mess.
Your Butter Options, Side by Side
| Butter Type | Best For | Smoke Point | Key Consideration |
|---|---|---|---|
| Clarified Butter or Ghee | Searing, frying, everyday cooking | High (around 450°F / 232°C) | Milk solids and water are removed, making it the most stable choice for cast iron. |
| Unsalted Butter | Lower-heat sautéing, baking | Medium (around 350°F / 177°C) | Watch the heat closely to prevent burning. The default choice for most cooking. |
| Salted Butter | Finishing a dish (like steaks or vegetables) | Medium-Low | The salt and extra moisture can cause sputtering and promote spotting if used for prolonged frying. |
| Cultured/European Butter | Low-heat applications where flavor is king | Lowest | Its rich, tangy taste is fantastic, but it will burn quickly. Use it like a finishing oil. |
For most high-heat cooking in your skillet, clarified butter or ghee is the superior choice because its high smoke point prevents burning and protects your seasoning. I keep a jar of homemade ghee next to my stove specifically for my cast iron. Regular unsalted butter is my go-to for eggs or a quick pan sauce, but I always start with a medium-low preheat.
Salted butter is perfectly fine for melting over a finished dish. Just avoid using it as your primary cooking fat for searing, as the water content can lead to more sticking and the salt can leave tiny pits in your seasoning over time.
What to Do When Butter Burns and Sticks
We’ve all been there. You glance away for a moment, and suddenly your kitchen is smoky and there’s a dark, sticky film welded to the pan. Don’t panic. This is almost always burnt butter residue, not a ruined seasoning.
Is It Burnt Butter or Damaged Seasoning?
Here’s how to tell the difference. Burnt butter residue is carbonized food gunk. It sits on top of the seasoning, feels rough or sticky, and often has a distinct, acrid smell. Damaged seasoning looks different: it will appear as grey, metallic patches where the black polymerized layer has been stripped away, often from prolonged exposure to acidic foods or harsh scrubbing.
Burnt butter is a surface-level cleaning issue. Damaged seasoning requires building new layers. What you’re dealing with right now is almost certainly the first one.
How to Fix Burnt Butter on Cast Iron: A Step-by-Step Cleanup
Follow this simple protocol. You won’t need to re-season your entire pan.
- Let the Pan Cool Completely. Never shock a hot pan with cold water. Let it come to room temperature on the stovetop.
- Scrub with a Mild Abrasive. Pour a handful of coarse kosher salt into the pan. Use a damp paper towel or dishcloth to scrub the salt in a circular motion over the burnt areas. The salt acts as a gentle, natural scrubber. For tougher jobs, a light pass with a chainmail scrubber works wonders without harming the seasoning underneath.
- Wash and Dry Thoroughly. Give the pan a normal wash with warm water and a dab of dish soap to remove all salt and residue. Dry it immediately and completely with a towel.
- Apply a Protective Oil Coat. This is the crucial maintenance step. Place the dry pan on a warm burner for a minute. Then, using a paper towel, rub in a microscopically thin layer of a neutral, high-smoke-point oil (like canola or grapeseed). Wipe it out as if you made a mistake and are trying to remove all the oil. Heat the pan for another 2-3 minutes until it just starts to smoke, then let it cool. This re-fuses a tiny protective layer.
A single butter burn event is a minor setback, not a disaster, and this cleanup and quick oil treatment will have your pan back in action for your next meal. My most-used skillet has seen its share of butter mishaps. A quick salt scrub and a fresh oil coat have always brought it right back.
Keeping Your Pan Happy with Butter and Oil
Butter is a fantastic cooking fat, but it’s a guest in your skillet, not a permanent resident. The key is the routine you follow after the food is plated.
Think of your pan’s seasoning like the finish on a well-loved wooden table. Butter is like setting a beautiful, fragrant candle on it. You enjoy the ambiance, but afterward, you wipe the table down and maybe give it a light polish to keep the wood itself protected and gleaming.
The Post-Butter Cleanup is Non-Negotiable
Once your pan has cooled enough to handle, you need to wash it. This is where I see people hesitate. They think, “I just cooked with fat, isn’t that good for it?” Not when that fat is butter.
Milk solids and salt left in the pan are enemies of your seasoning. They attract moisture and can lead to sticky spots or even rust if ignored.
- Use warm water and a small drop of dish soap. Modern soap is gentle and will not strip your well-bonded seasoning.
- Scrub with a brush or non-abrasive scrubber to remove all food residue. If you have stubborn bits, a little coarse salt makes a great, gentle abrasive.
- Rinse thoroughly.
The next step is the most critical: dry it bone-dry, immediately. I dry mine with a towel, then put it on a stovetop burner over low heat for 2-3 minutes. This drives off every last bit of water that can hide in the pores of the iron. You’ll see the last tiny droplets sizzle away. Let it cool completely on a rack to finish drying. When it’s cool and dry, you’re ready for the properly cooled, dry cast iron step outlined in the next steps.
The One-Minute Maintenance Wipe
Now your pan is clean and dry. Here’s the secret step that makes all the difference. Grab your bottle of a stable, high-smoke-point oil. I use grapeseed or avocado oil for this. That sets the stage for minimal smoke as you heat. We’ll cover why cast iron pans smoke and how to prevent it in the next steps.
Put a few drops in the warm, dry pan. Use a paper towel to wipe a microscopically thin layer over the entire cooking surface, the sides, and even the handle. Then, take a fresh, dry paper towel and buff it like you’re trying to remove all the oil you just put on. Clean your pan thoroughly after cooking before seasoning it again for best results.
This isn’t about adding a new layer of seasoning right now, it’s about protecting the strong, polymerized base layer that butter can’t create. That thin wipe of oil fills in any microscopic gaps and creates a water-resistant barrier until your pan’s next use. It takes less than a minute.
Seasoning Isn’t an Event, It’s a Rhythm
You don’t need to run your pan through a full oven-seasoning cycle every time you use butter. That’s overkill. Instead, reframe “how often to season” as “how to maintain.”
The one-minute maintenance wipe after washing is 90% of the battle. Your pan builds its seasoning through regular, gentle use and this consistent aftercare.
I only do a formal oven seasoning on my daily drivers a few times a year, or if I notice a patch feels dry or rough after cleaning. The rest of the time, that quick wipe with stable oil after cooking and washing is what keeps my 10-inch skillet slick and ready. It turns maintenance from a chore into a simple habit. After cooking, a quick clean—rinse and wipe dry—keeps the surface smooth. Then a light oil coat seals it for the next use.
Common Questions
Why do so many people on Reddit warn against using butter to season cast iron?
Because butter’s milk solids carbonize at low heat, creating a weak, sticky layer that flakes off. This “butter seasoning” fails to polymerize properly, unlike high-smoke-point oils. It’s a common rookie mistake that leads to a frustrating clean-up and re-seasoning job.
Is it safe to use butter in my cast iron if the recipe goes into the oven?
Yes, but only if the butter is contained within the food, like in a cake batter, or used as a brief finishing baste. Exposing plain butter directly to the hot oven walls will cause the milk solids to burn and stick. For oven roasting, a stable oil is your best bet.
If I cook with butter regularly, does that help maintain my pan’s seasoning?
No. Butter adds flavor but does not contribute to the polymerized layer that protects your pan. Maintenance comes from post-use cleaning, thorough drying, and a thin wipe with a high-smoke-point oil. Rely on dedicated seasoning oils for building and maintaining the base layer.
Butter and Your Seasoning: A Practical Partnership
The most reliable method for using butter is to treat it as a finishing fat, not a cooking oil, to safeguard your pan’s hard-earned patina. Always let your skillet heat fully first, then add butter just before your food to minimize its time on the hot surface. This simple step prevents the milk solids from burning and carbonizing, which is what can lead to a sticky mess and a weakened seasoning. For more on building and maintaining that essential non-stick layer, explore our detailed guides on oven seasoning and daily cleaning.
Research and Related Sources
- Can a good cast iron seasoning really be built from butter? – Seasoned Advice
- r/castiron on Reddit: Will butter build up a seasoning?
- How to Season Cast Iron Cookware with Butter?
- When cooking with cast iron, does frying with butter improve or degrade seasoning? – Quora
- This Is the Best Fat for Seasoning Your Cast Iron Skillet (No, It’s Not Oil)
A material science expert by profession, Joseph is also an avid cook. He combines his 10+ years expertise in material science and metallurgy with his passion for cast iron cookware to bring you best hands on advice. His expertise ranges from types of cast iron cookware to best seasoning tips as well as restoration of vintage cast iron utensils. Joe is here to help you solve all your cast iron cookware queries and questions.