
Can You Use Cast Iron on a Grill?
If you’re worried that the open flame of your grill will damage your pan’s hard-earned seasoning, you’re not alone. I can tell you from experience, cooking with cast iron on a grill is not only safe, it’s one of the best ways to build a stronger, more resilient patina.
This guide covers the practical steps to use your skillet or griddle outdoors with confidence. You’ll learn:
- How to manage heat on an uneven grill grate.
- The right tools and techniques for grill-top searing and sautéing.
- Simple cleanup that protects your seasoning from ash and grease.
Key Takeaways for Grill and Cast Iron Success
Grill cooking is fantastic for cast iron, but it demands a specific routine. Follow these four rules every single time.
- Always preheat your pan on the grill. Putting cold food into a cold pan on a hot grill is a sure way to make everything stick.
- Use tools with long, insulated handles. You’re dealing with intense radiant heat from the grill and the pan itself. Protect your hands.
- Let the cookware cool completely before you clean it. Thermal shock from cold water on a searing-hot pan can cause it to crack.
- Never skip the post-grill dry and oil step. The extreme heat and potential moisture from grilled food can strip a layer of seasoning. A quick re-oil protects it.
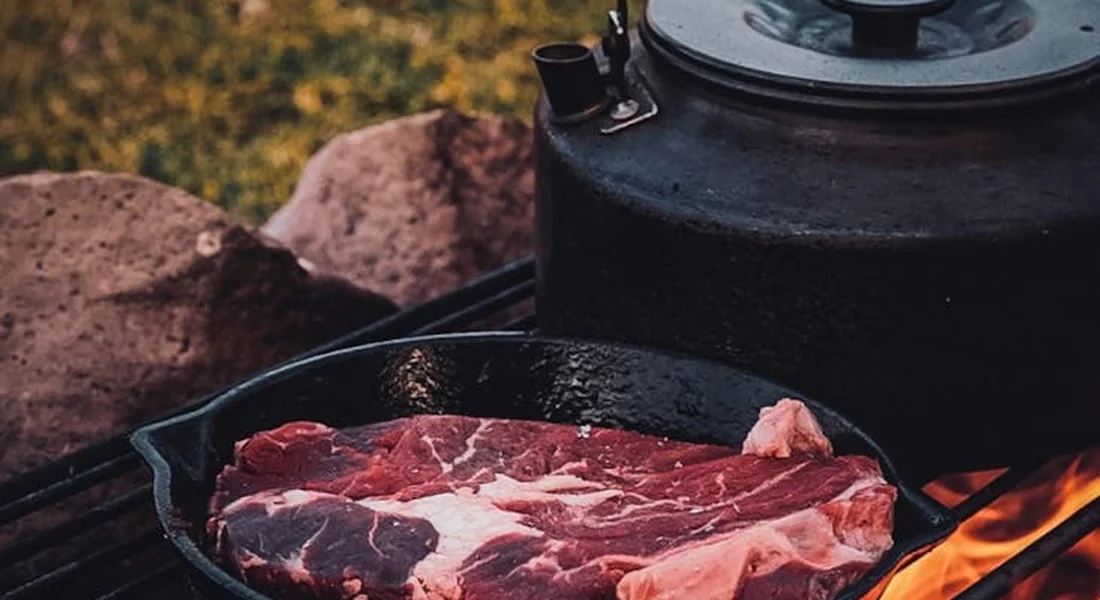
Can You Put a Cast Iron Skillet Directly on the Grill Grates?
Yes, absolutely. This is one of the best ways to use it.
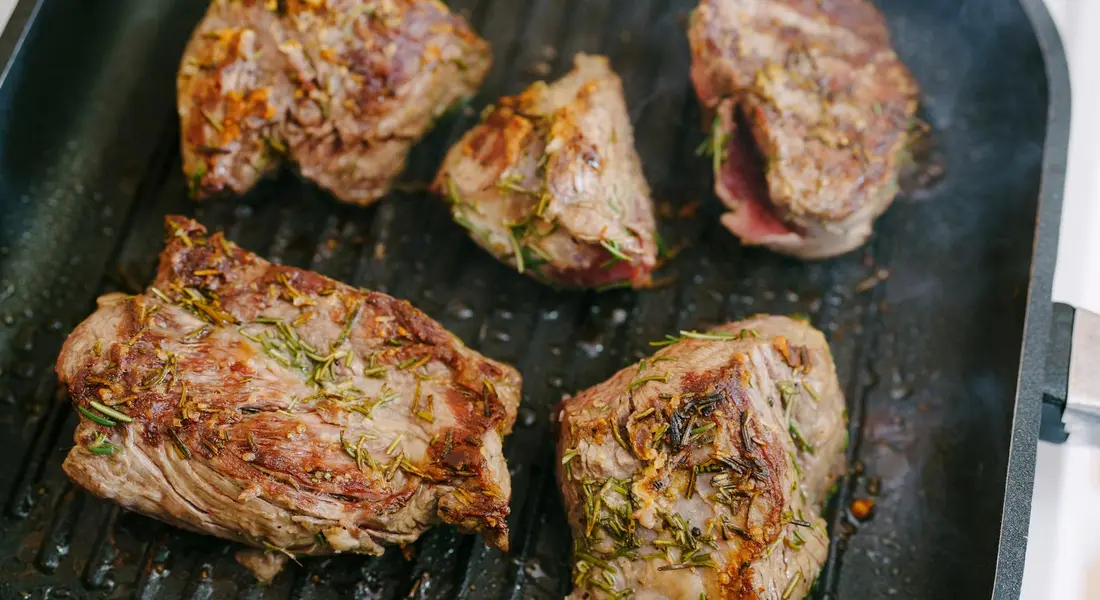
Cast iron is made for direct, high heat. Your grill is just another heat source, like your stovetop burners or your oven. I use my standard 10-inch skillet on my charcoal grill all summer long. The metal doesn’t care if the flames are underneath it in a fireplace or a grill; its job is to get hot and stay hot.
Putting a skillet on the grates gives you a major advantage: a perfectly even, consistent cooking surface. Grill grates themselves can have hot and cool spots, and delicate foods like fish or vegetables can fall through. Your skillet solves both problems. It acts like a flat, seasoned griddle right over the fire, giving you superb sear and total control. You get the smoky flavor from the grill with the reliable performance of cast iron.
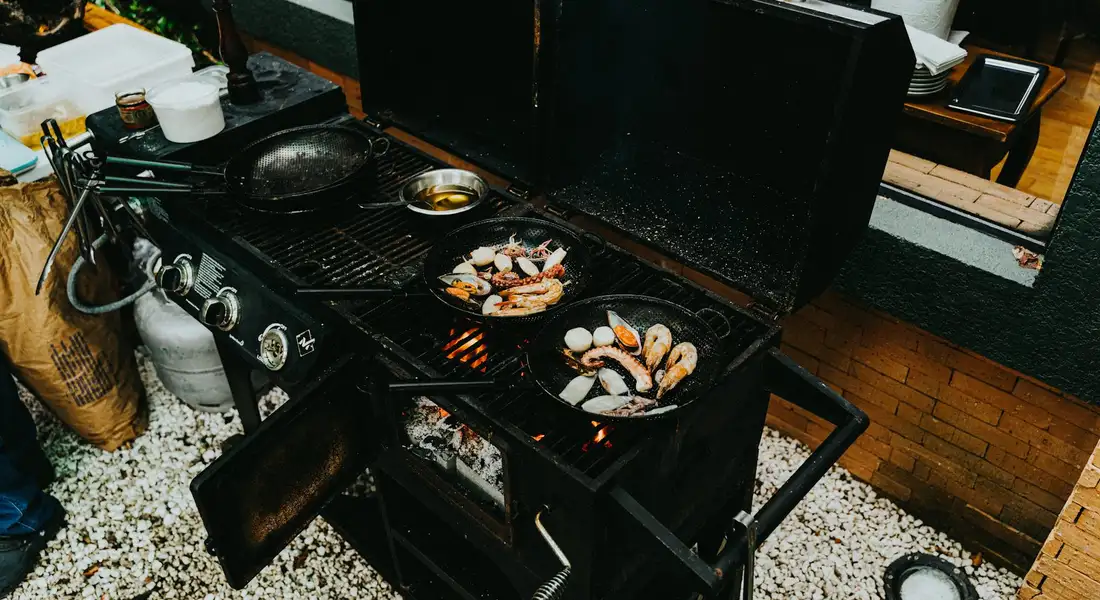
What You’ll Need: Cast Iron and Grill Tools
Your grill isn’t just for burgers and steaks. It’s an outdoor oven perfect for cast iron. The right piece makes all the difference.
A good skillet is the most versatile. I use mine for searing chops, roasting vegetables, and even baking cornbread with that smoky flavor. It’s important to know what to cook in cast iron, as it can handle a wide range of dishes. A Dutch oven is fantastic for chili, stews, or deep-frying wings outside where splatter doesn’t matter. A grill pan with ridges gives you classic char marks on things like asparagus or pineapple. For the purist, dedicated cast iron grill grates replace your grill’s grates entirely, turning the whole surface into a seasoned searing zone.
Is Enameled Cast Iron Safe for the Grill?
Yes, you can use enameled cast iron on a grill, but you must treat it gently. Think of the enamel coating like a glass lid. It can handle high heat, but it hates sudden temperature changes.
Placing a cold enameled pot directly onto blazing hot grates is the fastest way to cause thermal shock and crack the enamel. Always let it warm up gradually. The care is opposite of raw cast iron. You can scrub it with soap without worry, but you must avoid metal utensils and banging it around to prevent chips. For high-heat searing and less fuss, I always reach for my seasoned skillet.
Your tools are just as important as your cookware. Grilling with cast iron requires a bit more finesse and safety.
- Long-Handled Tongs & Spatula: Keep your hands away from the intense heat of the grill and the hot pan handles.
- Heat-Resistant Gloves: These are non-negotiable. Oven mitts can catch fire. Proper grill gloves protect you when moving a searing-hot Dutch oven.
- Dedicated Grill Brush or Scraper: You’ll need to clean your grill grates before you start. A separate, stiff brush or scraper for your cast iron is also wise to avoid mixing grill grit into your pan’s seasoning.
How to Prep Your Grill and Cast Iron
Good results start with good prep. You need to get both your grill and your pan ready to work together.
- Clean Your Grill Grates. Fire up your grill to a medium heat and let it run for 10-15 minutes to burn off old residue. Then, scrub the grates thoroughly with your grill brush. This prevents last week’s salmon flavor from transferring to your breakfast potatoes.
- Prepare Your Cast Iron. While the grill heats, take your pan outside. Make sure it’s clean, dry, and has a good layer of seasoning. Give it a very light wipe with a neutral oil like canola or grapeseed.
- Pre-Heat the Pan on the Grill. Place your oiled pan directly on the cleaned grates. Close the lid and let it heat up for a solid 5-10 minutes. You want it good and hot before any food touches it. This step is the secret to a non-stick surface and even cooking.
Pre-heating your cast iron on the grill is not a suggestion; it’s the rule for success, just like you would on your kitchen stove.
Why a Cold Pan on a Hot Grill is a Problem
Imagine taking a hot drinking glass straight from the dishwasher and filling it with ice water. That sharp tink you sometimes hear is thermal stress, and it can shatter glass. Your cast iron works the same way—especially when exposed to sudden temperature changes, like when they’re put in the dishwasher.
Placing a cold pan on a hot grill causes the metal to expand too rapidly. This can lead to immediate, stubborn food sticking as the surface doesn’t have time to polymerize the oil properly. Over many cycles, this stress can also potentially lead to warping or, in extreme cases, a crack. It’s rare, but I’ve seen it happen to a thin, vintage skillet. Always let your pan warm up with the grill.
Your Step-by-Step Guide to Cooking on the Grill
Grilling with cast iron is different from your stovetop. You’re dealing with open flame, uneven heat, and a lot of excitement. This method keeps you in control.
- Preheat Your Pan on the Grill
- Add Your Oil, Then Your Food
- Manage Your Heat Zones
- Handle With Extreme Care
Place your dry skillet or Dutch oven directly on the grill grates. Close the lid and let it heat for a good 10-15 minutes. You want the entire piece hot, not just the bottom. A properly preheated pan is your number one defense against food sticking.
Carefully open the lid. Using tongs and a folded paper towel, apply a thin coat of a high-smoke-point oil (like avocado, grapeseed, or canola) directly to the hot cooking surface. The oil should shimmer immediately. Now add your food. You’ll hear that satisfying sizzle.
This is your most powerful tool. For a hard sear (like on a steak), keep the pan over direct heat, right above the flames or coals. For slower cooking or finishing (like with chicken thighs or vegetables), simply move the pan to the cooler, indirect heat side of the grill. You control the temperature by moving the pan, not just turning a knob.
Every handle will be dangerously hot. I keep a thick, dry grill mitt dedicated to cast iron use on my apron. Never use a wet towel or pot holder, as the steam can burn you. Assume the handle is always hot, even after you move the pan off the fire.
The direct, radiant heat of a grill makes cast iron perfect for techniques that need a fierce, steady sear or a touch of smoke. Think of putting a perfect crust on a steak or using a Dutch oven with the lid on to gently bake a dessert with a subtle smoky flavor, without a single recipe required.
Handling Common Grill Cooking Issues
Things happen. Here’s how to handle the most frequent grilling puzzles.
If food is sticking, the cause is almost always one of two things: the pan wasn’t hot enough before adding oil and food, or you didn’t use enough oil. Don’t try to force food loose. Let it cook and release naturally. If it’s truly stuck, move the pan to indirect heat, let it cool slightly, then carefully work it free.
Temperature control varies by grill type. On a charcoal grill, control heat by piling coals for direct zones and leaving areas bare for indirect. On a gas grill, you control by burner knobs, but remember, the iron itself holds and distributes heat, so adjustments take a minute to register.
Seeing a lot of smoke after you add oil? A little is normal. A billowing cloud often means your grill (and pan) are simply too hot, or some of your seasoning layer is burning off. Don’t panic. Move the pan to indirect heat immediately to let the temperature come down. Your pan’s base seasoning is likely fine, and you can touch it up later.
How to Clean Cast Iron After Grill Use
Post-grill cleaning is non-negotiable, but rushing it is a mistake. Never put a piping hot pan under cold water.
Let your cookware cool down on a heat-safe surface until it’s warm to the touch. You should be able to comfortably hold your hand near it. This prevents thermal shock and makes handling safer.
Your cleaning ritual is simple. Use hot water and a stiff brush or a dedicated pan scraper. For most messes, this is all you need. Modern, mild dish soap is perfectly safe for a well-seasoned pan and helps cut through grill grease. Just rinse it all off.
For stubborn, baked-on bits from the grill’s high heat, the salt-scrub method is your best friend. While the pan is still warm, put a tablespoon of coarse kosher salt in it with a drop of water or oil to make a paste. Scrub firmly with a paper towel or cloth. The salt acts as a gentle abrasive that lifts gunk without harming your seasoning.
The Non-Negotiable Dry and Protect Step
This step is more critical after grilling than after any other cooking. Grills are humid environments, often left outside, and that moisture loves to find bare iron.
After rinsing, dry the pan immediately and thoroughly with a towel. Then, place it back on your stovetop or on a warm part of your (turned-off) grill for a few minutes. This drives off every last bit of invisible water. I do this with my #8 skillet every single time.
Once the pan is completely dry and slightly warm, apply the tiniest, thinnest coat of oil all over it, inside and out, with a paper towel. Then, use a clean paper towel to wipe it all off again, as if you made a mistake. This leaves a microscopic protective layer.
This final oil coat stops surface rust from forming and maintains your seasoning after the extreme heat of the grill, which can dry the metal out. It’s the two-minute insurance policy that keeps your pan ready for next time.
Keeping Your Grill Gear from Rusting
Leaving your cast iron on the grill after cooking is a common mistake. I’ve seen friends do it, and I’ve done it myself on a busy day. The problem is simple: your grill is a rust incubator. It’s humid, exposed to rain and morning dew, and often made of materials that themselves can rust and transfer that to your pan.
Your cast iron gear should always live indoors, in a dry cupboard or on the stovetop, not outside on the grill. Treat it like any other valuable kitchen tool you wouldn’t leave in the rain.
After you finish grilling, let the pan cool down enough to handle. Then, take it inside for its normal cleaning routine for cast iron – hot water, a gentle scrub, a thorough dry, and a thin coat of oil if your seasoning is newer.
If you know you won’t be using a piece for several weeks, give it a little extra attention. After cleaning and drying it, do a quick visual check for any dull spots in the seasoning. Wipe it all over with the tiniest amount of oil on a paper towel, as if you’re trying to remove all the oil. This ultra-thin protective layer is your best defense against surprise rust during storage.
Recommended Cast Iron for Your Grill
You can use almost any piece on the grill, but some are truly made for the job. Think about the function you need, not just the brand name.
The All-Purpose Skillet
Your standard 10-inch or 12-inch skillet is the MVP. It’s perfect for anything that might fall through the grates: vegetables, delicate fish, smash burgers, or even breakfast. Look for one with a flat bottom for stable contact with the grill grates and a helper handle opposite the main one. That small second handle gives you much better control when maneuvering a hot, heavy pan over open flames.
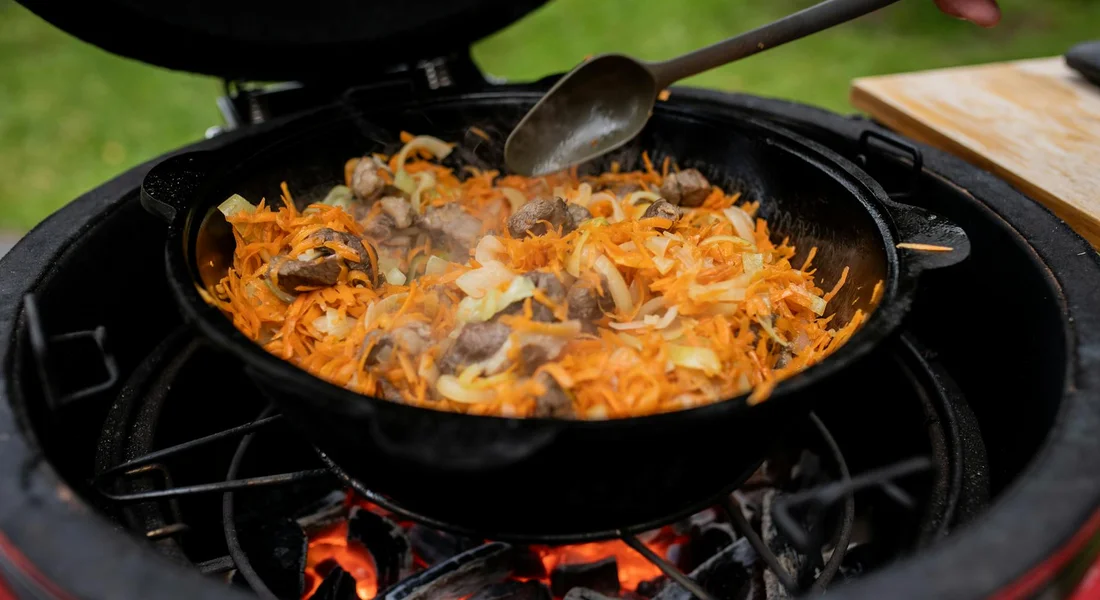
The Heavy-Duty Dutch Oven
A cast iron Dutch oven with a tight-fitting lid transforms your grill into an outdoor oven. It’s the ultimate tool for braising meats or baking bread with that signature smoky flavor you can’t get indoors. The thick walls and heavy lid create an incredibly even, steady heat environment ideal for slow cooking.
Dedicated Grill Grates & Presses
For pure grilling performance, a set of cast iron grill grates that sit over your existing ones will give you superior sear marks and heat retention. A cast iron grill press is another single-use champion. It weights down burgers, steaks, or chicken for maximum contact with the heat, ensuring a perfect, crispy sear with those classic grill lines. To explore the full range of cast iron press designs, see our complete guide on using different types of cast iron presses. This guide explains how each design changes contact and heat for better searing results.
Skillet vs. Grill Pan: A Quick Comparison
You might wonder about using a grill pan (the kind with raised ridges) on an actual grill. It works, but it’s often redundant. The grill’s grates already create the marks. A flat-bottomed standard skillet is generally more useful on a grill because it gives you a full cooking surface for sauces, onions, or anything you don’t want to fall through. Save the ridge pan for your indoor stovetop.
Common Questions
How do I care for dedicated cast iron grill grates?
Care is similar to a skillet but with extra attention to the grooves. After cooling, scrub thoroughly with a stiff brush to remove all debris from the ridges. Dry completely over the grill’s residual heat, then apply a whisper-thin coat of oil to the entire surface before storing.
Can I use a cast iron grill press on my charcoal grill?
Absolutely. A cast iron press is ideal for charcoal’s intense, direct heat. Always preheat the press on the grill grates alongside your pan to prevent food sticking. Clean it with hot water, dry it immediately, and give it a light oil coat to keep the seasoning intact.
Is cleaning a cast iron grill pan different after grill use?
The process is the same, but the ridges demand more diligence. Focus on cleaning the grooves where char and grease collect, using a brush or a folded paper towel. The critical post-grill dry and oil step is non-negotiable to protect the seasoning from the grill’s high, drying heat.
Grill-Seasoned Wisdom for Your Cast Iron
Always control the heat when moving your cast iron on and off the grill to prevent sudden temperature changes that can harm the iron. Without fail, clean the pan while it’s still warm, dry it completely, and apply a thin layer of oil before you store it to protect the seasoning. For more cast iron guidance, our site details topics like choosing the right oils for seasoning or fixing a warped pan.
Deep Dive: Further Reading
- r/grilling on Reddit: Cast Iron Pan on Propane Grill
- 5 Tips for Using Cast Iron on the Grill
- Savor the outdoors™ – Lodge Cast Iron
A material science expert by profession, Joseph is also an avid cook. He combines his 10+ years expertise in material science and metallurgy with his passion for cast iron cookware to bring you best hands on advice. His expertise ranges from types of cast iron cookware to best seasoning tips as well as restoration of vintage cast iron utensils. Joe is here to help you solve all your cast iron cookware queries and questions.