
How Do You Season Cast Iron on a Stovetop or Over an Open Flame?
If the idea of seasoning with direct heat seems messy or intimidating, take a deep breath. I season my favorite skillets on the stovetop all the time, and it’s a faster, more controlled way to build a layer than using the oven.
This method puts you in charge, letting you see and adjust the process as it happens. Here’s the practical, step-by-step advice we’ll cover:
- Preparing your pan correctly to ensure the oil bonds properly.
- Managing temperature for a smooth finish on any heat source.
- Doing a final wipe-down to prevent a sticky or tacky surface.
- What to do if you see smoke or uneven patches during the process.
| Method | Best For | Control Level | Speed |
|---|---|---|---|
| Stovetop (Gas or Electric) | Kitchen maintenance, fixing small sticky spots, quickly refreshing a pan after use. | High. You can see and adjust the heat instantly. | Fast. One layer takes 10-15 minutes. |
| Open Flame (Campfire, Grill, Gas Burner) | Outdoor restoration, applying initial seasoning to camp cookware, or when an oven isn’t available. | Low. Heat is uneven and harder to manage. | Variable. Depends on your fire management skills. |
Both methods work on the same simple principle: applying a microscopically thin layer of oil and heating it past its smoke point so it bonds to the iron. The main difference is your environment and control.
Why Use the Stovetop Instead of the Oven?
If you’ve searched for “season cast iron stovetop reddit,” you’ve seen people swear by this method. They’re onto something. While the oven is perfect for building a deep, even base coat on a brand-new or stripped pan, the stovetop has specific strengths for ongoing care.
The stovetop method is dramatically faster for applying a single, maintenance layer of seasoning. You can go from a washed pan to a freshly seasoned one in under 20 minutes without heating your entire kitchen for an hour.
It uses far less energy than running your oven at 450°F or higher for an extended bake. This makes it a more practical choice for weekly upkeep. You also get to watch the polymerization happen in real time, which is useful for learning. The oil will start to smoke, then the surface will transform from wet to dry and change to a deeper color.
Think of stovetop seasoning as a quick touch-up. It’s ideal for fixing a patch where food stuck or for adding a protective layer after you’ve scrubbed a pan clean. For building a foundation on completely bare iron, the oven’s all-around heat is still your best, most consistent bet.
What You Need to Get Started
Gathering the right tools before you start makes the whole process smoother and safer. Here’s exactly what you’ll need and why each item is non-negotiable.
- Your Cast Iron Piece: This seems obvious, but its condition dictates your starting point. A daily driver just needs a refresh, while a rusted find needs more work.
- High-Smoke-Point Oil: This is the foundation of your seasoning. You want a thin, durable layer. My go-to oils are grapeseed, avocado, or refined canola oil. Flaxseed oil is popular but can be brittle for some.
- Paper Towels or a Dedicated Rag: You need something lint-free to apply a microscopically thin layer of oil. I keep a specific cloth in my workshop just for this. Paper towels work perfectly, just avoid the super-flimsy kind.
- A Reliable Heat Source: This is your stovetop-gas, electric, induction, or even a portable butane burner for camping. The method adapts slightly for electric/induction, as I’ll explain.
- A Good Pot Holder or Oven Mitt: Your pan’s handle will get dangerously hot. Have your holder ready before you even turn on the heat.
- Excellent Ventilation: This is the most important safety item. You will create smoke when the oil polymerizes, so turn on your hood fan, open windows, or work outside if you can. Your kitchen should not fill with smoke.
Preparing Your Pan: The Non-Negotiable First Step
You cannot build a good seasoning layer on a flawed foundation. Applying oil to a dirty, rusty, or wet surface is the most common reason seasoning fails to stick, especially when trying to fix or repair cast iron seasoning.
Follow these steps every single time.
- Scrub the pan clean. Use warm, soapy water and a brush or scrubby sponge. For stuck-on bits, coarse salt works as a gentle abrasive. Rinse it well.
- Dry it completely. Wipe it down with a towel, then immediately move to the next step.
- Warm the pan on your burner. Place the clean, towel-dried pan over medium heat for 2-3 minutes. This drives off every last bit of invisible moisture. You’ll see the surface go from matte to completely dry. Let it cool just enough to handle.
If your pan has active rust or thick, flaky old seasoning, stovetop seasoning is not your first step. It’s the final step after a full restoration involving scrubbing, vinegar soaks, or stripping. Think of this method as maintenance and touch-ups, not emergency surgery. For the full context, the complete guide to restore rusty cast iron cookware covers cleaning, seasoning, and repair.
Is Your Pan Ready for Oil?
Before you reach for that bottle, do this quick check. Your pan should pass all three tests.
- Is it bone-dry? After heating, the surface should feel utterly dry to your fingertip, not cool or damp.
- Is it warm to the touch? Not scorching hot, but pleasantly warm. This helps the oil spread thinly and evenly.
- Is the surface sound? Run your fingers over it. It should feel smooth and solid, with no gritty debris, rust dust, or loose seasoning flakes that peel up.
Seasoning adheres best to a clean, sound, and perfectly dry surface, much like a new coat of paint needs a well-sanded and primed wall. If your pan fails any part of this check, go back to the preparation steps.
The Stovetop Seasoning Process: A Step-by-Step Guide
Seasoning on your stove is a fast, focused way to build up a layer on the cooking surface. I do this weekly on my daily driver skillet. It’s perfect for maintenance or fixing a small spot. For a deeper dive that covers seasoning cast iron beyond a skillet, our season cast iron pans dutch ovens complete guide is worth a look. Follow these steps in order.
-
Clean and Dry Completely
Start with a bare, clean pan. Scrub it with soap and water if needed, then dry it with a towel. Place it on a burner over low heat for two to three minutes to evaporate every last bit of moisture. A single drop of water will stop the oil from bonding correctly. Next, season the pan with a light coat of oil to maintain your cast iron cookware. This oil layer bonds as it heats, protecting the surface and helping it develop a natural nonstick patina.
-
Apply a Minuscule Amount of Oil
Pour a teaspoon of a high-smoke-point oil like grapeseed, canola, or refined avocado oil onto the pan. Use a paper towel to spread it over the entire surface, inside and out, including the handle and the bottom. This first application is always too much oil, which is why the next step is non-negotiable.
-
Wipe It All Off As If You Made a Mistake
Take a fresh, clean paper towel or lint-free cloth. Buff the entire pan vigorously, as if you are trying to remove all the oil you just put on. Wipe until no more oil transfers to the towel. The pan should look almost dry, just slightly glossy. This thinness is what prevents a sticky, gummy layer from forming.
-
Heat Until Smoking, Then Cool
Turn your burner to medium or medium-high. Heat the pan until the oil begins to smoke lightly. Keep it at this smoking temperature for about 5 minutes. You’ll see the finish change from glossy to a darker, matte patina. Turn off the heat and let the pan cool completely on the stove. Do not move it while hot.
-
Repeat for a Durable Layer
One cycle creates a very thin film. For a more durable seasoning, repeat the entire process two to three times. Apply the tiny amount of oil, wipe it all off, heat to smoke, and cool. Each cycle bonds a new micro-layer to the last.
How to Season Over a Campfire or Grill
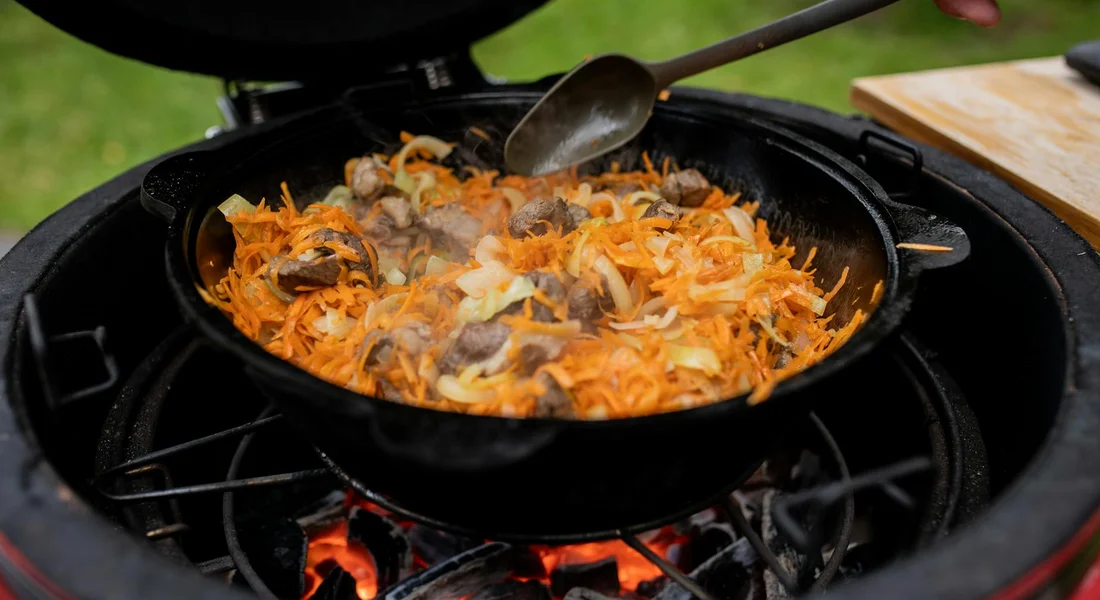
When you’re outdoors or restoring a rustic find, an open flame is your best tool. The principle is the same, but you trade control for brute heat. This method is fantastic for maintaining a camping skillet on a long trip or bringing life back to a flea market find.
Adapting the Core Steps for Open Flame
You’ll still clean, oil, wipe, heat, and cool. The difference is managing the fire. You want steady, medium heat, not roaring flames licking the pan.
- Let your campfire burn down to hot coals, or set your gas grill to medium indirect heat. You need consistent warmth, not extreme hot spots.
- After cleaning and drying your pan, apply and wipe off the oil just like you would indoors. Do this step away from the heat source.
- Place the pan on a stable grill grate over the coals or on the cooler side of the grill. The goal is to heat it evenly until the oil smokes, which usually takes 5-10 minutes. Rotate the pan occasionally with tongs to prevent one spot from getting too hot.
- Once smoking, use heavy-duty tongs or leather gloves to move the pan to a safe, non-flammable surface to cool completely before repeating.
Essential Safety and Tool Tips
Working with open flame requires more caution. Your standard kitchen tools won’t cut it here.
- Use long, sturdy tongs or leather welding gloves. Heat radiates far beyond the pan’s handle.
- Ensure your grill grate or fire ring is stable. A wobbly pan over coals is a spill waiting to happen.
- Keep a squirt bottle of water nearby for flare-ups, but never spray directly onto a hot, oiled pan. Control the fire, not the skillet.
Seasoning over a fire connects you to the history of this cookware, and a well-maintained camp skillet is a trusty companion for any adventure. Proper seasoning and maintenance ensure its longevity and performance.
Troubleshooting Your Stovetop Seasoning
Even with careful steps, you might run into a few hiccups. I’ve seen them all in my own kitchen. Here are the common issues and how to fix them.
My Pan Feels Sticky or Tacky. What Happened?
This is the most common issue. A sticky surface means there was too much oil left on the pan before it polymerized. The oil pooled instead of baking into a hard layer.
The fix is simple: put the pan back on medium heat and let it warm up for a few minutes, then wipe it firmly with a clean, dry towel or paper towel. You’re essentially giving the excess oil one more chance to bond. If it’s still sticky, you may need to heat it a little longer. Next time, remember the “dry wipe” step is non-negotiable.
Why Are There Blotchy or Streaky Spots?
You’ll see dark and light patches, often in rings. This is almost always caused by uneven heat. Your burner’s flame or element might have hot spots, or the pan was not centered.
For a blotchy pan, just apply another whisper-thin layer of oil and do the seasoning process again, making sure to rotate the pan on the burner every minute or two for even heating. Think of it like polishing a car-you need to move the cloth evenly to avoid swirls. Seasoning is the same with heat.
My Kitchen is Full of Smoke. Is This Normal?
Some smoke is normal as the oil reaches its smoke point and polymerizes. A lot of smoke means your heat is too high, or you’re using an oil with a very low smoke point for this method.
Turn down the heat immediately and improve ventilation by turning on your hood fan or opening a window. For stovetop seasoning, I stick with oils like canola, grapeseed, or avocado oil that have moderately high smoke points. If your smoke alarm is sensitive, do this when you can air out the kitchen easily.
Do I Need a Special “Recipe” or Oil Blend?
You might see elaborate mixes of oils and fats touted online. Ignore them. Seasoning is a simple chemical process, not a secret recipe. You especially don’t need to worry about flaxseed oil or any other fancy types.
Success comes from technique-a microscopically thin layer of oil and controlled, even heat-not from a special blend. I’ve seasoned dozens of pieces with plain supermarket canola oil. Fancy blends won’t polymerize better and can sometimes create a weaker, gummier layer.
Caring for Your Newly Seasoned Surface

Once your pan has cooled completely, it’s ready for its next chapter. This first layer is a foundation. Here’s how to treat it right.
The First Cook is Important
You want to reinforce that new layer, not stress it. Start with something simple that uses a good amount of fat.
- Cook some sliced onions or potatoes.
- Fry an egg with a pat of butter or bacon grease.
- Sauté vegetables in oil.
Always preheat your pan and use adequate fat or oil for that first meal; this helps continue the seasoning process gently. Avoid cooking tomatoes or other very acidic foods right away, as they can interact with the fresh, thin layer. If you plan to cook acidic foods like tomatoes in cast iron, our complete guide has the details you need.
Cleaning Your Newly Seasoned Pan
How you clean it after that first cook sets the pattern. You don’t need harsh soap or abrasive scrubbers.
- While the pan is still warm (not scalding), rinse it with hot water.
- Use a gentle brush, sponge, or chainmail scrubber for any stuck bits.
- If needed, a tiny drop of mild dish soap is fine. The myth that soap ruins seasoning is outdated; modern soaps don’t contain lye.
- Dry it immediately and thoroughly with a towel.
Then, place it back on a warm stove burner for a minute to evaporate every last bit of moisture, which is the true key to preventing rust. I do this after every single wash. If you do find any rust, check out how to remove rust from cast iron cookware.
How to Store It
Don’t trap moisture. Make sure the pan is completely dry and cool before putting it away.
- Store it in a dry place, like a shelf or rack.
- If you must stack pans, place a paper towel or a cloth between them to allow air circulation and prevent scratches.
- Never store it sealed in a plastic bag or a damp cupboard.
Remember, the single layer you just added on the stovetop is just the beginning. The legendary, durable, non-stick patina on my favorite vintage skillet wasn’t built in one session; it was built over years of regular cooking, gentle cleaning, and occasional touch-ups like the one you just learned. Your pan gets better every time you use it correctly.
Common Questions
Do I need to apply multiple layers of seasoning in one session?
For a maintenance touch-up, one layer is sufficient. If you are restoring a bare pan or building a more robust base, two to three layers are recommended. Allow the pan to cool completely between each cycle to ensure proper polymerization.
Can I use the same oil I cook with, like olive oil?
You should avoid low smoke-point oils like extra virgin olive oil, as they will burn and create a weak, sticky layer before properly polymerizing. Stick with a dedicated, high-smoke-point oil such as grapeseed or canola for your seasoning process.
How soon after seasoning can I cook with my pan?
You can cook as soon as the pan has cooled to room temperature. For the first meal, choose a simple cook with ample fat, like frying potatoes or onions, to help reinforce the new layer gently. Avoid acidic foods for the first few uses.
Caring for Your Cast Iron Over the Flame
The most reliable stovetop seasoning happens when you apply an impossibly thin layer of oil and heat it until the pan just starts to smoke. If your coating feels sticky, you used too much oil, wipe it out and heat the pan again to polymerize what remains. Science shows that this heat-driven polymerization bonds oil molecules into a durable, non-stick film on the pan. For more on foundational oven seasoning or fixing a tacky finish, explore our other guides.
Relevant Resources for Further Exploration
- How to Season a Cast Iron Pan (It’s Easier Than You Think!)
- r/castiron on Reddit: How to season your skillet: A detailed guide
- How to Season – Lodge Cast Iron
A material science expert by profession, Joseph is also an avid cook. He combines his 10+ years expertise in material science and metallurgy with his passion for cast iron cookware to bring you best hands on advice. His expertise ranges from types of cast iron cookware to best seasoning tips as well as restoration of vintage cast iron utensils. Joe is here to help you solve all your cast iron cookware queries and questions.