How Do You Use a Cast Iron Tawa for Perfect Flatbreads and Dosas?
Is your cast iron tawa causing your flatbreads to stick or cook unevenly? The secret to perfect dosas and rotis lies not in a recipe, but in how you prepare and care for your pan’s seasoned surface.
Drawing from my own workshop experience, this guide will walk you through the key steps to transform your tawa into a reliable kitchen workhorse.
- How to build and maintain a slick seasoning layer that naturally prevents sticking
- The simple heat control technique for even cooking without hot spots
- My go-to method for cleaning that protects your patina after every use
Why a Cast Iron Tawa Works for Flatbreads
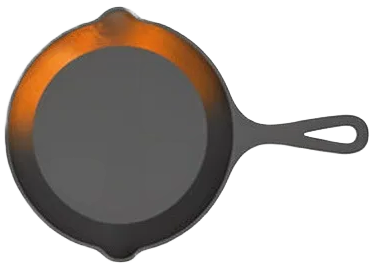
Before we talk about how to use it, let’s look at the tool itself. A tawa is a flat, slightly curved griddle, not a deep skillet with sides. That broad, shallow shape is the first secret to success.
It gives you a vast, uninterrupted cooking surface. You have room to spread a delicate dosa batter paper-thin or to cook multiple rotis at once.
The magic of cast iron for this job is its steady, even heat retention, which eliminates frustrating hot spots that can burn one part of your bread while leaving another undercooked. Once your tawa is properly heated, it stays at that consistent temperature, batch after batch. This thermal mass is what thin pans simply can’t match. That steady heat shapes every dish you cook, from searing to simmering. In the next steps, you’ll see how to leverage that warmth for consistent results.
To see why this matters, let’s compare a cast iron tawa to other common materials.
| Material | Heat-Up Time | Heat Retention | Durability & Care |
| Cast Iron | Slow (5-10 mins) | Excellent (Stays hot) | Extremely durable. Requires seasoning, improves with time. |
| Thin Non-Stick | Very Fast (1-2 mins) | Poor (Cools quickly) | Coating wears out. Can’t use high heat. Disposable. |
| Carbon Steel | Medium (3-5 mins) | Very Good | Durable, needs seasoning. Often lighter and thinner than cast iron. |
| Aluminum | Fast (2-3 mins) | Poor (Uneven heat) | Can warp. Often requires a non-stick coating. |
The comparison shows that cast iron trades a slightly longer pre-heat time for unparalleled cooking performance. You get that perfect, consistent surface your flatbreads need, especially when used for baking in cast iron.
For delicate foods like dosas that can tear, your well-maintained seasoning is the true non-stick layer, not a synthetic coating. A slick, polymerized surface lets you spread batter effortlessly and flip breads with confidence. It’s the foundation everything else is built on.
For most home kitchens, a 12-inch tawa is perfect. If you regularly cook for a crowd, an 18-inch model is a great upgrade. The best part? A simple slab of cast iron works on every heat source, from gas and electric coils to modern induction cooktops.
Your Pre-Cook Ritual: Seasoning and Heat
You might see “pre-seasoned” on the box. Think of that factory seasoning as a base coat. For cooking sticky batters and dry doughs, I always add a few dedicated layers myself. It makes all the difference.
How to Use a New Cast Iron Dosa Tawa: The Initial Seasoning
Here is my simple, foolproof method for that initial oven seasoning.
- Wash the tawa with warm, soapy water to remove any factory dust or residue. Dry it completely.
- Place it in a cold oven, then set the oven to 450°F (230°C). Let the tawa heat up with the oven for about 15 minutes.
- Using tongs and a folded paper towel, apply a tiny amount of a high-smoke-point oil (like flaxseed, grapeseed, or avocado) to the entire surface.
- This is the critical step: take a fresh, clean paper towel and wipe the tawa as if you made a mistake and are trying to remove all the oil. You want the thinnest, barely-there film. Any excess will bake into a sticky spot.
- Bake it upside-down on the middle oven rack for one hour. Let it cool completely in the oven.
- Repeat this process 2-3 times. You’re building a strong foundation.
The Daily Pre-Heat Process
This ritual is non-negotiable for perfect results. You must heat the tawa slowly and evenly.
Place your cold tawa on a medium-low burner. Let it warm up for a full 5 minutes. Then, increase the heat to your target cooking temperature (we’ll get to that in a moment) and let it sit for another 2-3 minutes.
To test for the right temperature, flick a few drops of water onto the surface. They should dance and evaporate in 1-2 seconds, not instantly vanish or just sit and boil. This “water droplet test” tells you the tawa is hot enough to sear but not so hot it will scorch.
Do You Put Oil on a Cast Iron Tawa When Making Roti?
This is a common point of confusion. For the actual cooking, a well-seasoned tawa should be dry for most rotis and chapatis. The dough won’t stick to a properly hot, seasoned surface.
Use just a faint, almost dry smear of oil only if you are making a specific oil-brushed paratha or if your seasoning is still very new and you need a bit of insurance. For daily cooking, trust your seasoning and keep the surface dry. If you want to optimize this, our ultimate guide on choosing the best oil for seasoning cast iron can help. It explains which oils and methods work best for a durable finish.
Heat Level Guidance
Different flatbreads need different heats:
- For Roti/Chapati: A steady medium heat. It gives the bread time to puff up without burning.
- For Dosa: A medium-high heat. You need that initial sizzle when the batter hits the pan to set it quickly.
- For Paratha: Start on medium, then adjust. They often need a slightly lower heat as they cook through their layers.
Your tawa’s incredible heat retention means you rarely need to crank the burner to high. Start lower than you think, and give it time.
The After-Cook Cleanup That Protects Your Seasoning
What you do in the ten minutes after cooking matters more than almost anything else. This routine stops food from bonding to your hard earned seasoning and locks in your progress.
Step 1: The Timely Clean
Let your tawa cool from searing hot to just warm. You should be able to comfortably hold your hand near the surface. Pour in some hot water. Use a stiff nylon brush or a dedicated cloth to gently scrub the surface. A little modern dish soap is perfectly fine for a well seasoned tawa, as it cleans grease without damaging the polymerized oil layer underneath. Rinse thoroughly.
Step 2: The Crucial Dry
This is non negotiable. Cast iron and water are enemies. Towel drying is not enough. Place your clean tawa back on a warm burner over low heat. Let it sit for a few minutes until every last bit of moisture, even from the tiny pores in the iron, has turned to steam and vanished. You’ll know it’s done when the surface feels completely dry to the touch and looks matte.
Step 3: The Final Shield
While the tawa is still warm from drying, apply your maintenance oil. Put a few drops of a neutral oil like grapeseed or sunflower on a paper towel. Wipe the entire cooking surface. Then, take a fresh, clean paper towel and buff aggressively. Your goal is to buff away every visible drop of oil. You are not applying an oil coating, you are filling microscopic pores with a protective layer you can’t even see. If the surface looks or feels oily, you used too much. Buff again.
Step 4: Smart Storage
Store your tawa in a dry place. If you need to stack it with other pans, make absolutely certain it is completely cool and dry first. Trapping heat or the slightest moisture between pans is an invitation for rust. I keep mine on a shelf with a simple cloth between them.
Long-Term Care and Troubleshooting
Think of your tawa’s seasoning like the paint on a well used tool. It’s durable, but it needs occasional touch ups. Learning how to re season your tawa is a core maintenance skill.
When and How to Re Season
You’ll know it’s time for a refresh if your breads start sticking persistently, you see dull, dry patches in the seasoning, or the dreaded orange blush of rust appears. For quick maintenance, the stovetop method is perfect.
- Clean and completely dry your tawa as described above.
- Place it on a burner over medium low heat for 3 5 minutes to warm it evenly.
- Apply the tiniest amount of oil with a paper towel and buff it to an invisible layer.
- Increase the heat to medium. Let the tawa heat until it just starts to smoke, then immediately turn off the heat and let it cool on the burner.
That’s it. You’ve just added a fresh, thin layer of polymerized protection.
Troubleshooting Common Issues
Sticking
If your dough sticks, the problem is almost never the dough. Check these three things first.
- Pre heat: Your tawa must be fully and evenly hot before the food touches it. Give it a full 5 8 minutes on medium low heat.
- Temperature: Too low a heat makes food glue itself to the surface. A proper cooking temperature lets steam form a release layer.
- Seasoning: If your pre heat is good, the seasoning itself may be thin or damaged. A round of stovetop seasoning will often solve it.
Uneven Cooking
Seeing hot spots where bread browns too fast? You’re heating the tawa too quickly. Cast iron heats slowly but holds heat incredibly well. Always pre heat using a “low and slow” method to allow the entire iron mass to come to an even temperature, preventing those frustrating hot and cold spots. That same approach lays the groundwork for properly preheating and seasoning your cast iron cookware for perfect results. When heat is even, your bread browns reliably and your pan’s seasoning improves over time.
Rust Spots
Don’t panic. Spot rust happens, often from a missed droplet of water. Make a paste with coarse salt and a drop of water, or use a 50 50 water and white vinegar solution. Scrub the spot vigorously with the paste or a vinegar soaked cloth. Rinse, dry completely on the stove, and immediately re season that spot using the stovetop method. You are back in business.
Sticky or Gummy Surface
A tacky surface means there is a build up of oil that never fully polymerized. It’s like a half dried coat of paint. To fix it, you need to strip that layer and start fresh.
- Place the tawa in your oven and run the self clean cycle, or heat it in a 500°F oven for an hour. This will turn the gunk to ash.
- Let it cool completely, then scrub off all the ash with soap and water.
- Dry it thoroughly and apply 3 4 new, thin oven seasoning coats from scratch.
I once found a tawa at a flea market so gummed up it felt like syrup. A full strip and re season brought it back to a flawless, slick black finish. Every single one of these problems has a straightforward solution. Your tawa is far more resilient than it seems.
Common Questions
Is a “pre-seasoned” tawa from Lodge or Amazon ready to use for dosa right away?
Think of factory seasoning as a primer coat. For the delicate, sticky task of dosa batter, it is rarely sufficient. I always recommend adding 2-3 thin layers of your own oven seasoning immediately to build a robust, slick foundation that will prevent sticking from day one.
How do I choose between a 12-inch and an 18-inch cast iron tawa?
A 12-inch tawa is the versatile workhorse for most kitchens, perfect for 1-2 rotis or a single large dosa. The 18-inch model is a specialty tool for frequent, high-volume cooking, requiring a larger burner and more storage space. Choose based on your typical crowd, not the occasional feast.
How do I maintain the seasoning if I use my tawa almost every day?
Frequent use, when paired with proper care, actually builds better seasoning. Your daily ritual is key: clean gently with hot water while warm, dry completely on the stove, and finish with a microscopically thin buff of oil. This quick, post-cook maintenance replaces the need for constant re-seasoning.
Mastering the Care of Your Cast Iron Tawa
Your tawa’s performance hinges on a consistent post-use ritual: clean it gently while it’s still warm and apply a whisper-thin layer of oil. This daily practice steadily fortifies the seasoning, creating that slick, non-stick surface perfect for delicate dosas and charred flatbreads. For those times when maintenance needs a reset, exploring how to fully strip and re-season cast iron is a valuable next step.
Related Guides and Information
- Amazon.com: 11-Inch Cast Iron Roti Tawa, Double Handled Cast Iron Crepe Pan for Dosa, Tortillas: Home & Kitchen
- Shop Chemical-Free Enamel Cast Iron Dosa & Roti Tawa
- Cast Iron Dosa Tawa – Vayal Foods
- r/IndianFood on Reddit: Difference between cast iron tawa and dosa cast iron tawa
- Shop Durable Cast Iron and Non-Stick Tawas and Griddles for Cooking
- Prestige Cast Iron Scratch Resistant Round Base Dosa Tawa 30 cm, (Black) Online
Joseph Gerald
A material science expert by profession, Joseph is also an avid cook. He combines his 10+ years expertise in material science and metallurgy with his passion for cast iron cookware to bring you best hands on advice. His expertise ranges from types of cast iron cookware to best seasoning tips as well as restoration of vintage cast iron utensils. Joe is here to help you solve all your cast iron cookware queries and questions.