
How Do You Clean and Maintain Cast Iron Grill Grates and Stove Grates?
After a hearty grill session, your cast iron grates might look like a lost cause. I’ve restored dozens of grates just like yours, and with a few simple tools, you can clean them thoroughly without stripping the seasoning.
This guide covers my hands-on routine to keep your grill and stove parts in top shape:
- The everyday kitchen tools that make cleaning easy
- A step-by-step clean-up right after cooking
- How to remove tough, stuck-on residue safely
- When and how to touch up the seasoning
- Smart storage to prevent rust between uses
Key Takeaways for Iron Grate Care
You can keep your grates in perfect shape by following three simple rules.
- Clean them while they are still warm from use, not stone cold.
- Dry them completely with heat, not just a towel.
- Give them a microscopic coat of oil after every cleaning.
This process is straightforward, and if you ever see a spot of rust, you can always fix it. It is not a permanent flaw. The one absolute rule is to never, under any circumstances, put bare cast iron grates in the dishwasher. The harsh detergent and prolonged soaking will strip the seasoning and guarantee rust.
Why Grill Grates and Stove Grates Need Different Care
While the core principles are identical, your grill grates and your stove’s burner grates live very different lives. This changes what you’re cleaning off and how often you need to do it.
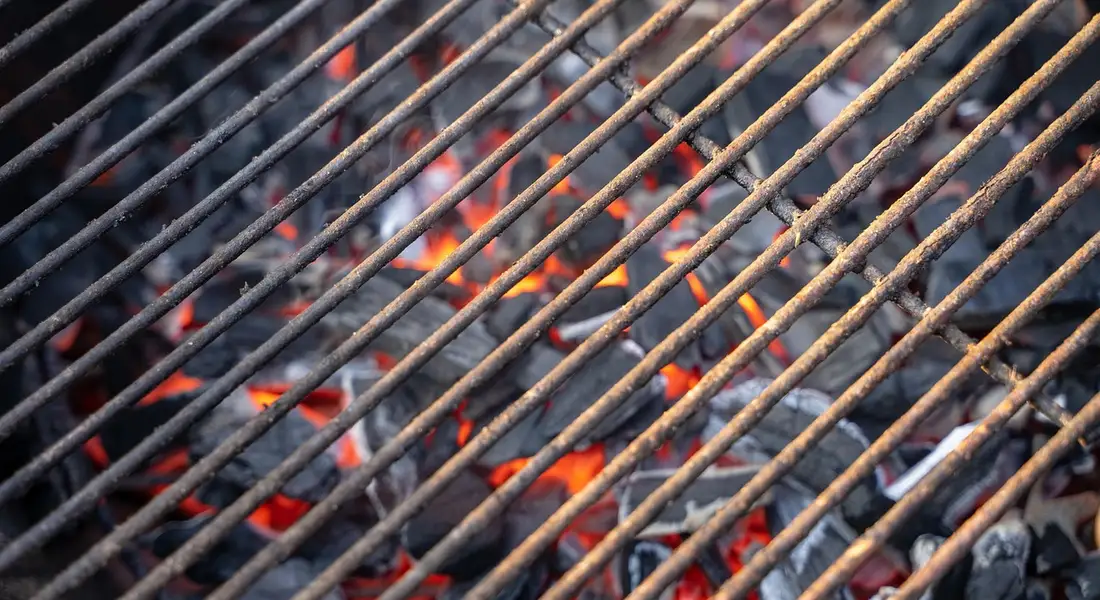
Outdoor grill grates face extreme, direct flame. This intense heat carbonizes food drippings almost instantly, turning them into a hard, crusty layer. Think of it like turning sugar into hard candy. This carbonized gunk is your main enemy on a grill grate.
Stove grates, on the other hand, live with lower, more consistent heat and constant food splatter from pots and pans. The buildup here is less carbon and more polymerized grease combined with stray bits of pasta sauce or boiled-over milk. It’s stickier and can be gummier than grill carbon.
The cleaning techniques for both are similar-you’re removing unwanted buildup-but you’ll likely need to deep-clean grill grates more frequently due to the aggressive nature of the carbonization. Your stove grates might just need a simple wipe-down for weeks if you’re careful.
Your Essential Cast Iron Grate Cleaning Kit
You don’t need a garage full of specialty products to keep your cast iron grill grates in great shape. With a handful of simple, effective tools, you can handle nearly every cleaning job. This is the same basic kit I use for my own grates and stove griddles.
The Core Tools for Everyday Cleaning
These are the workhorses. Keep them together in a small bucket or caddy near your grill or stove for easy access.
- A Stiff Nylon or Brass-Bristle Grill Brush: This is your first line of defense for knocking off fresh, loose food bits after cooking while the grates are still warm. I prefer brushes with a scraper edge on the side.
- A Plastic or Wooden Scraper: For anything the brush can’t dislodge. It’s perfect for prying up burnt-on chunks without risking damage to your hard-earned seasoning. A putty knife from the hardware store works just as well as a fancy “grill tool.”
- A Chainmail Scrubber: This is the heavy-duty player for tackling stubborn, stuck-on carbon. It acts like gentle sandpaper, scraping off gunk without harming the underlying polymerized seasoning layer. It’s far superior to steel wool, which can leave behind tiny particles that rust.
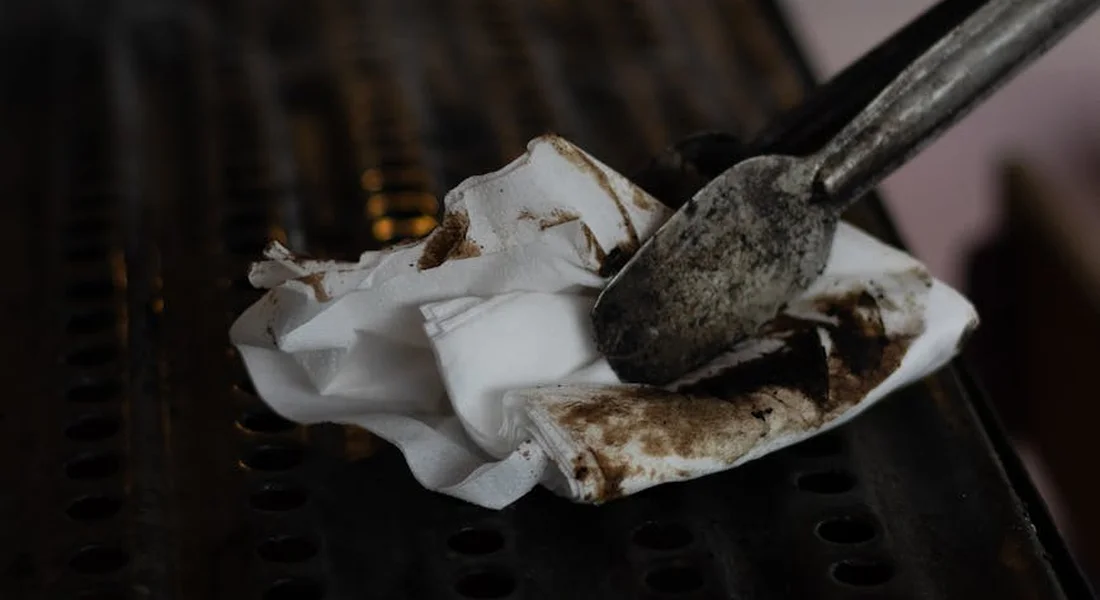
- Lint-Free Cotton Cloths or Paper Towels: You’ll use these for drying, applying thin coats of oil, and doing the final “buff.” Old t-shirts are perfect. Avoid fluffy towels that can leave fibers on the rough surface.
- A Bottle of Mild Dish Soap: Yes, soap. Modern dish soap is perfectly safe for seasoned cast iron. It won’t strip your seasoning, but it will cut through grease and food residue that hot water alone can’t handle.
Choosing the Right Tool for the Job
Think of your tools like a ladder of aggression. You start with the gentlest option and move up only as much as you need to.
| Tool | Best For… | Use When… |
| Stiff Brush | Quick, post-cook cleanup of loose debris. | The grates are still warm (not piping hot). |
| Plastic/Wooden Scraper | Dislodging larger, semi-stuck food chunks. | You see buildup between the grooves after brushing. |
| Chainmail Scrubber | Scraping off thin, stubborn layers of carbonized gunk. | There’s a dull, black, sticky film that won’t brush off. |
| Soap & Water | Removing oily grease and final residue. | After scraping, or for a periodic deep clean. |
What’s in a Commercial Cast Iron Care Kit?
You’ll see pre-packaged kits that often include a chainmail scrubber, a scraper, a brush, and sometimes a jar of specialty wax or oil. They’re convenient, but not magical.
The tools are usually the same quality you could buy separately. The main advantage is having a matched set designed to work together. The included conditioner is often a blend of oils with a high smoke point, like grapeseed or sunflower. While convenient, a kit is not necessary; a simple chainmail pad and a bottle of your own cooking oil will achieve the same result.
If you do use a kit, follow the same gentle-to-aggressive principle. Use the brush first, then the scraper for chunks, and the chainmail as your final physical cleaning step before washing, drying, and applying the provided oil.
The Basic Cleaning Method for All Grates (After Every Use)
The best time to clean your grates is right after you finish cooking, while they are still warm. Follow this simple three-step routine after every use.
- Brush and Scrape While Warm
With your grill off or stove burner cool, use a stiff bristle brush (brass or nylon) or a dedicated metal scraper to remove loose food bits and char. The warmth makes this much easier.
- Wash with Minimal Soap
Take the grates to the sink. A little modern dish soap is perfectly safe for your seasoning. Use a scrub brush or a non-abrasive pad with warm water. You want to remove grease and any remaining debris.
- Dry Completely
This is the step that stops rust. Towel-dry the grates aggressively. Then, place them back over a medium stovetop burner or on a warm grill for 2-3 minutes. This heat will evaporate every last bit of moisture you can’t see. Fixing and preventing rust on cast iron cookware follows similar principles.
Finish with a quick, thin wipe of a high-smoke-point oil like grapeseed or canola while the iron is still slightly warm to maintain that protective layer. Just a teaspoon on a paper towel is plenty. You’re not seasoning, just giving the surface a quick drink.
How to Clean Cast Iron Grill Grates with Stuck-On Food
Sometimes food gets welded on, and the basic brush-and-wash isn’t enough. Don’t reach for harsh chemicals or power tools. A little more elbow grease with the right materials will save your seasoning.
For cool grates, make a thick paste with coarse kosher salt and a little water or baking soda and water. Scrub the paste into the stuck-on spots with a brush or a crumpled piece of aluminum foil. The abrasiveness of the salt cuts through the gunk without damaging the iron underneath.
If you see surface rust starting, a white vinegar and water soak (1:1 ratio) for no more than an hour can help lift it. After soaking, scrub, rinse, and dry immediately and thoroughly on the stove before applying a light coat of oil.
Never use your oven’s “self-clean” cycle to clean cast iron grates; the extreme, prolonged heat can warp the metal and permanently damage the microstructure of the iron, making it brittle. It’s a sure way to ruin a good piece. Patience and a salt scrub are always the safer choice, especially when cleaning cast iron grates.
How to Remove Rust from Cast Iron Grates
Finding rust on your grill grates can feel like a setback. I’ve been there. The good news is, rust is almost never the end of the line for cast iron. Think of it like a car getting a scratch in the paint. It needs attention, but the underlying metal is still solid and ready for years of service. Rust is a surface problem with a straightforward solution, and dealing with it promptly is the key to preserving your cookware.
The Simple Three-Step Fix
For light to moderate rust, you can often restore your grates in one afternoon. This process is about removing the iron oxide (rust) and then protecting the bare metal with a fresh layer of polymerized oil.
- Scrub with Vinegar or a Mild Abrasive. White distilled vinegar is my first choice for its chemical reaction with rust. Submerge the grates in a 50/50 vinegar and water solution for no more than an hour. For spot rust, you can soak paper towels in the solution and lay them on the affected areas. After soaking, use a stainless steel scrub brush or a piece of crumpled aluminum foil to scrub away the rust. The foil acts as a fine abrasive that conforms to the grate’s shape. For stubborn spots without deep pitting, a paste of baking soda and water can also work well.
- Rinse and Dry Immediately. This step is critical. Rinse the grates thoroughly with clean water to stop the vinegar’s acid from working. Then, you must dry them completely and without delay. I towel-dry mine aggressively, then immediately place them on a hot grill or in a preheated oven (around 200°F) for 10-15 minutes. Any lingering moisture on bare iron will cause “flash rust,” which looks like a faint orange haze, forcing you to start the cleaning process over.
- Re-season. Once the grates are bone-dry and warm, apply a microscopic layer of a high-smoke-point oil like grapeseed, canola, or Crisco. Wipe it on, then use a clean towel to wipe it almost all off, as if you made a mistake. This thin layer is what polymerizes. Bake the grates in an oven at 450°F for an hour, let them cool in the oven, and repeat the oil-and-bake cycle 2-3 times for a strong base coat.
Surface Rust vs. Deep Pitting
Not all rust is created equal. Knowing what you’re dealing with tells you how much work is ahead.
Light surface rust is the most common. It looks like a dusty orange film and often appears after a grill is left uncovered in humidity. It usually comes off with the vinegar scrub described above, revealing smooth metal underneath. This is an easy fix.
Deep pitting is more serious. It looks like small, crater-like holes where rust has eaten into the metal itself. You’ll feel these pits with your fingernail. While pitting requires more elbow grease, it doesn’t necessarily mean the grate is junk, but it does mean the damaged area won’t hold seasoning as well as a smooth surface. To tackle pitting, you may need a more aggressive approach after the vinegar soak, like using a drill with a brass wire wheel (softer than steel and won’t scar the iron) or even fine-grit sandpaper to grind down to solid metal. The goal is to create the smoothest surface possible before you re-season.
Are Cast Iron Grates Dishwasher Safe? The Final Answer.
No, they are not. You should never put bare cast iron grill grates or stove grates in the dishwasher. I know the convenience is tempting, but it’s one of the fastest ways to ruin your iron.
I learned this the hard way years ago with a set of stove grates I was too lazy to scrub. The results were a rusty, patchy mess that took me a full weekend to strip and re-season.
Why Your Dishwasher is the Enemy of Cast Iron
Dishwashers attack your cast iron’s seasoning in three specific ways. Understanding this helps you protect your cookware.
1. Harsh Detergents Strip the Seasoning
Dishwasher detergent is designed to break down grease and baked-on food. Your hard-earned seasoning is, chemically, just a layer of baked-on grease (polymerized oil).The powerful alkaline detergents will actively strip that protective layer right off, leaving the bare metal exposed and vulnerable.
2. Prolonged Soaking Guarantees Rust
Cast iron starts to rust when it sits wet. The dishwasher cycle keeps your grates soaking in hot, steamy water for over an hour. Even “stainless” cast iron will flash-rust under these conditions.By the time the drying cycle starts, the damage is already done, and you’ll open the door to find orange spots blooming on the metal.
3. Intense, Uneven Heat Can Warp Them
This is a less common but real risk, especially with longer, thinner grates. The heating element in a dishwasher gets extremely hot to dry your dishes. Cast iron heats slowly and evenly, which is its strength, but a sudden, intense blast of heat from below can cause thermal shock.This uneven heating can potentially warp or crack a grate, making it sit unevenly on your stove forever.
The Exception: Enameled Cast Iron
Here’s the important contrast. Enameled cast iron grates-those with a hard, glass-like coating-are a different story. The enamel seals the iron completely. Most manufacturers state their enameled pieces are dishwasher safe, as the detergent cannot penetrate the glass coating to reach the iron beneath. Always check your specific product’s care instructions, but you generally get a pass on this one task with enameled iron.
How to Re-Season Your Grill or Stove Grates

Your cast iron grates have a tough job. They face extreme heat, food residue, and often the weather. A strong, fresh layer of seasoning is their best defense. This process isn’t much different from seasoning a skillet, but paying attention to the details for these shapes makes all the difference.
Choosing the Right Oil for the Job
You need an oil that can handle high heat without burning away. The goal is polymerization, where the oil transforms into a hard, slick coating, not to create smoke and ash.
My top choices are:
- Grapeseed Oil: My personal favorite. It has a high smoke point, applies thinly, and builds a very durable finish.
- Avocado Oil: An excellent option with one of the highest smoke points available in kitchen oils.
- Refined Coconut Oil: A great performer. Make sure it’s refined, as unrefined (virgin) coconut oil has a lower smoke point and a distinct scent.
Avoid low smoke point oils like olive or flaxseed oil for this task. They can leave a sticky or brittle layer that flakes off.
Seasoning Method 1: The Oven (Best for Grill Grates)
This is the most thorough method, perfect for getting heat on all sides of intricate grill grates. You’ll need an oven, a baking sheet, and aluminum foil.
- Clean and dry the grates completely. Any moisture or debris will bake into the finish.
- Place a sheet of aluminum foil on a baking sheet to catch any drips. Position your grates on top. If you have an oven-safe wire rack, you can prop them up so air circulates all around.
- Warm the grates in a 200°F (95°C) oven for 15 minutes. This opens the pores of the iron.
- Remove the grates (use oven mitts) and apply a microscopic layer of your chosen oil. Wipe it on, then use a clean paper towel to wipe it all off like you made a mistake. This “dry wipe” is the single most important step for a smooth, non-sticky layer.
- Place the oiled grates back in the oven, upside down if possible. Increase the oven temperature to 450-500°F (230-260°C).
- Bake for one hour, then turn the oven off and let the grates cool completely inside. For a stronger coat, you can repeat the oiling and baking cycle 2-3 times.
Seasoning Method 2: The Stovetop (Best for Stove Grates)
This is a fast, effective method for the flat grates from your kitchen stove. It works because you can apply direct heat.
- After cleaning, place one grate directly over a medium-high burner on your stovetop.
- Let it heat for 3-5 minutes until it’s very warm to the touch. Turn off the burner.
- Using a folded paper towel and tongs for safety, apply a few drops of oil to the grate. Quickly rub it over the entire surface. The residual heat will thin the oil.
- Immediately take a clean, dry paper towel and wipe the entire grate again to remove any visible oil. You should see just a faint sheen.
- Turn the burner back on to medium-high. You will see wisps of smoke as the oil polymerizes. Let it smoke for 5-10 minutes, then turn the burner off and let the grate cool.
- Repeat this process for all sides of the grate (top, bottom, edges) and for each grate in your set.
How to Know Your Grates Are Protected
A well-seasoned grate won’t look like glossy black paint. Instead, it will have a satin or matte black finish that feels smooth to the touch.
The true test is how water behaves on the surface. A few drops of water should bead up and roll around, not soak in or spread out. This hydrophobic quality is your sign that the seasoning is doing its job.
If your grate still looks dry, gray, or rusty in spots, it needs another layer of seasoning. Don’t worry, this is normal, especially for older pieces. I have a set of stove grates that took four thin oven cycles to look and feel uniformly protected. Patience here builds a foundation that makes future cleaning effortless.
Daily Habits to Keep Your Grates in Perfect Shape
Think of your grates and stove parts like a good pair of leather boots. A little regular care prevents the need for a major, painful restoration down the line. The best cleaning happens before food even hits the iron. These simple habits build up over time, creating a nearly non-stick finish that repels gunk. It’s much easier than deep cleaning and restoring grates when they get neglected for months.
Your Post-Cook Ritual
Right after cooking, while the grate is still warm (not scalding hot), is your golden window. Heat makes cleaning easier and sets the stage for protection.
- Wipe with oil after every cleaning. Once your grate is clean and dry, give it a very thin coat of a high-smoke-point oil like grapeseed or avocado. I keep a dedicated rag in a jar with a bit of oil for this. A quick wipe is all it takes.
- Always store in a dry place. Never put a damp grate away in a closed grill or a humid cabinet. Moisture is rust’s best friend. Let it cool completely in the open air after oiling.
- Do a weekly visual check. Once a week, give your grates a quick look-over. You’re checking for any dull, dry spots in the seasoning or the first signs of orange dust (surface rust). Catching these early makes them trivial to fix.
A fast oil wipe on a warm, clean grate is the single most effective thing you can do to build and preserve your seasoning.
A Simple Maintenance Schedule
You don’t need a complex calendar. Your schedule is based on use, not the date. Listen to what the iron is telling you.
If you grill multiple times a week, give the grates a light stovetop re-seasoning every two or three months. This just means heating them on your kitchen burner, applying an ultra-thin layer of oil until it smokes, and letting them cool. For lighter use, you might only need to do this once or twice a grilling season. Curiosity about how often to season cast iron is natural, and understanding the frequency can help maintain your cookware effectively.
Heavy use requires a touch-up every few months, while occasional use might only need one refresher per season. The goal is to reinforce the layer before it wears thin enough for rust to start.
Why This Makes Cleaning Effortless
This routine transforms your relationship with your cookware. A well-maintained, frequently oiled surface becomes slick and polymerized. Stuck-on cheese or sauces release with a gentle scrape instead of a brutal scrubbing session.
You spend less time scraping and more time cooking. Future clean-ups become a simple wipe-down because food residue can’t bond strongly to a well-oiled, smooth layer of seasoning. It’s the difference between cleaning a non-stick pan and scouring a burnt pot.
Preventative care means you’ll rarely need intensive cleaning methods, saving you time and preserving your grate’s finish for years.
Common Mistakes and How to Avoid Them
Even with the best intentions, a few simple errors can undo your hard work. Spotting these mistakes early keeps your grates in top shape.
Putting Grates in the Dishwasher
The high heat, harsh detergents, and prolonged soaking in a dishwasher will strip away your hard-earned seasoning. Your cast iron will come out dull, gray, and completely vulnerable to rust. Hand washing is the only safe method for preserving that protective patina.
Letting Them Air Dry
Water is the enemy of bare iron. Letting water droplets evaporate on their own leaves just enough moisture behind to start the rusting process. You must actively dry your grates every single time they get wet. Take the extra minute to heat them on the stove or in the oven until they are hot to the touch.
Scrubbing Too Hard with Steel Wool
While a small piece of steel wool can tackle stubborn spots, aggressive scrubbing acts like sandpaper. You’re not just removing gunk, you’re scraping off the thin, baked-on layer of seasoning you need. For most cleanings, a stiff brush or scrub pad paired with hot water does the job without damage.
Storing Them Before They’re Bone Dry
This is how mystery rust happens. If you put grates away with even a hint of dampness, that moisture gets trapped. Storing cast iron wet guarantees you’ll find spots of rust before your next cookout. Always confirm they are fully dry and cool before they go back on the grill or into a cupboard.
Common Questions
Is a branded cast iron care kit worth it, or can I use what I have?
A pre-made kit is a convenience, not a necessity. The core tools-a stiff brush, a scraper, and a chainmail scrubber-are what matter, and you can assemble these individually. The key is using the right tool gently and following up with proper drying and a thin coat of your own cooking oil.
As a beginner, how often should I fully re-season my grates?
You likely won’t need to do a full oven seasoning often if you maintain them properly. Focus on the post-clean ritual: after each use, dry the grate with heat and apply a microscopic coat of oil. Only perform a full re-seasoning if you’ve had to strip rust or the surface has become dull and sticky.
Do I need special soaps or oils made for cast iron?
No, you do not. Modern, mild dish soap is perfectly safe for cleaning seasoned iron. For oiling and seasoning, any cooking oil with a high smoke point-like grapeseed, canola, or avocado oil-from your pantry is an excellent and economical choice.
Your Cast Iron Grill and Stove: A Lifetime of Simple Care
Clean your grill grates and stove components while they are still warm, using a brush and a little water. Dry them completely with heat and apply a whisper-thin layer of oil after every use-this routine is what builds lasting protection. This routine also helps season and maintain cast iron grill grates for perfect results. For more on fixing a damaged seasoning or choosing the right oil, I share my workshop-tested approaches in other guides here.
Deep Dive: Further Reading
- r/CleaningTips on Reddit: How to clean cast iron stove top grate? It’s sticky and rough, so my cloth and sponge get caught on it and don’t really clean it
- How to Clean and Season Cast-Iron Stove Grates Without Damaging the Finish
- Foolproof Method For Cleaning Cast Iron Stove Grates – Cleanzen
A material science expert by profession, Joseph is also an avid cook. He combines his 10+ years expertise in material science and metallurgy with his passion for cast iron cookware to bring you best hands on advice. His expertise ranges from types of cast iron cookware to best seasoning tips as well as restoration of vintage cast iron utensils. Joe is here to help you solve all your cast iron cookware queries and questions.