How Do You Keep Pie Crust from Sticking to Your Cast Iron Pan?
That moment when your beautiful pie crust rips because it’s fused to the pan is incredibly frustrating. The good news is that a well-maintained cast iron surface, combined with a few simple steps, makes sticking a problem of the past.
This guide will walk you through the cast iron-specific techniques that ensure a clean release every time:
- Why your pan’s seasoning is the most important factor for non-stick baking.
- How to prepare the pan’s surface right before you add the dough.
- The simple trick for letting your pie cool so it pops out easily.
Why Pie Crust Sticks to Cast Iron (And How to Stop It)
Your cast iron pan’s seasoning is your first line of defense. Think of it like a hard, slick coat of paint. If that coat is thin, patchy, or damaged, sticky dough and sugary fillings will grab onto the bare iron underneath.
The three biggest reasons for sticking are a weak seasoning layer, moisture on the pan’s surface, and simply not using a proper barrier between the crust and the pan. Additionally, even well-seasoned pans can cause food to stick if not cared for properly.
Surface moisture is a stealthy culprit. Even a pan that looks dry can have a thin film of humidity from the air. When you lay dough on it, that moisture gets trapped and acts like glue. This is exactly why a pie crust left in the pan overnight becomes a nightmare to remove. The moisture from the filling slowly migrates through the crust, welding it to the metal.
Sticking works differently depending on your crust. A raw, buttery dough for a fruit pie needs a solid, seasoned surface to slide off. A wet filling like pecan pie is more aggressive. The sugary syrup can seep into microscopic pores in the seasoning and cement itself. A pre baked graham cracker crust is less prone to sticking to the sides, but the buttery crumbs can fuse to the bottom if the pan isn’t prepared right.
How to Prepare Your Cast Iron Pan for Pie Success
Don’t just assume your pan is ready. Give it a quick check and tune up.
- Wash and dry your pan thoroughly. Feel the cooking surface with your fingers. It should feel slick, like smooth plastic, not rough or gritty.
- If it feels less than perfect, give it a quick seasoning boost. Warm the pan slightly on the stovetop for one minute. Apply a tiny drop of oil and wipe it over the entire interior with a paper towel.
- Here’s the critical dry wipe step. Now, take a clean, dry paper towel and buff the pan aggressively. Your goal is to pretend you’re trying to remove all the oil you just put on. You’ll leave behind a microscopically thin, dry layer that will polymerize perfectly when heated.
- Place the oiled pan upside down in a cold oven. Heat it to 450°F and let it bake for 30 minutes. Turn the oven off and let the pan cool inside.
To preheat or not? For a sturdy quiche or a pie with a raw bottom crust you want to blind bake, a lightly preheated pan (just 5 minutes in a 350°F oven) can help set the crust faster. For delicate custard or chess pies, always start with a cool, room-temperature pan to prevent cooking the filling too quickly from the bottom up. It’s important to know how to properly preheat and bake in a cast iron skillet as well.
Relying on seasoning alone is for the confident. Using seasoning plus a liner like parchment is foolproof insurance. The table below shows the best approach for different situations.
| Crust Type | Key Prep Step | Best Barrier |
|---|---|---|
| Traditional Fruit Pie | Ensure strong, smooth seasoning | Light grease or parchment |
| Pecan Pie / Wet Fillings | Robust seasoning is critical | Parchment paper sling |
| Graham Cracker Crust | No preheating, cool pan | Butter or cooking spray in crust mix |
| Frozen Store-Bought Crust | Thaw first, then check for gaps | Light butter or oil on pan |
Choosing and Applying Your Anti-Stick Barrier
Your fat choice matters. Butter adds flavor but can burn at high heat. Shortening is neutral and has a higher smoke point, making it very reliable for baking. A neutral oil like canola works well too. I keep a dedicated jar of melted shortening and a pastry brush just for greasing pans.
How much should you use? After greasing, the pan should have a slight sheen, not a visible puddle or globs of fat. If you see pools, wipe it out with a paper towel. Too much grease will fry the crust and make it soggy, not prevent sticking. These same guidelines help prevent pancake batter from sticking to the pan. Properly greased, the surface lets the batter set and flip cleanly.
For ultimate security, use a parchment paper sling. Cut a circle for the bottom and a long strip for the sides that overhangs the edge. This creates handles to lift the whole pie out. You do not need to oil the parchment. If using aluminum foil, give it a very light spray of cooking spray, as the dough can sometimes stick to foil.
What to Do If Your Dough Is Already Sticking (Before Baking)
If the dough is sticking to your counter, don’t pull it. Slide a bench scraper or a thin spatula underneath to release it. Use more flour on your surface and rolling pin, but brush off the excess before placing the crust in the pan.
If the crust tears while transferring, don’t panic. Gently press it back together in the pan. If a gap forms, take a small piece of leftover dough, moisten the edges with water, and patch the hole. A good seal prevents filling leaks, which are a major cause of crusts fusing to the pan. For small sticks or tears before baking, a little patching and a confident move forward usually works just fine.
Handling the Crust: From Counter to Pan Without Sticking
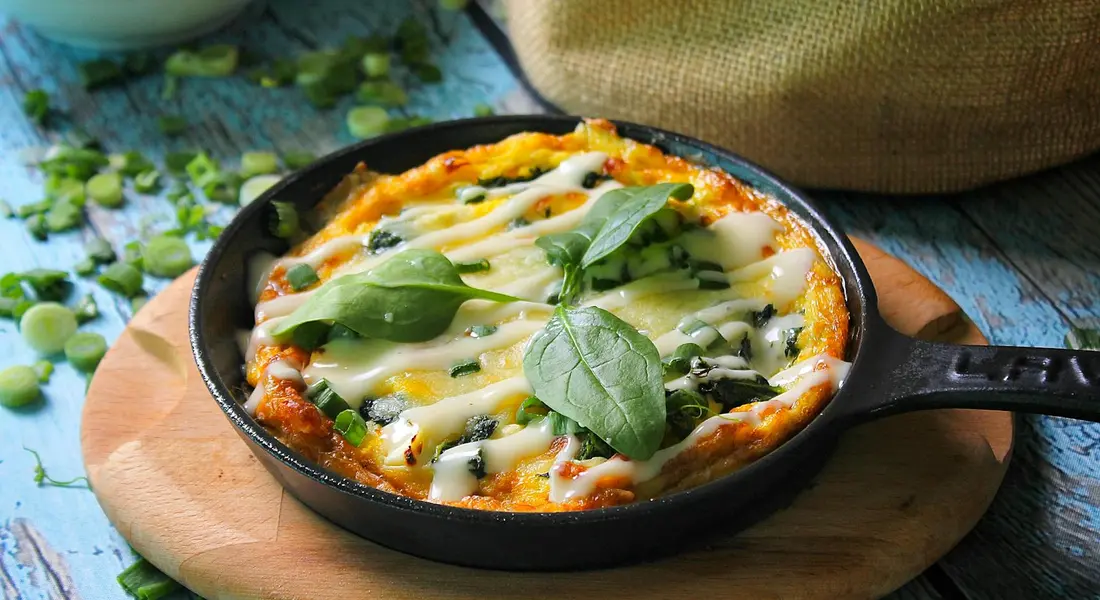
I keep a 10-inch skillet just for pies, and its deep, seasoned walls are perfect for the job. The trick to getting the dough in there is all in the transfer. Stretching the dough to fit is the number one mistake that leads to a stuck, shrunken crust. You can even bake everything in a cast iron skillet—pies, brownies, hash browns, and more.
When you stretch dough, it develops a memory and will fight to snap back during baking, gluing itself to the pan in the process. Your goal is to lay the dough in without any tension. Here’s my foolproof method:
- Roll your dough out on a lightly floured surface to a circle about 2 inches wider than your skillet’s top diameter.
- Gently fold the dough circle in half, then in half again to form a quarter-circle.
- Lift the dough and place the pointed center of the fold into the center of your skillet.
- Unfold the dough carefully. It should drape over the sides with plenty of overhang.
- Without pulling, use your fingertips to gently nudge and settle the dough into the corner where the bottom meets the wall.
That last step is vital. You’re just tucking the dough into place, not dragging it. The overhang is your friend. For crimping, press the excess dough firmly against the rim of the skillet to create a solid seal. This isn’t just for looks; a good seal stops fruit juices from seeping underneath the edge and cementing it to the pan.
How to Save a Pie That’s Stuck in the Pan
It happens to everyone. The pie has cooled, and it won’t budge. Don’t force it. Take a breath and work methodically. Your first tool is patience, and your second is a thin, flexible metal spatula-the kind for frosting cakes is perfect.
Let the pie cool completely. Slide the spatula gently between the crust and the pan, starting at any edge. Work slowly around the entire perimeter, focusing on that critical seam where the side wall meets the bottom. Your goal is to break the adhesive bond of cooled fats and sugars all the way around the pie before attempting to lift it out.
If the spatula isn’t enough, apply gentle, localized heat. Place the skillet on a stovetop burner over the lowest possible heat for no more than 30 to 45 seconds. You just want to warm the pan enough to relax the solidified butter or shortening in the crust. Immediately try the spatula again. The slight thermal expansion often provides just enough release. If you’re baking, grease the cast iron skillet beforehand to prevent sticking. A light coat of oil before heating can help ensure the crust releases cleanly.
Once the pie is free, your pan will need attention. That stuck-on residue has likely compromised the seasoning in spots. You’ll need to clean it thoroughly and then likely apply a fresh stovetop seasoning layer to restore the surface.
Cleaning and Care After Baking Pie
Cleaning after a pie is different than after searing a steak. You’re dealing with sugary, sticky polymers that can be surprisingly tenacious. Aggressive scrubbing can strip your hard-earned seasoning.
Fill the warm (not hot) skillet with an inch of very hot water and let it sit for 10-15 minutes. This loosens the sugars. Use a soft sponge or a flexible nylon dough scraper to gently dislodge the residue. For any stubborn spots, make a paste with a teaspoon of water and a tablespoon of finely-ground salt and use gentle, circular pressure with your fingers or the sponge.
Always dry the pan immediately and completely after washing to prevent flash rust, especially where the seasoning is thin. Place it on a stovetop burner over low heat for a few minutes until all moisture evaporates. While it’s still warm, apply a microscopically thin layer of your preferred oil with a paper towel, then buff it all off as if you made a mistake. This quick ritual maintains the pan’s baked-on non-stick qualities between uses, especially when combined with proper cleaning and maintenance after cooking.
Recommended Products for Cast Iron Baking
The right tools make handling dough and maintaining your pan much simpler. You don’t need fancy gear, just a few purposeful items.
- A rigid bench scraper: This is your primary tool for lifting, dividing, and transferring dough from the counter. It gives you clean control without using your warm hands.
- A flexible dough/bowl scraper: Often made of silicone or flexible plastic, this is my favorite tool for gently cleaning sticky, baked-on pie residue from my skillet without scratching.
- A silicone pie sling or wide jar lifter: If you’re nervous about removal, one of these can help lift a whole pie out after you’ve loosened the edges. It provides support for the delicate bottom crust.
For your cleaning kit, dedicate a small jar of finely-ground salt (like popcorn salt) for abrasive cleaning. Its small crystals are effective yet gentle on seasoning. For oil, if this pan is used primarily for baking, consider a pure, food-grade mineral oil. It polymerizes well at baking temperatures and is flavor-neutral, so your next peach pie won’t taste like yesterday’s bacon. This approach supports cleaning, seasoning, and maintaining your cast iron skillet. Keep at it for a skillet that lasts.
Common Questions
Can I leave a pie in my cast iron skillet overnight?
Never. Moisture from the filling will migrate and permanently glue the crust to the pan, risking severe damage to your seasoning when you try to remove it. Always transfer the pie to a different plate for storage once it has fully cooled.
My pie crust always sticks to the rolling pin. Is that a pan issue?
No, that’s a surface prep issue on your counter. A well-floured surface and a clean, smooth rolling pin are essential. Think of it as maintaining all your tools with the same care as your cast iron-proper upkeep prevents problems.
I see tips online about using butter or spray. What’s best for the pan’s seasoning?
Use a fat with a higher smoke point, like shortening or a neutral oil, to avoid burning and creating a gummy residue on your seasoned surface. The key is applying a microscopically thin layer; excess grease will polymerize into a weak, sticky coating that defeats the purpose.
Cast Iron Care for Nonstick Pie Baking
Your best defense against sticking is a properly preheated cast iron pan, as the even heat sets the crust quickly before it can adhere. Follow this by applying a whisper-thin coat of oil to the hot surface, which polymerizes during baking to form a release layer. My other articles on building a durable seasoning from scratch and cleaning after sugary pies can help you maintain that perfect surface.
Related Guides and Information
- The Complete Guide to the Perfect Pie Crust (With Pictures!) – Lodge Cast Iron
- How to Keep Food From Sticking to Cast Iron – Lodge Cast Iron
- The New Piece of Cast Iron Cookware You Absolutely Need – Especially If You’re a Lover of Flaky Pie Crusts
Joseph Gerald
A material science expert by profession, Joseph is also an avid cook. He combines his 10+ years expertise in material science and metallurgy with his passion for cast iron cookware to bring you best hands on advice. His expertise ranges from types of cast iron cookware to best seasoning tips as well as restoration of vintage cast iron utensils. Joe is here to help you solve all your cast iron cookware queries and questions.