
Can You Season Cast Iron with Olive Oil? A Complete Guide
You’re probably eyeing that bottle of olive oil in your kitchen, wondering if it’s the secret to a slick, non-stick finish on your skillet. Yes, you can season cast iron with olive oil, but it requires a careful approach to avoid a sticky or weak layer.
Based on my time restoring and cooking with cast iron, here’s what we’ll cover:
- The science behind why olive oil behaves differently than high-smoke-point oils.
- A detailed, safe method I use for seasoning with olive oil on my own pans.
- How olive oil seasoning compares to using oils like flaxseed or canola in the long run.
Key Takeaways
You can use olive oil on your cast iron, but you need to know its limits. Using the right oil makes the difference between a slick, durable finish and a sticky mess.
- Olive oil works for a quick stovetop touch-up but fails for a full oven seasoning. Its low smoke point means it can’t handle the prolonged, high heat needed to build a strong base layer.
- Olive oil often creates a tacky or gummy coating. When the oil doesn’t fully polymerize, it leaves a residue that attracts food and dust instead of repelling it.
- For a durable, non-stick foundation, oils like grapeseed, sunflower, or flaxseed are superior. They have higher smoke points and polymerize into a harder, more resilient finish.
- If you use olive oil, apply the thinnest layer possible. Wipe the pan as if you’re trying to remove all the oil. A thick layer is the main cause of a sticky finish.
What Cast Iron Seasoning Really Is
Seasoning isn’t just oil sitting on the metal. It’s a chemical transformation. When you heat a thin layer of oil past its smoke point, it bonds to the iron and changes into a plastic-like coating. This process is called polymerization. Understanding the chemistry of cast iron seasoning reveals how polymerization forms a durable, non-stick surface. The coating grows stronger with proper seasoning as more polymerized layers build up.
The Paint Analogy: A Hard Finish vs. Sticky Syrup
Think of a perfectly polymerized seasoning layer like a thin, hard coat of enamel paint. It’s smooth, durable, and protects the surface underneath. A poorly polymerized layer, often from using an oil like olive oil at too low a temperature, is like brushing on a layer of syrup. It stays sticky, soft, and picks up every bit of lint from your towel. It just doesn’t polymerize like it should.
The goal of seasoning is always to create that hard, slick “paint,” not the sticky “syrup.”
Why “Smoke Point” is Your Most Important Word
The smoke point is the temperature at which an oil starts to break down and smoke. For polymerization to happen correctly, you need to heat the oil to at least its smoke point, and often a bit beyond.
Extra virgin olive oil has a low smoke point, typically between 325°F and 375°F. Most oven seasoning methods require 450°F to 500°F for an hour. At that temperature, olive oil burns. It breaks down before it can properly polymerize, leaving behind carbonized, gunk that feels tacky.
A successful seasoning session happens when the oil fully transforms at the right temperature, leaving no sticky residue behind.
Where Olive Oil Fits In Your Care Routine
This doesn’t mean you should banish olive oil from your kitchen. I keep a bottle near my stove for cooking. Its lower smoke point is actually an asset for a specific maintenance task.
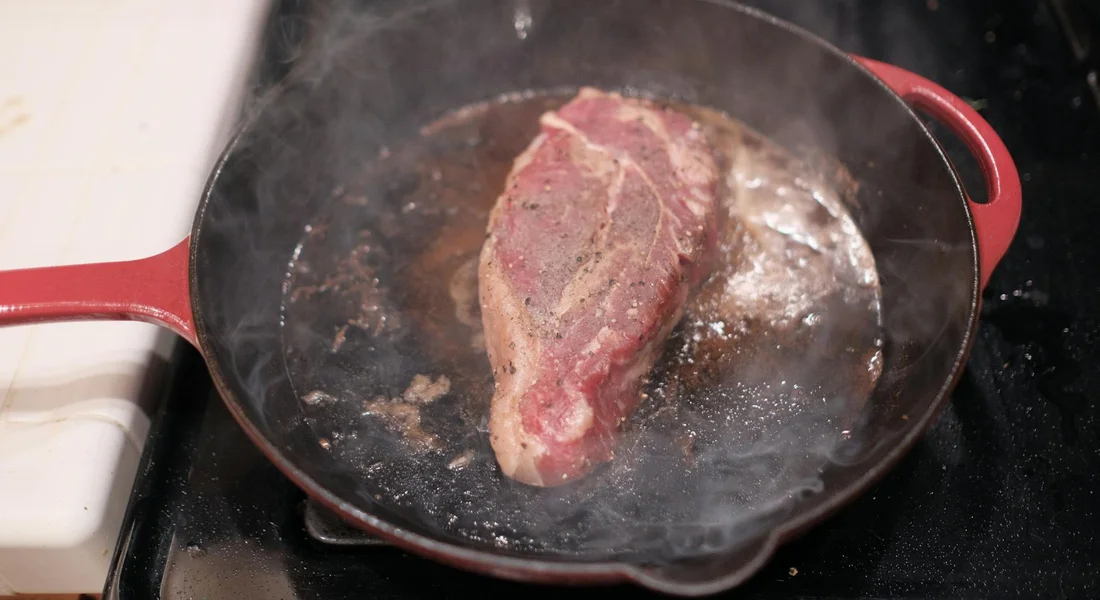
After cleaning and drying a warm pan, I sometimes add a few drops of olive oil and wipe it in for a quick stovetop refresh. I heat the pan just until it starts to smoke lightly, then let it cool. This can help maintain the existing seasoning between uses. It’s a patch job, not a full rebuild.
For building the foundational layers of seasoning on a new or stripped pan, I always reach for a high-smoke point oil. My daily driver skillet has a base of grapeseed oil, and its jet-black, glassy finish is proof of the difference it makes.
The Straight Answer on Olive Oil
Yes, you can season cast iron with olive oil. Technically, it will work. But if you’re asking for my honest, from-the-workshop opinion, it’s not the best choice for building your pan’s primary, long-term seasoning layer. For a deeper look, the ultimate guide to choosing the best oil for seasoning cast iron lays out the oils that perform best and why. It’s a handy reference as you shop.
The core issue is a mismatch between olive oil’s properties and what the seasoning process demands. Seasoning requires heating oil past its smoke point so it can polymerize, transforming from a liquid into a hard, plastic-like coating. Olive oil’s relatively low smoke point makes this transformation messy and inefficient compared to better oils.
The Problem with Smoke Point
Most olive oils you cook with have a smoke point between 375°F and 420°F. The ideal temperature for building durable seasoning starts around 450°F and goes higher.
When you heat olive oil past its smoke point in your oven, it doesn’t just smoke. It breaks down. This thermal breakdown can leave behind a layer that’s weak, tacky, or even gummy. I’ve seen pans seasoned with olive oil that feel slightly sticky to the touch, even after cooling.
Compare that to an oil like grapeseed or avocado oil. Their smoke points are much higher (often over 450°F). When you heat them for seasoning, they polymerize more completely at the right temperature, creating a harder, more resilient finish. Think of it like baking a cake at the correct temperature versus one that’s too low, the structure just turns out better.
When Using Olive Oil Makes Sense
I keep a bottle of inexpensive olive oil next to my stove for one specific cast iron task, maintenance. After I wash and dry a pan, I’ll give it a tiny drop of olive oil, wipe it over the entire surface, and then warm it on the burner for a minute.
This isn’t to build seasoning. It’s a protective step. That vanishingly thin layer of oil stops rust from forming before the pan goes back into the cupboard. For this quick after-cleaning wipe-down, the oil you just cooked with, even if it’s olive oil, is perfectly fine. It’s a maintenance habit, not a building technique.
How to Season Cast Iron with Olive Oil (If You Choose To)
If olive oil is what you have, and you need to season a pan right now, here is the method to follow. The key is fighting its tendency to gum up.
- Start with a clean, completely dry pan.
- Apply a microscopic, almost invisible layer of oil.
- Bake it at a specific temperature and repeat.
Step 1: Start with a Clean, Bare Pan
Your pan must be free of old seasoning, rust, and any grease. For a full restoration, this means stripping it using a lye bath or electrolysis tank. For a new, unseasoned pan, a good scrub with soap and water is enough. Restoring and repairing antique cast iron pans requires extra care in this step.
Dry it with a towel, then place it on a low stove burner or in a warm oven for 5-10 minutes. Any hidden moisture will cause the oil to bead up and create a spotty, uneven finish. The metal should feel warm and completely dry to the touch.
Step 2: Apply a Microscopic Layer of Oil
Pour a small amount of olive oil onto a paper towel. Wipe it over the entire pan, inside and out, including the handle. Now, take a fresh, clean paper towel or cloth and try to wipe every bit of that oil off.
You are not wiping off excess. You are trying to remove it all. What remains in the microscopic pores of the iron is the perfect amount. When you’re done, the pan should look dry and matte, not wet or glossy. If it looks shiny, you have too much oil and it will likely turn sticky.
Step 3: Bake and Repeat
Place the pan upside down on the middle rack of your oven. Put a sheet of foil on the bottom rack to catch any drips. Heat the oven to 425°F. This is just above olive oil’s smoke point, which is the goal.
Bake it for one hour. Turn the oven off and let the pan cool completely inside. This slow cooling is part of the process.
One layer will be very thin and may look bronze or amber. Because olive oil doesn’t polymerize as efficiently, you may need four or five of these thin layers to achieve the darkness and durability that two layers of a better oil would provide. Repeat the apply-wipe-bake-cool process for each layer.
Better Oils and Products for Seasoning
For a tougher, more reliable seasoning foundation, choosing a fat with a higher smoke point makes everything easier. These options polymerize more cleanly and create a harder finish with fewer layers.
Top-Tier Seasoning Oils
- Grapeseed Oil: My personal favorite for a balance of performance and cost. Its smoke point is around 420-450°F, and it builds a remarkably hard, slick layer.
- Flaxseed Oil: It creates a very hard, glass-like finish that looks beautiful. The downside is it can be brittle and prone to flaking over time if applied too thickly.
- Avocado Oil: With a smoke point over 500°F, it’s an excellent high-heat choice. It’s more expensive but very effective.
- Canola or Vegetable Oil: A classic, affordable, and reliable choice with a smoke point well above 400°F. It’s what I used for years before experimenting with others.
A note on tradition: animal fats like lard or tallow were historically used and work very well. They have a moderate smoke point and polymerize into a durable coating. The best cast iron seasoning temperature is typically 25-50°F above your chosen oil’s smoke point, which is easy to achieve with these options.
Convenient Seasoning Products
Several companies now sell products specifically blended for cast iron seasoning. They take the guesswork out of oil selection. A good seasoning oil makes it easier to season and maintain your cast iron cookware over time. Regular oiling helps prevent rust and keeps the surface smooth and ready for cooking.
- Seasoning Sticks/Waxes: These are solid blends of oils and natural waxes (like beeswax). You rub the stick on the warm pan, the wax melts, and you wipe off the excess before baking. They’re clean, simple, and have optimized smoke points.
- Sprays and Pastes: These are usually blends of high-smoke point oils in a convenient form. The pastes often include a mild abrasive for cleaning and oiling in one step.
The main advantage is consistency. The “cast iron seasoning recipe” is already formulated for you in the bottle. The trade-off is cost per use compared to a bottle of basic canola oil. For a beginner or someone restoring many pieces, they can be a great, foolproof tool.
Caring for Your Seasoned Pan
Once your pan is seasoned, whether with olive oil or something else, the job shifts from building to maintaining. Good daily habits protect your hard work.
You can and should use modern dish soap to clean your pan. The old rule about never using soap applied to harsh, lye-based soaps that could strip seasoning. Today’s gentle soaps won’t harm your polymerized oil layer. Using a little soap with a soft brush or sponge is the best way to clean off food residue without damaging your seasoning.
After washing, drying is non-negotiable. I dry mine with a towel and then place it on a warm stove burner for a minute. This ensures all the microscopic moisture in the pores of the iron evaporates.
Then comes the final maintenance step. A very light coat of oil applied after the pan is dry and still warm helps protect the surface from ambient humidity. This isn’t about building new layers, it’s about preservation. Some cooks lean on olive oil for routine maintenance, valuing its mild flavor and easy availability. The key is choosing the right oil and applying a light, even coat to support ongoing care. So, to answer the common question directly: yes, you should oil your cast iron after cooking. It’s a core habit for a rust-free pan.
My routine looks like this:
- Wash with warm, soapy water.
- Dry completely with a towel.
- Warm on the stove to evaporate leftover moisture.
- Apply a tiny drop of oil and wipe it all over, then buff it off like I made a mistake putting it on.
Fixing Common Issues
If you used olive oil for a full oven seasoning and the pan feels sticky or tacky, the oil didn’t fully polymerize. It’s a common result of its lower smoke point.
To fix sticky seasoning, you need to remove the gummy layer and start fresh with a more suitable oil. Scrub the pan vigorously with coarse salt and a dab of oil, or use a chainmail scrubber. If it’s really persistent, a quick scour with fine steel wool will take it off. Once the surface is smooth and matte, wash, dry, and re-season using the oven method with a high-smoke point oil.
Rust is a different issue. If you find rust spots, the process is to strip the rust (using vinegar or electrolysis), scrub the pan bare, and then perform a full re-seasoning from the start. We cover complete rust removal in its own dedicated guide.
Recommended Products
Having the right tools makes maintenance effortless. Here are the categories I keep in my kitchen.
High-Smoke Point Plant Oils
Look for a neutral-tasting oil with a smoke point above 400°F. Grapeseed, safflower, and sunflower oil are excellent choices. Avocado oil has a very high smoke point but can be pricey. The key is refining; refined oils have fewer impurities and polymerize more evenly.
Blended Seasoning Waxes
These are commercial products that blend oils like grapeseed and beeswax. They are formulated for easy application and storage. A good blend should be solid at room temperature, melt easily in your hands, and contain only a few natural ingredients.
100% Lint-Free Cloths
For applying and buffing oil, you need a cloth that won’t leave fibers behind. Look for cloths labeled for automotive or glass cleaning. Old t-shirts work in a pinch, but purpose-made cloths are superior for getting that mirror-finish buff.
Common Questions
What temperature should I use to season with Crisco or vegetable shortening?
Crisco has a smoke point of approximately 360°F to 390°F. Set your oven to 400°F to 425°F-just above that range-to ensure full polymerization without burning. Always apply a whisper-thin layer and bake for one hour, letting the pan cool completely inside the oven.
Are seasoning waxes and sticks better than liquid oils?
Seasoning waxes and sticks offer convenience and a formulated blend for consistent results, making them foolproof for maintenance or beginners. For building a durable, long-term base, I still prefer the control and proven performance of a high-smoke point liquid oil like grapeseed. Your choice hinges on whether you prioritize ease or a hands-on approach.
How should I use a cast iron seasoning spray?
Hold the spray can about 8-10 inches away and use a brief, light mist to coat the pan evenly. Immediately buff the surface with a clean, lint-free cloth until it appears dry and matte-this prevents a sticky, pooled finish. Then bake according to the spray’s specified temperature, typically between 450°F and 500°F, for a complete polymerization cycle.
Stewarding Your Seasoned Skillet
When you use olive oil for seasoning, treat it like a fine wax on wood, buffing it into the iron until the surface looks almost dry before applying heat. This careful approach minimizes gumminess and helps build a serviceable, if delicate, protective layer over time. For deeper knowledge, our guides on fixing sticky seasoning or selecting the right oil for your climate offer practical next steps.
Deep Dive: Further Reading
- r/castiron on Reddit: So what’s the best oil for seasoning?
- Cast Iron Seasoning Oil – Field Company
- What oils should you use for cast iron cooking and seasoning? – Lodge Cast Iron
- Cast Iron Seasoning Oil | Clean, Season, & Protect
A material science expert by profession, Joseph is also an avid cook. He combines his 10+ years expertise in material science and metallurgy with his passion for cast iron cookware to bring you best hands on advice. His expertise ranges from types of cast iron cookware to best seasoning tips as well as restoration of vintage cast iron utensils. Joe is here to help you solve all your cast iron cookware queries and questions.