
Can You Make Perfect Pizza in a Cast Iron Skillet?
You might worry that baking a pizza could damage your skillet’s seasoning or make a sticky mess. I make pizza in my own cast iron regularly, and with a few simple steps, you can get a crispy crust while keeping your pan’s finish intact.
- How to prep your skillet with heat and oil to create the ideal cooking surface.
- Why the high heat of pizza baking affects your seasoning and what to watch for.
- Cleaning methods that remove cheese and sauce without harming the patina.
- My personal tips for maintaining that slick, non-stick layer after pizza night.
Why a Cast Iron Skillet is a Pizza Stone Alternative
You can absolutely use a cast iron skillet instead of a pizza stone. The question isn’t *can* you, but *why* you’d want to. The answer lies in the metal itself. Cast iron is incredibly dense, which means it absorbs and holds a tremendous amount of heat. When you preheat your skillet in a hot oven, it becomes a steady, radiating heat source from below, mimicking the function of a pizza stone or steel.
This heat retention promotes a fantastic crust. While a pizza stone provides a hot surface, a cast iron skillet surrounds your pizza with heat. The heavy walls and base deliver consistent, even heat that minimizes hot spots, helping the bottom and edges of your crust cook uniformly. Think of your skillet as a personal, mini pizza oven with walls, not just a flat cooking slab.
Quick Snapshot: Cast Iron vs. Other Pizza Surfaces
Here’s a straightforward look at how a cast iron skillet compares to other popular tools. This isn’t about which is best, but which properties suit your style of cooking and maintenance. When you talk about cast iron vs. other materials, it mainly boils down to your preferences and needs.
| Tool | Heat Properties | Maintenance & Care | Best For |
| Cast Iron Skillet | Superior heat retention and even heating from sides and base. Heats slower but stays hot. | Requires seasoning to be non-stick and rust-proof. Hand wash and dry thoroughly. | Deep-dish, pan, or thick-crust pizza. Versatile for stovetop-to-oven cooking. |
| Baking Steel | Extremely high thermal conductivity. Heats very fast and transfers heat aggressively. | Simple: scrub with soapy water and dry immediately to prevent surface rust. | Crispy, Neapolitan-style thin crust. Professional-level heat transfer. |
| Ceramic Pizza Stone | Porous, absorbs moisture from dough for a crispier bottom. Can crack from thermal shock. | Never use soap. Brush off crumbs. Must dry completely to avoid absorbing odors. | Traditional home oven pizza. Good for absorbing excess moisture. |
| Perforated Pizza Pan | Allows air circulation for a crisper crust on the bottom. Minimal heat retention. | Dishwasher safe (typically aluminum). No special maintenance. | Quick, thin-crust pizzas with minimal preheating needed. |
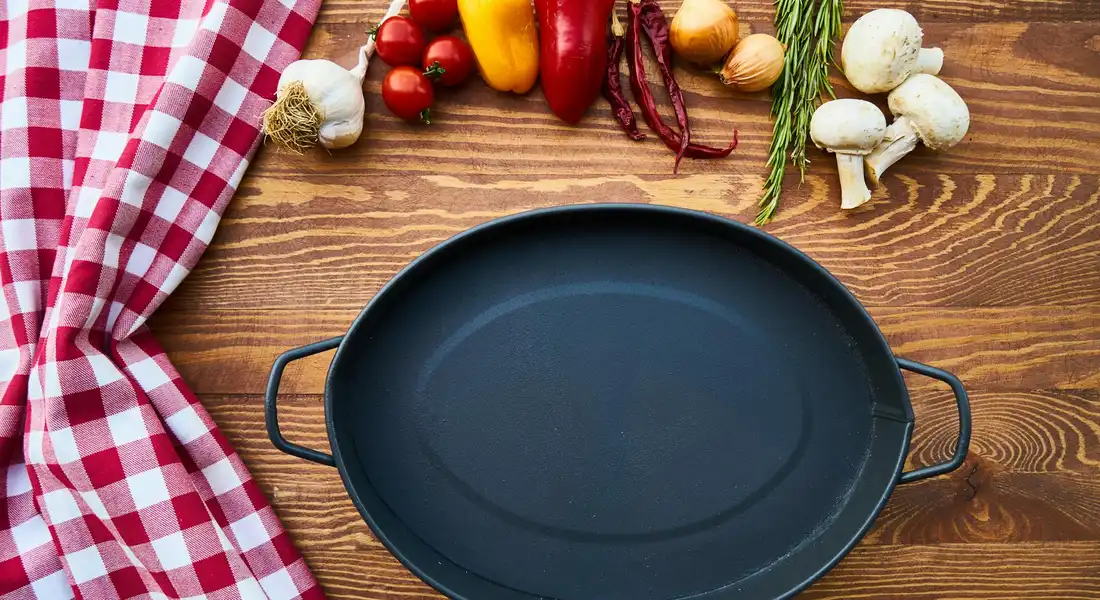
How to Prepare Your Skillet for Pizza Night
Pizza night success starts long before the toppings. The most critical step is preparing your pan. A well-maintained skillet will release that golden crust beautifully. A neglected one might leave you with a stuck, messy dinner. This preparation is non-negotiable for your pizza’s outcome and your pan’s long-term health.
Checking Your Seasoning Before High Heat
Your seasoning is your pan’s non-stick coating. Pizza requires a very hot oven, so you need to ensure that coating is ready for the challenge. Start with a visual check. A pizza-ready skillet should have a dark, semi-glossy to matte black finish. It should not look red, orange, or metallic, which indicates bare iron.
Next, do a touch test. Run your fingertips lightly across the cooking surface. It should feel smooth like a polished stone, not gritty or flaky. It should never feel sticky or tacky. Sticky seasoning is a sign of built-up, unpolymerized oil that can burn and smoke at high pizza temperatures. If your pan passes these checks, you’re in great shape. A smooth, dark, non-sticky seasoning layer is your best defense against sticking and can easily handle the high heat needed for pizza.
The Pre-Pizza Pan Conditioning (A Mini Seasoning Refresh)
Even if your pan looks good, a quick conditioning step adds an extra layer of protection. I do this with my own skillets before any high-heat task. Think of it like applying a fresh, ultra-thin coat of protective varnish before a big job.
Here is a simple stovetop method:
- Warm your clean, dry skillet over low heat for about two minutes.
- Add just a few drops of a high-smoke-point oil (like canola, grapeseed, or avocado) to the pan.
- Using a folded paper towel and tongs, spread the oil over the entire interior surface, including the sides.
- Now, take a fresh, clean paper towel and aggressively wipe the pan out. Your goal is to remove all visible oil. It should look almost dry.
- Continue heating the pan on medium-low until it just starts to smoke faintly, then turn off the heat and let it cool. Your pan is now fortified and ready for the oven.
This process bakes on a micro-layer of fresh seasoning. The key is that invisible, wiped-out layer of oil; a visible layer will gum up, while a properly thin one polymerizes into a stronger shield. This is pan maintenance, not cooking, and it makes all the difference.
The Right Way to Preheat for Pizza
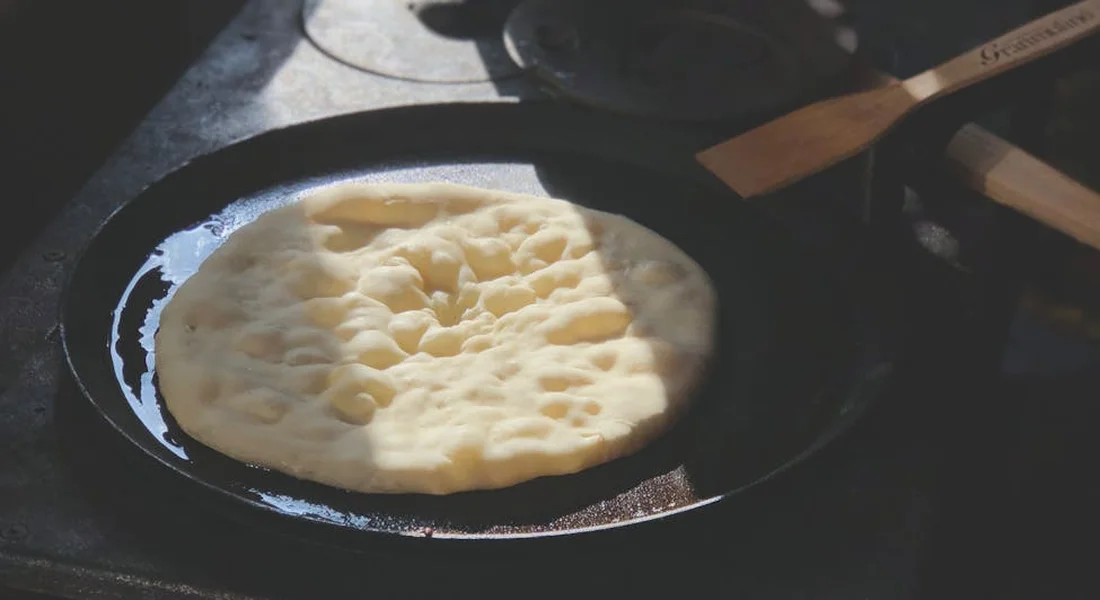
A cold cast iron skillet is a sticky pizza’s best friend. Proper preheating is non-negotiable for that crisp, golden crust and for making sure your creation slides right out. Think of it like searing a steak. You want that instant sizzle when the dough hits the pan to start cooking the bottom immediately.
You have two good options, but the oven method is my go-to for even heating.
- Oven Method: Place your skillet on the middle rack of a cold oven. Set the temperature to your desired baking temp (usually 450°F to 500°F) and let the pan heat up with the oven for a full 45 minutes. This prevents thermal stress.
- Stovetop Method: Place the skillet over low to medium-low heat for 5 minutes. Gradually increase the heat to medium, then medium-high over the next 5-10 minutes. The pan is ready when a few drops of water skitter and evaporate instantly.
The biggest mistake is rushing this step or exposing the pan to extreme, rapid temperature changes. Never put a cold skillet into a blazing hot oven, and don’t take a screaming-hot pan and run it under cold water. That’s called thermal shock, and it can cause your pan to crack. Patience here protects your pan for life.
How Temperature Affects Your Pan (Not Your Dough)
Your pizza dough cares about temperature for rising and browning. Your pan’s seasoning cares about temperature for survival. Seasoning is a polymerized oil layer, a plastic-like coating bonded to the iron. At typical pizza baking temperatures (450°F to 500°F), a well-built seasoning layer simply continues to cure and harden, becoming more resilient. From a chemistry perspective, that coating forms through polymerization and cross-linking of oils on the iron surface. The question of whether seasoning actually bonds cast iron hinges on this polymerization and surface adhesion, a nuanced aspect of the chemistry involved.
This is why a properly seasoned pan is perfect for high-heat pizza. The polymer layer is stable at these temps. I regularly bake pizza in my main 12-inch skillet at 475°F, and the seasoning comes out slicker than ever.
You know your pan is too hot for its seasoning if you see your oil smoking aggressively before you add the dough, or if you notice a bluish, rainbow-like discoloration on the cooking surface. This means the heat is exceeding the oil’s smoke point by a wide margin and can start to break down the polymer bonds. For maintenance, it’s a sign to lower the heat slightly next time.
Cleaning Up After the Pizza Party
Pizza cleanup is where your maintenance skills shine. Unlike searing a steak, pizza leaves behind a tricky combination of caramelized sugars from sauce, melted cheeses, and oils. Letting this residue cool into a concrete-like state is the main challenge. A good cleanup routine turns a potentially difficult job into a simple one and keeps your pan in prime condition for the next pie.
The Post-Pizza Cleaning Protocol
Your goal is to clean the pan while it’s still warm, but not scorching hot. Here is the routine I use for my own pans.
- Let the skillet cool on the stovetop until it’s warm to the touch. You should be able to comfortably handle the handle.
- Add about half an inch of warm water to the pan and place it back on a low heat. Use a flat-edged wooden or silicone spatula to gently dislodge any stuck-on bits. The warm water deglazes the crusty residue.
- Pour out the water and debris. Use a soft brush or non-abrasive scrub pad under warm running water to wipe the surface clean. No soap is needed.
- Dry the pan immediately and thoroughly with a towel. Then, place it on a low stovetop burner for 2-3 minutes to evaporate any last moisture.
- Apply the tiniest drop of oil to a paper towel and wipe the entire cooking surface. This protective coat replaces the oils cooked off during baking.
This simple five-minute routine after cooking is what maintains that legendary non-stick surface for your next culinary project, pizza or otherwise.
Handling Tough, Stuck-On Cheese and Sauce
Sometimes, a corner of cheese fuses to the pan. Don’t panic, and don’t attack it. Harsh metal scrapers, steel wool, or abrasive cleansers will cut right through your hard-earned seasoning. Soaking the pan in soapy water will invite rust. Instead, use these gentle but effective methods.
- Coarse Salt Scrub: While the pan is still warm, sprinkle a tablespoon of coarse kosher salt onto the stuck spot. Use a folded paper towel or a damp cloth to scrub in a circular motion. The salt acts as a gentle abrasive that won’t hurt the seasoning.
- Gentle Chainmail Use: A chainmail scrubber is excellent for this. Use it under warm running water with very light pressure. Let the chainmail’s loops do the work of scraping, don’t force it.
- Boiling Water Method: For a really stubborn mess, put the cooled skillet back on the heat, add an inch of water, and bring it to a simmer. Use your spatula to scrape the bottom as it softens the burnt-on food.
These methods work with your pan’s seasoning, not against it, preserving that polymerized layer for your next cooking adventure. The key is patience and using tools that clean the food, not the seasoned surface itself (understanding polymerization).
Common Pizza-Making Mistakes (And How They Hurt Your Pan)
Even a great cooking technique can work against your pan’s seasoning if done carelessly. These common errors don’t just risk a soggy crust, they can actively damage the hard-won polymerized layer on your cast iron. Fixing the seasoning when it gets damaged can be a hassle.
Mistake: Adding Dough to a Cold or Oily Skillet
This is the single biggest threat to your pan’s surface. A cold skillet won’t give you that initial sear, so the dough bonds directly to the metal. An oily skillet creates a barrier that prevents the dough from making proper contact with the hot surface, resulting in a gummy, uncooked layer that can fuse to your seasoning.
The solution is to always preheat your dry skillet thoroughly before the dough touches it, creating an instant non-stick effect that protects the seasoning. I preheat my skillet on the stovetop over medium heat for a solid five minutes. The surface should be hot, but completely dry-no pooling oil or butter.
Mistake: Using the Skillet as a Serving Dish
Letting your finished pizza sit in the pan seems convenient, but it’s an attack on two fronts. Tomato sauce is acidic, and given time, that acidity will start to break down the delicate polymerized oil layer. Secondly, the steam from the hot pizza gets trapped against the pan, creating moisture that is the primary enemy of bare iron.
Protect your pan by immediately transferring the pizza to a cutting board, which stops both chemical and moisture damage before it starts. This gives you a head start on the most important step: cleaning your skillet while it’s still warm.
Mistake: Skipping the Post-Pizza Seasoning Touch-Up
Baking a pizza subjects your pan to very high, dry heat for a long time. This can slightly degrade the seasoning, making it thirsty. A good scrub after cooking removes food, but it also microscopically roughs up that protective layer. Skipping the re-oil step leaves the iron vulnerable.
After washing and fully drying the pan, a quick stovetop seasoning session reinforces the layer you just worked hard to preserve. I put my clean, dry skillet over low heat, add a few drops of oil, wipe it all over, and let it smoke for a minute. It takes sixty seconds and makes the next pizza even easier.
Choosing Your Tool: Skillet, Pan, or Griddle?
Your choice of tool changes the pizza style and, more importantly for us, the care approach. Each has pros and cons for maintenance.
- Standard Skillet (10-12 inch): The most common choice. Its sloped sides make it easy to launch and retrieve your pizza. Seasoning care is straightforward, as the entire cooking surface is easy to reach and oil. The main concern is ensuring the seasoning on the vertical sides is robust to handle high oven heat.
- Deep Skillet or Chef Pan: Great for deep-dish or Detroit-style pizza with thicker crusts. The care is identical to a standard skillet, but you must pay extra attention to seasoning the tall, vertical walls, as dough and cheese often bake onto them.
- Cast Iron Pizza Pan (Round or Square): This is a dedicated, flat pan with a very short lip or no lip at all. It promotes maximum crust crispiness. The maintenance challenge is its large, flat surface area, which requires a very even, well-maintained seasoning layer to prevent sticking. Without the deep sides, it’s also easier for oils to pool at the edges during seasoning.
- Cast Iron Griddle/Reversible Grill: The flat side of a griddle acts like a giant pizza stone. Seasoning it is similar to a pizza pan, but often these are larger. You must be diligent about covering the entire surface with a thin coat of oil during maintenance to prevent rust spots.
A note on the “cast iron pizza steel”: This is typically a thick slab of steel, not cast iron. The care principle-keeping it clean, dry, and lightly oiled-is similar, but it lacks the porous surface of cast iron that holds seasoning. It’s more about preventing rust than building a non-stick polymer layer. In true cast iron, seasoning is a chemistry process where oil polymerizes on the surface to form a durable, non-stick coating. That chemistry is why high heat and the right oil choices matter for a good seasoning.
For most home cooks, a well-seasoned standard skillet is the most versatile and easiest to maintain tool for the job. It’s what I use for 90% of my skillet pizzas.
Seasoning and Caring for a Dedicated Cast Iron Pizza Pan
If you invest in a specialized pizza pan, its care follows the same core rules as a skillet, with one major adjustment for scale.
The process of washing, drying, and applying a thin coat of oil is identical. The difference is that a large, flat pan exposes more iron surface at once, making even coverage during seasoning and after-care absolutely critical. A missed spot is a direct invitation for rust.
When I season my large round pizza pan, I place it in the oven horizontally and apply the oil in very thin, consecutive layers, wiping off excess each time. I also make sure to rotate it halfway through the oven process to account for any hot spots. For storage, I never stack other pans on top of its cooking surface, as that can scratch the seasoning. A dedicated pan like this often develops a beautiful, hard seasoning from repeated high-heat use, but it demands your consistent attention to keep it perfect. This approach fits into a complete guide on seasoning cast iron pans and Dutch ovens. In that guide, you’ll find step-by-step instructions and tips to troubleshoot and maintain your cookware.
Common Questions
How does baking pizza affect my skillet’s seasoning compared to using a pizza stone or steel?
It actively cures and strengthens it. A stone or steel is inert; you only clean it. Your skillet’s seasoning is a living layer that improves with correct high-heat use, making it more non-stick with each pizza.
Is the high temperature needed for pizza safe for my pan’s seasoning?
Absolutely, if the seasoning is sound. A properly polymerized layer is stable at typical baking temperatures (450°F-500°F). You only risk damage from extreme, direct flame or by exceeding the oil’s smoke point by several hundred degrees.
What’s the single most important maintenance step after making a pizza?
Applying a whisper-thin coat of oil after cleaning and drying. The high heat dries out the seasoning. This micro-layer re-hydrates and protects the iron, ensuring your pan is ready for its next task. That’s the essence of seasoning and maintaining your cast iron cookware. Regular oiling and proper heating keep your pan in top condition.
Maintaining Your Skillet’s Seasoning After Pizza
Always clean your skillet promptly after baking, while it’s still warm but not hot, to prevent stuck-on cheese and sauce from damaging the seasoning. Thoroughly dry it on a burner and apply a whisper-thin layer of oil before storing to guard against rust. If you’re curious about why this routine matters, our deep dives into seasoning science and proper cleaning methods can offer more insight.
Sources and Additional Information
- The Best Cast Iron Skillet Pizza (30 Minute) – Modern Crumb
- Cast Iron Skillet Pizza Is Crispy and Crunchy on the Outside
- How to Make Cast-Iron Skillet Pizza | Epicurious
- Easy Cast Iron Skillet Pizza (Better Than Takeout!) – Cambrea Bakes
- Easy Cast Iron Skillet Pizza Recipe | So Much Food
A material science expert by profession, Joseph is also an avid cook. He combines his 10+ years expertise in material science and metallurgy with his passion for cast iron cookware to bring you best hands on advice. His expertise ranges from types of cast iron cookware to best seasoning tips as well as restoration of vintage cast iron utensils. Joe is here to help you solve all your cast iron cookware queries and questions.