
How Do You Season and Maintain Cast Iron for Camping Adventures?
Worried your trusted skillet will rust or lose its non-stick magic on a camping trip? I’ve been there with my own favorite Dutch oven, but a little preparation makes all the difference. With the right steps, your cast iron can thrive outdoors just as it does at home.
- How to give your pan a camping-ready seasoning that withstands open flames.
- My go-to method for cleaning cast iron without running water at the campsite.
- The best way to pack and store your skillet to avoid rust and dings.
- What to do if you find rust or stubborn residue after your trip.
Key Takeaways for Your Next Trip
After years of packing my trusty 10-inch skillet into the backcountry, I’ve boiled down success to a few simple, non-negotiable rules. Think of this as my personal field guide, scribbled in the margins of a well-used trail map.
- Always Dry with Direct Heat. A towel is not enough in the damp outdoors. After washing or a morning dew soak, place your pan over your campfire grate or camp stove for a few minutes until it’s hot and bone-dry to the touch. This one habit stops rust before it can start.
- Pack Your Oil. Bring a small, sealed container of your seasoning oil (I use a tiny bottle of grapeseed oil). A quick, thin wipe with oil after every heat-drying session keeps the protective layer fed and resilient against the elements.
- Embrace the Gentle Scrub. Skip the soap if you can. For most camp meals, a splash of hot water and a stiff brush or a handful of coarse salt will clean everything out. Soap can strip away the thin, fresh oil layers you’re trying to build daily.
- Avoid Prolonged Acidic Baths. Cooking a tomato-based stew over the fire for hours on your first trip is asking for trouble. Acidic foods can break down seasoning. Stick to searing, frying, and baking for the first few outings until your pan’s outdoor patina is established.
- Let It Be Imperfect. That spot of ash, the slightly uneven sheen-it’s all part of the story. Outdoor cast iron care is about maintaining function, not achieving a museum-grade finish. A little character is a sign of a well-used camp companion.
Campfire cooking changes the game, but with these habits, your cast iron will not just survive, it will thrive. The goal is to enjoy the meal, not to fret over the pan.
What Makes Outdoor Cast Iron Care Different?
Your home kitchen is a controlled lab. Your campsite is not. At home, you have consistent oven heat for seasoning, a soap dispenser by the sink, and a dry dish towel always within reach. In the field, you’re dealing with three big variables that force a change in strategy.
First is pervasive moisture. Morning dew, humidity, an unexpected rain shower, or even cleaning with lake water introduces constant moisture. This is rust’s favorite invitation. Second is particulate matter: fine ash from the fire pit and grit from the ground love to stick to an oily surface. Third is wildly uneven heat. A roaring campfire creates intense hot spots that can stress thin or weak seasoning layers.
This harsh reality is exactly why a bulletproof preseasoning at home is the single most important step for outdoor success. Think of your at-home seasoning as the primer and base coats on a piece of outdoor furniture. That deep, polymerized foundation protects the metal from the first splash of rain or ash. Trying to build a good base layer from scratch over a campfire is a frustrating battle against the elements. Do the hard work on your kitchen stove first.
This leads to the necessary mindset shift. Perfect, glossy-black, slidey-egg seasoning is a home kitchen ideal. The outdoor ideal is a resilient, non-stick surface that keeps food from sticking and metal from rusting. Your maintenance at camp is less about perfection and more about pragmatic damage control-drying thoroughly, applying a micro-layer of oil, and keeping the foundation intact for your next adventure.
Building a Bombproof Seasoning Before You Go
My camping skillet gets special treatment before it ever sees a campfire. I treat this initial seasoning like putting a primer and several tough topcoats on a piece of outdoor furniture. It needs to withstand more than my kitchen stove ever throws at it. I follow a thorough seasoning process to ensure it’s ready for any cooking adventure.
For the wilderness, I build up at least three to four layers in my home oven. This method heats the entire pan evenly, baking the oil into a hard, polymerized layer all over, including the handle and the outside walls where drips and splatters will hit. Oven seasoning creates a more uniform and durable foundation than stove-top seasoning, which is perfect for the uneven heat of a campfire. Getting the oven temperature and timing right is essential. The next steps will outline the exact process for seasoning cast iron in the oven.
Why Thin and Multiple Beats Thick and Single
It’s tempting to slather on a thick coat of oil to get it done faster. Don’t. A thick layer can’t polymerize properly; it turns sticky, gums up, and is more likely to flake off when you’re scraping a fish filet out of the pan. Think of it like painting a wall. One thick coat will drip, sag, and take forever to dry properly. Several thin, even coats dry hard, smooth, and bond tightly to the surface below. Multiple thin layers create a finish that is far more resilient to scratches, sticky foods, and aggressive campfire cleaning.
Choosing Your Outdoor Seasoning Oil
Not all oils create the same finish. For a camping pan, you want a finish that’s as hard as possible. Here’s how my top choices compare.
| Oil | Best For | Watch Out For |
| Flaxseed Oil | The hardest, most chip-resistant finish when applied perfectly in thin layers. | It’s expensive and can be finicky. If applied too thickly, it’s prone to flaking. Many restorers swear by it, but it’s not forgiving. |
| Grapeseed Oil | A very hard, high-smoke-point finish. It’s my personal favorite for a balance of durability and ease. | It can sometimes leave a slightly sticky residue if not baked long enough. Make sure your oven is fully up to temperature. |
| Canola Oil | A reliable, affordable, and easy-to-find workhorse. It builds a very serviceable, tough seasoning. | The finish might not get quite as glassy-hard as flax or grapeseed, but it’s incredibly dependable and hard to mess up. |
My go-to is grapeseed for my dedicated camp pan. It gives me that extra hardness I want over an open flame.
My Pre-Trip Seasoning Steps
- Clean the pan thoroughly. Wash with warm, soapy water to remove any factory coatings or dust. Dry it completely, then warm it on the stove to evaporate any hidden moisture.
- Apply a microscopically thin coat of oil. Pour a small amount of your chosen oil onto a paper towel. Wipe it over the entire pan, inside and out. Then, take a clean, dry paper towel and buff the pan aggressively. It should look almost dry, with just a faint sheen.
- Bake it upside down. Place the pan upside down on the middle rack of your oven, with a sheet of foil on the rack below to catch any drips. This prevents pooling. Heat the oven to 450°F (or 25°F above your oil’s smoke point) and bake for one hour.
- Cool and repeat. Turn off the oven and let the pan cool completely inside. Repeat the thin coat and bake process two to three more times for your base camp layers.
This process takes an afternoon, but that pan will be a tank, ready for anything your trip throws at it.
Your Camping Cast Iron Care Kit (What to Actually Pack)
Proper care at the campsite is non-negotiable. You can’t just toss your skillet in the trunk and hope for the best. I keep a dedicated kit that lives with my camping gear. Here’s exactly what’s in it and why.
The Essential Item List
- A Small, Sealed Bottle of Oil: The same oil you used for seasoning. A two-ounce bottle is plenty for a weekend. This is for the quick post-clean seasoning touch-up.
- Coarse Kosher Salt: This is your gentle, natural scrubber. A handful of salt and a little water makes a great abrasive paste for cleaning off food without harming your seasoning.
- A Dedicated Cleaning Rag or Paper Towels: I use a few squares of old, worn cotton t-shirt. It’s for wiping, scrubbing with salt, and applying your thin coat of oil. Pack it in a small ziplock bag.
- A Stiff Nylon Brush or Scraper: For dislodging stubborn, stuck-on bits. A small nylon brush is perfect and won’t damage the pan like metal utensils can if you’re not careful.
- A Heat-Resistant Glove or Pot Holder: Your pan handle will be extremely hot during and after cooking. A simple welder’s glove offers great protection and is tough enough for outdoor use.
- A Small Square of Aluminum Foil: Useful as a lid, a makeshift plate to set your hot brush on, or to cover food.
This compact kit addresses every step of campsite care: safe handling, effective cleaning, and immediate protection against rust.
A Look Inside My Kit
Mine fits into a small gallon-sized ziplock bag. The oil bottle and salt are in their own tiny bags to prevent any leaks. The brush, rag, and glove sit together. It’s not fancy, but it means I’m never caught without the right tool. Having a dedicated kit means you’ll actually use it, because the process is simple and everything is right there.
Minimalist vs. Comprehensive: What to Pack
Your kit can scale based on your trip. For a simple overnight car-camping trip, my full list above is perfect. For a longer expedition or if you’re cooking for a group, consider adding a chainmail scrubber for tougher messes and a small container of biodegradable soap for a deeper occasional clean.
If you’re backpacking and every ounce counts, you can strip it down to the absolute core: a tiny bottle of oil, a mini salt shaker, and a bandana that serves as your rag, pot holder, and napkin. The minimalist rule is this: you must always pack a way to clean (salt/rag) and a way to protect (oil) your pan, no matter how far you go.
How to Clean Cast Iron at the Campsite
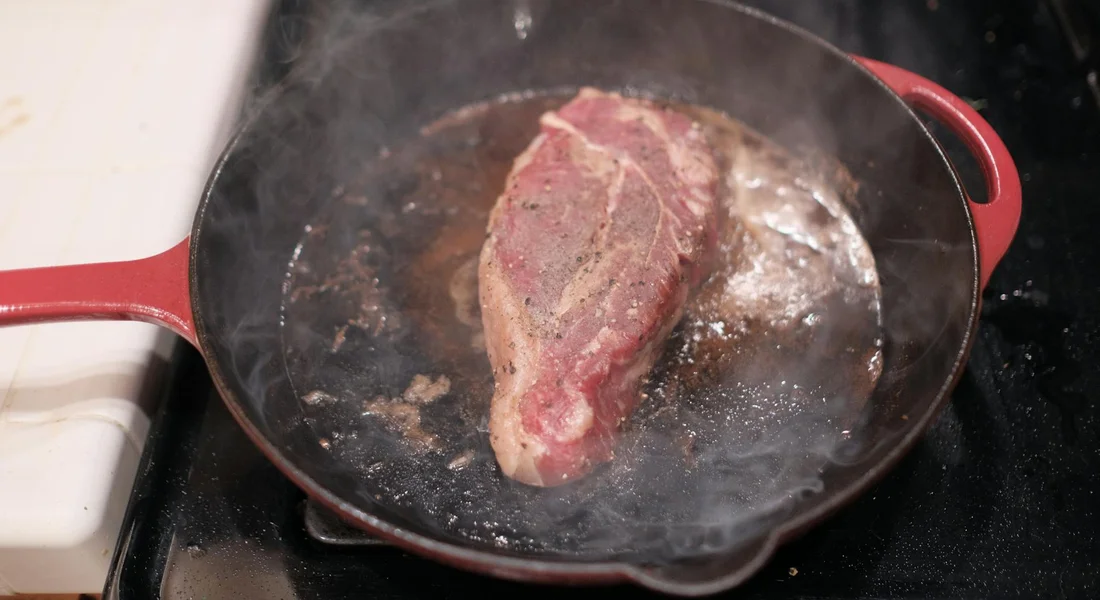
Cleaning your cast iron in the great outdoors is different from your kitchen routine. The goal is the same-preserve that hard-earned seasoning-but you need a simpler, more rugged method. Forget the sink. Your campfire or stove is your best tool. On camping trips over an open fire, use a stable grate and heat gradually to avoid burns and warping. Clean, dry, and lightly oil the pan after cooking to protect the seasoning. It’s important to safely use clean cast iron when cooking over an open flame.
Your Step-by-Step Field Cleaning Method
This method uses minimal water because letting a wet pan sit is the fastest way to rust. The heat-dry step is not a suggestion. It’s your final, non-optional guard against moisture.
- While the pan is still warm (not scalding hot), pour a small amount of hot water into it. Use your long-handled camp scrub brush to loosen any food bits.
- Scrub vigorously. For light messes, the brush and hot water alone often do the trick.
- Immediately and thoroughly empty and dry the pan with a dedicated camp towel or paper towels.
- Place the dry pan back over your fire or camp stove for 2-3 minutes. You want to see all traces of moisture evaporate and the pan become warm to the touch, ensuring it’s completely bone-dry.
- Once off the heat and slightly cooled, apply a whisper-thin layer of your camping oil with a paper towel.
Salt Scrub vs. Biodegradable Soap: A Campsite Comparison
What if water and a brush aren’t enough? You have two good options, and I’ve used both depending on the mess.
- The Salt Scrub: Pour a handful of coarse salt (kosher salt works great) into the warm, dry pan. Use a folded paper towel or cloth to scrub the salt around like an abrasive paste. The salt absorbs grease and lifts debris without damaging the seasoning. Simply wipe it all out when done.
- A Dab of Biodegradable Soap: Modern, mild, biodegradable camp soap is seasoning-safe. If you’re dealing with greasy residue, a single drop on your brush with hot water cuts through it fast. The key is to rinse it completely and never let soapy water sit in the pan. Follow immediately with the heat-dry step.
I prefer salt for everyday messes, but I keep a small bottle of camp soap for those sticky, greasy cleanups. Both work when you finish with heat.
Dealing with Stubborn, Burnt-on Food
Sometimes food gets welded on. Don’t panic and don’t reach for metal tools that can gouge your pan’s surface.
First, try adding a bit more hot water to the warm pan and let it sit for a minute to steam the crust loose. Then scrub. If that fails, use your salt scrub method with extra elbow grease. For the toughest spots, you can carefully use the edge of a flat wooden stick (like a camping spatula) to gently scrape. The rule is to use a softer material than your cast iron-wood, nylon, or salt-to avoid scratching down to the bare metal. For a gentler, baking soda-based scrub that’s safe on seasoned surfaces, you can use a light paste with a pinch of salt. This approach complements the safe scrubbing methods you’ll see covered in the next steps.
A Reassuring Note for Beginners
If this sounds like a lot, it becomes second nature quickly. I ruined my first camp Dutch oven by letting it air dry in the cool night air. I woke up to a speckled pan. That mistake taught me the absolute importance of the heat-dry step. Now, it’s as automatic as putting out the fire. Your pan is tougher than you think. Just get it clean, get it dry, and give it a light oil kiss. You’ve got this.
Handling Rust and Damage in the Field
Even with perfect care, the outdoors is a humid, damp place. Morning dew, an unexpected rain shower, or a damp storage bag can lead to the first signs of surface rust. Spotting it early makes fixing it trivial. Knowing how to identify, prevent, and remove rust on cast iron is essential for maintaining your outdoor furniture.
How to Spot Early Rust
Look for a dull, orange-brown speckling or film on the cooking surface or the pan’s exterior. It often appears as tiny dots or a light, uneven coating. This is most common after a dewy night when condensation forms on the metal. This superficial “flash rust” hasn’t eaten into the metal yet and is completely fixable on the spot. If you see deep, pitted, or flaky reddish patches, that’s more severe, but let’s tackle the common surface rust first.
Removing Light Surface Rust at Camp
You only need two things from your kit: a abrasive scrub pad (like a Dobie pad or even a piece of steel wool if you packed it) and your oil. Do not use sandpaper.
- Pour a small amount of oil directly onto the rusty spot.
- Use your scrub pad to vigorously scrub the area in a circular motion. You’ll see the rust transfer onto the pad and mix with the oil, creating a reddish slurry.
- Wipe out all the rust-and-oil residue with paper towels.
- Now, clean the pan as you normally would with your hot water method to remove any last bits of abrasive grit.
- Heat-dry the pan completely on your fire or stove.
- Apply a fresh, thin layer of oil to the entire pan, focusing on the area you just scrubbed. The heat from drying will help this oil begin to bond.
This process essentially re-seasons that small spot. I’ve done this to my own 10-inch skillet after a wet backpacking trip, and it blended right back in with the surrounding seasoning after a few more uses. Regular cleaning and proper maintenance help the seasoning last. The next steps will cover how to clean, season, and maintain your cast iron skillet.
Minor Damage vs. Major Restoration
Knowing what you can fix in the field versus what needs to wait for home saves frustration.
- Fix It Now (Minor): Light surface rust, minor food sticking that left a thin, patchy residue on the seasoning, or small, shallow scratches. These are maintenance issues. Your scrub pad and oil method will handle them.
- Wait for Home (Major): Deep pitting from advanced rust, a large area of seasoning that has flaked off down to bare, grey metal (more than a couple of inches), or a crack/hairline fracture in the iron itself. Major damage requires a controlled, full restoration-stripping, re-seasoning in a home oven-which isn’t practical or safe to do properly at a campsite. For major issues, just do a gentle field clean to prevent further damage, dry it well, and plan a restoration project when you get back.
When to Seek Professional Help
Most outdoor wear and tear is fixable at home. Some damage isn’t. Recognizing the difference saves you time and preserves your pan.
If your skillet has a severe thermal crack—a visible split running through the wall or base—it’s time to retire it from active duty. This usually happens from extreme, rapid temperature change, like a frozen pan hitting a blazing campfire. A cracked pan is a safety hazard and cannot be reliably repaired; you can assess and repair minor damage to your skillet, but not severe cracks.
Deep, widespread pitting from years of rust is another candidate for the pros. I’m not talking about a few surface specks. I mean metal that looks spongy or cratered. Removing that much rust yourself risks removing good metal, too. A professional with an electrolysis tank can strip it cleanly and evenly, assessing the true thickness of the iron left behind.
A warped cooking surface is a tricky one. If your pan rocks noticeably on a flat surface, heat distribution will be terrible. While some services can mill a pan flat again, this is a major procedure that removes material. For a common skillet, replacement is often more practical.
Finding a good restoration service is about asking the right questions. Look for someone who details their process. They should mention stripping methods like electrolysis or lye baths (not just sandblasting, which is too aggressive). Ask about their seasoning protocol. A good service will use food-grade oils and a proper curing oven, not just spray on a mystery coating. They’re preserving a tool, not applying a quick cosmetic fix.
Checklist: From Packing to Post-Trip Recovery
Think of this as your cast iron camping protocol. Follow these steps, and your pan will come home ready for the next adventure.
1. Pre-Trip Prep
- Inspect the Seasoning: Wash and dry your pan. Does the surface look uniform and dark, or are there light, dry, or rusty patches? If it’s the latter, give it a round of oven seasoning before you pack it. A strong base layer is your best defense.
- Pack Your Care Kit:
- A small bottle of your seasoning oil (like crisco or grapeseed).
- A dedicated camp scrub brush (not your kitchen one).
- A few sheets of paper towel in a zip-top bag.
- A pair of heavy-duty heat-resistant gloves. Handling a hot handle over a fire is different than on your stove.
- Protect for Transport: Tuck your skillet in a cloth bag or wrap it in a kitchen towel to prevent it from banging against other gear and chipping your cookware (or your car’s interior).
2. At Camp: The Field Routine
- Start with Moderate Heat: Whether on a grate or in coals, let your pan heat up gradually. Throwing a cold pan onto roaring flames is the fastest way to cause thermal shock and weaken its seasoning.
- Cook with Confidence (and Fat): Use a little more oil or butter than you might at home. This constant lubrication builds seasoning even as you cook.
- Clean While Warm: After eating, while the pan is still warm (not scorching hot), pour in some hot water. Use your scrub brush to dislodge food bits. Dump the water out away from your camp.
- The Crucial Drying Ritual: This is non-negotiable. Place the cleaned pan back on your heat source for a few minutes until all moisture evaporates and the pan is hot to the touch. I watch for the moment the last steam wisp disappears.
- A Quick Field Seasoning: With your gloves on, apply the tiniest dab of oil to the warm, dry pan. Use a paper towel to spread an impossibly thin coat over the entire surface, inside and out. It should look barely there, not glossy. Heat it for another minute to set it, then let it cool.
3. Post-Trip: The Homecoming
- At-Home Inspection: Back in your kitchen, give the pan a thorough wash with soap and water. This removes any soot, ash, or lingering camp grease you might have missed. Dry it completely on the stovetop.
- Assess and Re-Oil: Under your kitchen lights, check for any dull or dry spots that appeared during the trip. A single, light coat of oil applied after this post-trip wash will protect the metal during storage and reinforce your seasoning. Remember: thin coat, warm pan, wipe it like you’re trying to remove it all.
- Store Properly: Keep it in a dry place. I leave the lid off my camp Dutch oven and will sometimes even tuck a paper towel inside my skillets to absorb any stray humidity. Avoid sealing it in an airtight plastic bin where moisture can get trapped.
Common Questions
What is each item in my camping care kit actually for?
The oil is for a protective wipe after heat-drying. Coarse salt is a gentle, natural abrasive for scrubbing. The stiff brush dislodges stuck-on food, and the dedicated rag applies oil without introducing lint or soap. Each item serves one step in the clean-dry-protect field ritual.
How do I know if my preseasoning is good enough for campfire cooking?
A properly seasoned pan will be uniformly dark and smooth, not sticky or glossy. It should shed water in beads. If your preseasoning feels tacky or looks blotchy, give it another thin oven layer. A strong base should not flake when lightly scraped with a fingernail.
What’s the best way to store my cast iron between trips?
Ensure it is bone-dry and lightly oiled. Store it in a breathable bag or wrap, like cotton, in a dry place. Never seal it long-term in plastic or an airtight container, as trapped moisture will guarantee rust. A paper towel tucked inside can help absorb ambient humidity.
Taking Your Cast Iron into the Wild
The single most important thing you can do is clean and dry your pan completely, then give it a very light coat of oil, every single time you use it in the field. This habit stops rust before it starts and builds your seasoning with every trip. For more on keeping your gear in top shape, explore our guides on proper storage and fixing minor rust.
Sources and Additional Information
- Outdoor & Camping – Lodge Cast Iron
- How to Season Coghlan’s Cast Iron Camp Cooker
- 7 Essential Cast Iron Cooking Tips for Campers (plus recipes)
A material science expert by profession, Joseph is also an avid cook. He combines his 10+ years expertise in material science and metallurgy with his passion for cast iron cookware to bring you best hands on advice. His expertise ranges from types of cast iron cookware to best seasoning tips as well as restoration of vintage cast iron utensils. Joe is here to help you solve all your cast iron cookware queries and questions.