
How Do You Keep Cast Iron Safe on Camping Trips?
Packing your cast iron for the outdoors might make you nervous about rust or a ruined seasoning. I’ve brought my own well-loved skillets camping for seasons, and with the right approach, your cookware will come home ready for the next adventure.
This guide focuses on practical, field-tested methods to protect your iron. You’ll learn:
- How to clean your pan thoroughly without a kitchen sink
- Simple steps to fix a rust spot right at your campsite
- The best way to dry and store cookware in a damp tent or car
- How to maintain that hard-earned seasoning over an open flame
How to Prep Your Cast Iron Skillet Before a Camping Trip
Think of your seasoning as the pan’s armor. A strong, slick layer you build at home is your best defense against rust, sticky food, and panic in the woods. I never pack a pan I haven’t personally vetted.
Start by giving your skillet a thorough inspection under good light. Look for areas where the classic black patina appears dull gray or feels rough to your fingernail. These are thin spots. Also, run your fingers over the surface. If any part feels tacky or greasy, that’s old, unpolymerized oil. Both need attention before you go.
Your pre-trip prep kit is tiny but mighty. You only need three things:
- A small container of a high-smoke-point oil.
- A dedicated rag (not your good kitchen towel).
- A sturdy metal scraper or spatula.
A skillet you’ve prepped is like a seasoned hiker, ready for the trail, while a neglected one is like heading out in sneakers, asking for a blister (or in this case, a rust spot).

Giving Your Seasoning a Health Check
The easiest test is the water bead check. Heat your dry pan on the stove for a minute, then flick a few drops of water onto the cooking surface. If the water balls up and dances like mercury, your seasoning is in great shape. If it just sits there and steams, the layer is weak or non-existent in that spot.
If you find a weak spot, a quick stove-top seasoning session is all you need. Just rub on a microscopically thin layer of oil, heat the pan until it starts to smoke, let it cool, and wipe it once more. This isn’t a full oven session, just a patch-up job. My trusty 10-inch skillet gets this spot treatment before every big trip.
Building Your Portable Maintenance Kit
For your oil, choose one that’s stable and won’t go rancid quickly in a pack. I prefer grapeseed or avocado oil. They have high smoke points for any field repairs and come in small, leak-proof bottles. Avoid flaxseed oil for camping, it’s too finicky.
Your rag is your main tool. An old, clean cotton t-shirt cut into squares is perfect. It’s absorbent, cheap, and you can burn it when it’s too dirty. Use one square for applying oil and another, kept dry, for final buffing. This simple separation prevents you from accidentally gumming up your pan with too much oil.
The Right Way to Cook with Cast Iron Over a Campfire
Campfire cooking is all about managing wild heat to protect your food and your pan’s finish. You’re the conductor, not the passenger.
Flames are your enemy. They lick the pan, creating soot and hot spots that will burn your dinner. Coals are your friend. They provide a steady, even, radiant heat much like your home oven. For 90% of camping cooking, you want a bed of mature, glowing coals, not roaring flames.
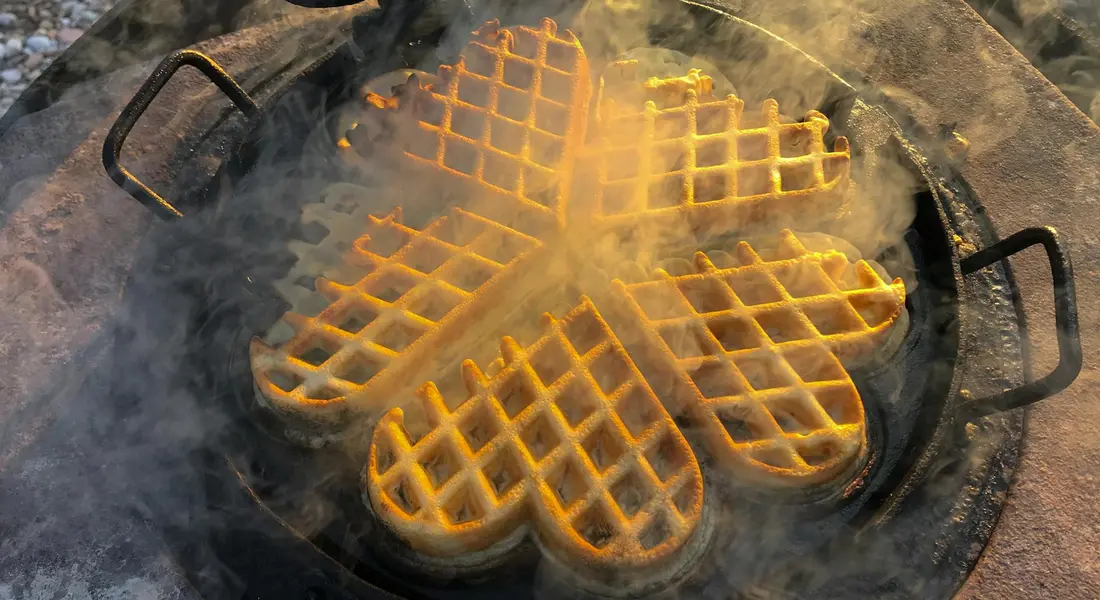
This is especially true for baking, like a camping cake. You need that consistent, all-around heat that only a deep bed of coals can provide. You can even shovel some coals onto the lid for true oven-like baking. Baking over open flames will give you a charred bottom and a raw top every single time.
Never shock a hot pan. If your pan is searing hot from the fire, let it cool down naturally away from the heat. Plunging it into a cold stream or snow can cause it to warp or even crack. Thermal shock is real, and I’ve seen the tragic results.
Finding the Sweet Spot in the Fire Pit
Let your fire burn down until you have a bed of hot, ash-covered coals. Rake them into an even layer. To control the temperature, adjust the pan’s height. Set it directly on the coals for high heat searing. Use a couple of stable rocks or a portable grill grate to lift it 2-3 inches for more moderate, frying heat.
Think of the bed of coals like the heating element in your oven. It radiates heat upward evenly. The more coals and the closer the pan, the hotter it gets. You’re building a controllable outdoor stove.
Managing Soot and Grime During Cooking
A sooty black exterior on your pan is a badge of honor, not a problem. It washes off easily later and doesn’t affect the cooking surface or food. Don’t waste effort scrubbing the outside during your trip.
Your focus should be keeping the cooking surface clean between uses. After cooking, while the pan is still warm, use your scraper to remove any stuck-on food. A little hot water and your rag can wipe it out. Dry it thoroughly, give it a whisper-thin coat of oil from your kit, and it’s ready for the next meal. This stops carbon from building up into a thick, flaky mess that’s hard to clean later.
How to Clean Your Cast Iron Without Running Water
Not having a kitchen sink nearby is the biggest worry for most campers with cast iron. I get it. The good news is, you don’t need one. A proper field cleaning is simpler and faster than you think, and it all starts while your pan is still warm. Outdoors, you can clean with a little water or even dry-sweep—no running water required. These camping tips keep your skillet ready for the next meal.
The key is to build a quick ritual you do right after cooking, using only the heat from your fire, a cup of water, and a simple tool. This method stops food from cementing itself into a stubborn, sticky mess.
The Immediate Post-Cook Scrub
Do this as soon as the food is out and the pan is cool enough to handle with a glove. Acting fast makes everything easier.
- Pour a small amount of hot water (from your kettle or the edge of the fire) into the warm pan.
- Use a dedicated metal spatula or a flat-edged camp scraper to gently dislodge any stuck-on bits. The warm pan and hot water will loosen them.
- Carefully wipe the entire interior with a sturdy paper towel or a dedicated camp rag, using the scraper to help press the towel into the surface.
- Dump the dirty water away from your camp, preferably onto gravel or soil.
That’s often all it takes. You’ve just prevented a cleaning crisis. If the pan looks and feels clean, you can move straight to drying it.
When You Need More Scouring Power
For a more stubborn meal, you need a gentle abrasive. Your campsite provides perfect options.
- Coarse Salt: A handful of kosher or coarse sea salt is my go-to. Sprinkle it in the damp pan and use your rag or a small bunch of dry grass to scrub. The salt crystals act like tiny scrubbers without harming the seasoning.
- Clean Sand or Fine Gravel: From a dry riverbank or a non-muddy path, this works in a pinch. Use it the same way as salt, then rinse and wipe thoroughly to ensure no grit remains.
- Crushed Dry Leaves or Pine Needles: In a forested area, a bundle of dry, crumbly leaves can provide just enough texture for a light scrub.
Always avoid using sharp rocks, gravel with hard edges, or metal brushes from other kits, as these can scratch the iron and damage your hard-earned seasoning. The goal is to clean the surface, not scour it bare.
Drying and Storing Cast Iron to Stop Rust in the Field
This is the single most important step for camp cast iron care. In the cool, damp air of the outdoors, letting a pan “air dry” is an invitation for rust. Moisture will cling to the iron and start its work overnight. This is especially crucial when using cast iron in humid environments.
You must actively drive every last bit of moisture from the pan’s surface and pores before you even think about putting it away.
Forcing Moisture Out with Fire
Your campfire is your best drying tool. After cleaning and wiping the pan, place it near the edge of your fire or over very low coals.
You don’t want it screaming hot for seasoning, just hot enough that you can’t hold your hand on it for more than a second. Leave it there for 2-3 minutes, moving it around to heat evenly. You’ll see any remaining water evaporate instantly.
I learned this the hard way on a dewy morning in the Appalachians. I cleaned my favorite skillet well, wiped it dry, and left it on the picnic table. By sunrise, a fine speckling of rust had already formed. Now, I never skip the fire-dry step.
Packing It Away Safely
Once the pan is completely dry and has cooled down to ambient temperature, you can pack it.
- Let it cool fully. Packing a hot pan can melt gear, start a fire, or trap steam which leads to rust.
- Wrap it in an old towel, a dedicated cloth bag, or even a sweatshirt to protect it from dings and to keep other items in your pack clean.
- For extra protection in humid climates, I first slip my cooled pan into a paper grocery bag before wrapping it. The paper absorbs any stray moisture and keeps the towel cleaner.
This simple system keeps your pan ready, protected, and rust-free for the next meal, no matter where you are.
Fixing Minor Damage on a Camping Trip

A hairline crack or a big chip is a trip-ender for that piece of cookware. Those repairs need a stable workshop, epoxy, and time you just don’t have at a campsite.
The good news is that the most common outdoor problems, surface rust and flaking seasoning, are completely manageable with your camp kit. Your goal isn’t a showroom finish, but to stabilize the pan so you can keep cooking safely until you get home for a proper fix.
Dealing with Fresh Rust Spots
That little orange spot that appeared overnight is just surface rust. It happens with moisture and is no reason to panic. You can stop it in its tracks.
First, scrub the spot aggressively with a handful of coarse salt. The salt crystals are a perfect abrasive. Use a damp cloth or paper towel to grind it into the rust. If you have a small piece of chainmail scrubber, that works even better. This technique is especially useful when removing rust from cast iron cookware.
Wipe out all the salt and rust residue. Now, drying is critical. Hold the pan over your campfire or stove flame for a full minute until it’s uncomfortably hot to the touch. This drives off every bit of moisture. While camping over an open fire, use a stable grate and moderate the flame. A dry, clean pan handles heat better and stays safer around flames, ensuring you can safely use clean cast iron.
Finally, put a tiny drop of your cooking oil on a paper towel and wipe it over the warm, clean spot. The heat helps the oil soak into the pores of the freshly scrubbed iron. For the full post-use routine, see our clean cast iron pan after cooking complete post-use guide. It covers storage and occasional re-seasoning to keep your pan ready for next time.
This is strictly a field patch to prevent the rust from spreading; plan to give the pan a full oven re-seasoning when your trip is over.
When the Seasoning Starts to Flake
Flaking happens, especially with rapid temperature changes over a fire. You’ll see little black flakes in your food or patches of gray, bare metal in the pan.
Your first job is to remove any loose material. Take your metal spatula and gently scrape the flaking areas. You’re not sanding it, just lifting off what’s already detached.
Wipe the pan clean. What you have now is a spot of exposed, vulnerable iron. If you cook on it, food will stick fiercely and rust can start quickly.
The solution is to apply a quick “campfire seasoning” layer right over that bare spot, which we’ll cover next. This creates a temporary, polymerized shield so you can use the pan for the rest of your trip.
How to Apply a Quick Seasoning Layer Over a Campfire
Seasoning over a fire is different from your controlled kitchen oven. You won’t get the same perfectly even, hard-baked layer. Think of it as applying a protective top coat of varnish rather than doing a full paint job.
How do you know your pan needs it? After you clean and dry it, run your fingers over the cooking surface. If it feels dry and chalky, or if it still feels slightly sticky from old oil, it needs a refresh. A well-seasoned pan should feel smooth and almost dry to the touch.
The Campfire Seasoning Method
Grab your oil. High-smoke-point oils like avocado or grapeseed are great, but your regular camping canola or vegetable oil works perfectly.
- Set your cleaned and dried pan over the campfire coals or on your camp stove. You want steady, medium heat.
- Let it heat for 3-5 minutes. The pan needs to be hot enough to polymerize oil, which we’ll test for in a moment.
- Carefully remove the pan from the heat using a glove or towel. Put a half-teaspoon of oil onto a folded paper towel.
- Wipe the oil all over the cooking surface, inside and out. This is the key step. Now, take a fresh, clean paper towel and wipe it all out again, as if you made a mistake and are trying to remove every drop. What remains is the perfect, micro-thin coat.
- Return the pan to the heat. It will likely smoke a bit. Let it heat until the smoking mostly stops, about 2-3 minutes.
- Remove it from the heat and let it cool down naturally. Your quick seasoning layer is done.
This process polymerizes the oil, just like in your oven, but faster and less evenly. It bonds a new protective layer to the iron. From a chemistry viewpoint, this is polymerization in action. It also raises the question: does seasoning actually bond to cast iron?
Knowing When the Pan is Hot Enough
Getting the temperature right is what makes this work. Too cool, and the oil will just sit there, sticky and gross. Too hot, and you can burn off your existing seasoning.
I use the “water flick” test. After the pan has been heating for a few minutes, flick a few droplets of water from your fingers onto its surface.
If the water just sits and boils slowly, the pan isn’t hot enough. If the droplets instantly sizzle, scatter, and dance around before vanishing, the pan is perfectly hot for seasoning.
If the pan is so hot that the water beads up and skates around without immediately evaporating (the Leidenfrost effect), it’s too hot. Pull it off the heat and let it cool down a minute or two before applying your oil. You should never let your cast iron get glowing red hot, as that extreme heat can damage the molecular structure of your hard-earned seasoning.
Common Cast Iron Camping Mistakes and How to Avoid Them
Camping with cast iron is rewarding, but a few small errors can lead to big headaches. Here are the pitfalls I see most often and how to steer clear of them. Start with the right cast iron for camping, and learn practical usage tips. Those choices and tips prevent most headaches on the trail.
Letting the Pan “Soak” or Air Dry
In the backcountry, water is your pan’s biggest enemy. At home, air drying might be fine in your dry kitchen. In a humid forest or dewy meadow, it’s a rust invitation. Even a few hours of moisture sitting on the iron can kickstart the rusting process, especially if the seasoning is thin from cooking over a fire. Clean, season, and maintain your cast iron skillet after backcountry use. A quick dry and light oil will help keep it rust-free for the next camp. That spot you missed drying? It’ll be orange by morning.
The solution is non-negotiable. Always dry your pan with heat. After washing, place it directly on your campfire grate or camping stove over a low flame for a few minutes. Swirl it around to get the bottom dry too. When the entire surface is hot to the touch and all visual moisture is gone, you’re safe.
Using the Wrong Tools for Cleaning
It’s tempting to grab the most abrasive scrubber to power through stuck-on food, especially when you’re tired after a meal. This is where damage happens. Using steel wool or a harsh metal scrub pad is like using sandpaper on your pan’s hard-earned seasoning layer; it will scrape it right off, exposing the raw iron underneath. Once that bare spot is exposed, rust follows quickly.
Stick to the gentle, effective tools. Use coarse salt as a natural abrasive with a rag or paper towel. A dedicated chainmail scrubber works wonders on stubborn bits without harming good seasoning. For a badly stuck mess, boiling a little water in the pan first will loosen everything, making the gentle scrub much easier.
Packing the Pan Away While Damp or Greasy
How you store your pan at camp is just as critical as how you clean it. Tossing a slightly damp pan into your gear tub or car is asking for rust to spread. Conversely, packing away a pan slick with oil is a different kind of problem. A greasy pan acts like a magnet for dust, pine needles, and curious insects, creating a gritty, dirty mess for your next cook.
The goal is a perfectly dry pan with a micro-thin protective coat. After heat-drying, let the pan cool just enough so you can handle it. Then, take a single drop of oil on a paper towel and wipe the entire cooking surface. Now, take a clean paper towel and buff vigorously as if you’re trying to remove all that oil. You’re leaving behind only a protective molecule-thin layer, not a sticky residue. Your pan is now ready to be packed.
Common Questions
How should I store my skillet between meals on a multi-day trip?
After each use, clean, heat-dry, and apply a micro-thin coat of oil. Let it cool completely, then keep it in a dry place like your tent or a covered box. Leaving it by the fire pit overnight invites rust from dew or rain.
Can baking a cake or other sweets damage my pan’s seasoning outdoors?
Sugars and acidic fruits can degrade seasoning if left to sit. Always use a solid bed of coals, not flames, for even heat to prevent scorching. Clean the pan thoroughly immediately after baking to remove any sugary residue before it bonds to the surface.
How can I tell if a rust spot is too deep to fix at camp?
Scrub the spot vigorously with coarse salt. If the rust clears away to reveal smooth, grey metal, you can patch it. If you find a pitted hole or the metal feels rough and porous, stop cooking with it; the structural integrity is compromised and requires professional repair at home. For a quick guide on identifying, preventing, and removing rust on cast iron, see the next section.
Stewarding Your Cast Iron in the Wild
The single best thing you can do for your camp skillet is to dry it completely the moment you finish cleaning it. I always give mine a quick heat over the campfire or stove, then wipe on a whisper of oil before it cools to lock in protection. My own well-traveled Dutch oven thrives on this routine, and if you’re curious about tackling trailside rust or which oils pack best, our site has deeper dives waiting for you.
Sources and Additional Information
- The Best Cast Iron Set for Camping [And How to Use It Like a Pro] | Take The Truck
- 7 Essential Cast Iron Cooking Tips for Campers (plus recipes)
- Camping with Cast Iron Pans – Stovetop, Charcoal, or Campfire? | Cook Smarts
- r/CampingandHiking on Reddit: Why cast iron?
- How Do I Clean My Cast Iron While Camping?
- r/CampingGear on Reddit: Camp Kitchen Question: Is Cast Iron Worth It?
A material science expert by profession, Joseph is also an avid cook. He combines his 10+ years expertise in material science and metallurgy with his passion for cast iron cookware to bring you best hands on advice. His expertise ranges from types of cast iron cookware to best seasoning tips as well as restoration of vintage cast iron utensils. Joe is here to help you solve all your cast iron cookware queries and questions.