
Pre-Seasoned Cast Iron: Is the Factory Finish Rust-Proof?
You bought a pre-seasoned pan for its promised no-fuss protection, but that thin factory coating might not be the rust-fighting champion you hope for. From my own bench, I can tell you that this initial layer is often more of a starting point than a complete shield.
- What “pre-seasoned” actually means and how it’s different from your home seasoning.
- The real-world factors that determine if that factory coat will fail.
- My simple check to test your pan’s current rust resistance.
- How to build a durable, rust-proof finish right over the factory base.
The Factory Finish: A Primer, Not Armor
That dark coating on a new pan is a thin, baked-on layer of oil. Most brands use a vegetable or soy-based oil that gets polymerized in a factory oven. Think of this factory seasoning like a primer coat on a wall: it’s a foundational barrier, not the final, durable topcoat. Its primary job is simple: to prevent rust during shipping and while the pan sits on a shelf. It is not built for a lifetime of cooking right out of the box.
You will likely notice the surface feels drier and less slick than the glassy finish on a well-maintained vintage piece. This is normal. The factory coat gives you a head start, but it is not the finished product.
Factory Seasoning vs. Your Seasoning: The Durability Showdown
Let us compare how each layer is made. Factory coats are applied quickly to hundreds of pans at once. The process is efficient, but it results in a thin, uniform layer. Your home seasoning is different. You apply it carefully, one thin coat at a time, with direct control over the heat and oil type.
This careful, layered approach creates a stronger bond with the iron. Multiple home-applied layers will always be more durable and rust-resistant over time than the single factory coat. The factory finish is a sketch; your seasoning is the detailed painting.
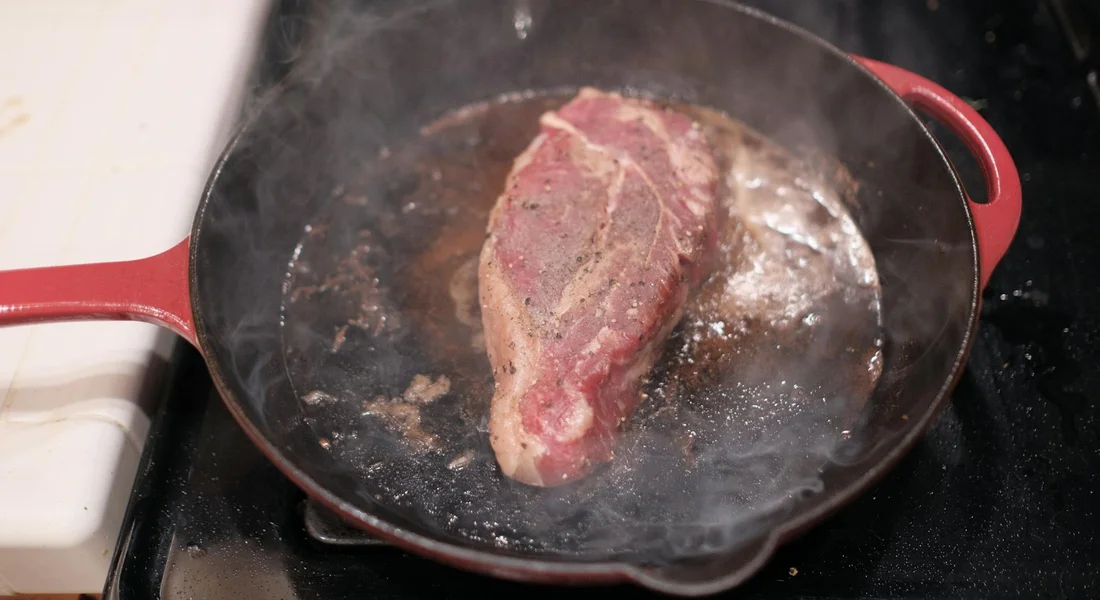
I have seen this difference firsthand. The factory coating on a new skillet of mine flaked off after I cooked a steak at high heat too soon. My own seasoning, built up over years on a different pan, did not budge under the same conditions. Your own layers simply bond better.
Why Does the Factory Coating Fail?
The thin factory layer has several common enemies. These actions can strip it away:
- Abrasive scrubbing with steel wool or harsh scouring pads.
- Prolonged soaking in water or the dishwasher.
- Cooking acidic foods like tomatoes or wine in the first few uses.
- High heat searing without a buffer of cooking fat or more seasoning.
These actions can scrape or dissolve the thin polymerized oil, exposing bare iron to moisture and causing rust spots. It happens quickly because the coating is so thin. A little dulling or light scratching from normal use is not a sign of failure. It is just the pan wearing in and telling you it is ready for your personal touch. Do not panic when you see this.
How to Test Your Pan’s Rust Resistance (The Water Bead Test)
Before you start cooking, there’s a quick, five-second check you can do. Think of it like checking the oil in your car. It tells you the condition of your pan’s protective layer.
Make sure the pan is completely clean, dry, and at room temperature. Then, just sprinkle a few drops of water onto the main cooking surface.
Watch what the water does. If the drops stay as tight, rounded beads that roll around easily, that’s a great sign. The beading action shows your factory seasoning is still hydrophobic, meaning it actively repels water and moisture that causes rust.
If the water instantly spreads out into a flat sheet or soaks into the surface, the protective coating is worn thin or gone in that spot. The metal is exposed and can rust. Don’t panic if you see this.
This test is just a useful snapshot. It helps you understand what your pan needs, whether that’s a little extra care or a fresh start. A pan that fails the bead test isn’t ruined, it’s just asking for help.
Your First-Aid Kit for the Factory Finish
That factory coating is a good foundation, but it’s often a bit thin. Your job is to protect it and help it grow stronger with use. Follow these simple rules for the first month or so.
The single most important habit is to dry your pan completely on the stovetop after every wash. A towel leaves behind invisible moisture. Heat the pan over a medium flame for a minute or two until it’s hot to the touch and all traces of water have vanished.
While the pan is still warm from drying, apply a whisper-thin layer of a high-smoke-point oil. Grapeseed, avocado, or even classic Crisco work well. Use a paper towel to rub a tiny amount all over, then take a clean towel and buff it again. Your goal is to make the surface look dry, not glossy.
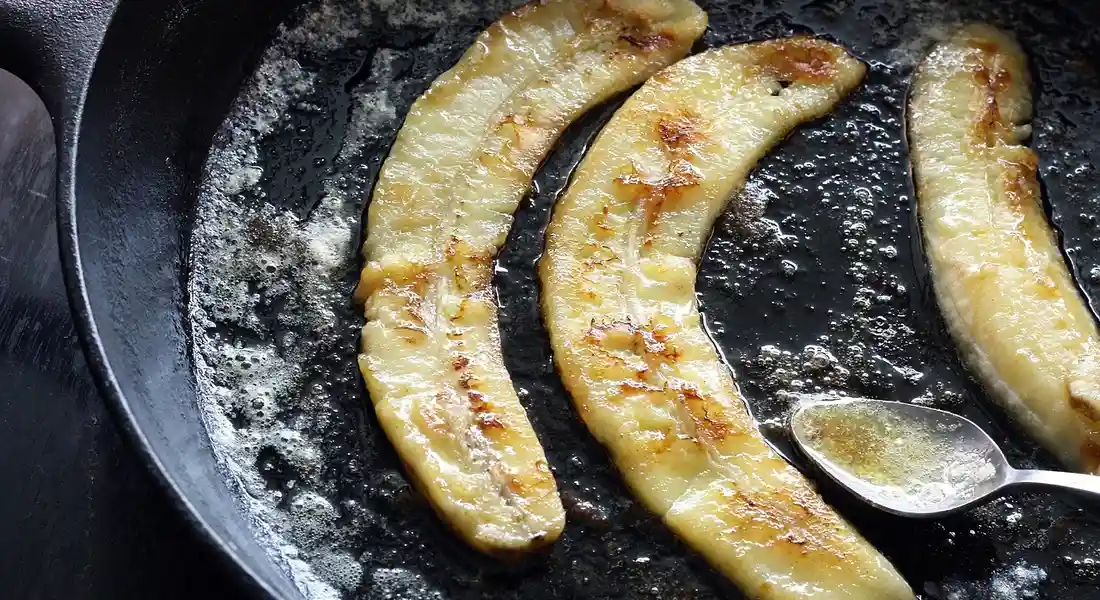
For your first few meals, choose ingredients that add their own fats. Cooking bacon, frying potatoes in oil, or making a grilled cheese sandwich deposits natural seasoning as you go. It’s like giving your pan a helpful supplement with every use.
Avoid cooking highly acidic foods like tomato sauce or boiling water in the pan during this break-in period. Acid can break down the young, thin seasoning layers before they’ve had a chance to strengthen.
When to Move On: The Re-Seasoning Reset
Sometimes, the factory coat is too far gone to patch up, or it was poorly applied from the start. You’ll know it’s time for a reset if you see any of these signs:
- Rust spots that keep coming back right after you clean them.
- The surface is flaking off in patches.
- The pan feels sticky or gummy, even after proper stove-top drying.
If you see these issues, a fresh start is your best path forward. The process is straightforward.
- Give the pan a gentle scrub with warm, soapy water and a non-metallic scrubber to remove any loose, flaky, or sticky coating. You don’t need to strip it to bare gray metal, just to a sound base.
- Dry it thoroughly on the stovetop.
- Apply that same whisper-thin layer of oil and bake it upside-down in a 450°F oven for one hour. Let it cool in the oven. One or two rounds of this is often enough.
Needing to re-season a pre-seasoned pan is a completely normal step in a pan’s life, not a reflection of your skill. I’ve done it to brand-new pans from reputable brands. Think of it not as fixing a failure, but as finally giving your pan the strong, custom-built finish it deserves. Here’s how you can do it yourself.
Does Brand or Material Change the Game?
You might wonder if paying more for a premium brand gets you a tougher, rust-proof factory finish. The short answer is no. While brands use different oils and application methods (spraying, baking, etc.), the result is always a thin, foundational layer.
Think of every factory seasoning as a single, somewhat fragile coat of primer paint applied to protect the metal during shipping and storage; it’s not the durable, multi-coat finish you’ll build yourself in your kitchen. For many cooks, pre seasoned cast iron that is safe and high quality offers a reliable starting point, blending convenience with dependable performance. A high price tag often reflects craftsmanship in the casting or a smoother finish, not a magic, impervious coating.
Rough vs. Smooth Surfaces
A pan’s surface texture affects how the seasoning bonds, not what the seasoning is made of. A classic, rough-cast pan has microscopic peaks and valleys. The factory oil pools in those valleys, which can make the initial coating feel slightly more adhered. From a metallurgy point of view, cast iron’s porous microstructure provides a scaffold for seasoning layers to anchor to. That combination helps explain why cast iron is often considered ideal for building durable seasoning layers.
A modern, machined-smooth skillet has a finer, flatter surface. The factory coat sits on top of this smooth plane. In my experience, this smooth surface can sometimes make the factory layer seem thinner or easier to disturb, but its fundamental weakness against prolonged moisture is the same.
The real difference is that a smoother surface makes it easier for you to apply your own, even layers of seasoning later, which is where true durability comes from. My machined-smooth Field Company skillet arrived with the same basic protective layer as my textured Lodge-I treated both the same way before their first use.
What About Carbon Steel?
The principle is identical for carbon steel pans like those from Matfer or de Buyer. They also arrive with a thin, factory-applied seasoning or beeswax coating. This layer has the same job: prevent rust on the shelf. It is not a ready-to-cook, non-stick surface. You must wash it off and build your own polymerized layers from scratch, following the same logic as cast iron care but considering the unique aspects of carbon steel cookware.
Recommended Products for Pre-Seasoned Pan Care
Caring for your new pan is simple. You don’t need special products, just the right tools for a gentle start. Here is what I keep at my sink.
For Gentle Cleaning
Your goal is to clean without scouring off that thin factory layer. Avoid steel wool or abrasive scrubbers right away. A gentle, baking soda and salt approach offers safe scrubbing methods for cast iron that won’t strip the seasoning. This keeps your pan ready for its next bake.
- A soft-bristle brush (like a nylon dish brush) is perfect for wiping away food residue.
- Non-abrasive scrubby sponges (the blue or white kind) offer a bit more scrubbing power for stubborn bits without being aggressive.
For Drying & Oiling
This is critical. Proper drying prevents flash rust, and the right cloth prevents lint.
- Lint-free cotton towels, like flour sack towels, are my absolute favorite. They absorb water and oil perfectly without leaving fuzzies on your pan.
- A dedicated oil applicator rag. I keep a small, clean cotton rag in a sealed jar with a bit of oil in it. It’s always ready for a quick wipe-down after drying.
Using a lint-free towel ensures you’re applying oil to a clean iron surface, not trapping fibers that will burn and create a spotty finish.
For Your First Oiling
After washing and drying your new pan, you’ll apply a whisper-thin layer of oil before storing or using it. Keep it simple.
- Grapeseed oil is my top choice for its high smoke point and neutral flavor.
- Canola oil is a widely available, affordable, and effective alternative.
- Flaxseed oil creates a very hard finish, but it can be brittle and chip if applied too thickly; use it sparingly if you choose it.
For a Reset
If you get some light rust or sticky spots early on, you can often fix it without a full re-seasoning.
- Coarse kosher salt. Use it as a gentle abrasive with a bit of oil and a paper towel to scrub away minor issues. It’s effective and rinses away cleanly.
These tools aren’t for heavy restoration-they’re for the gentle upkeep that helps your factory coat evolve into your own durable patina.
Common Questions
Are there specific cooking or cleaning practices that accelerate rusting on pre-seasoned pans?
Yes, the main culprits are abrasive scrubbing, prolonged soaking, and cooking acidic foods like tomatoes in the pan’s first few uses. These actions can scrape away or dissolve the thin factory layer. High-heat searing without adequate fat can also stress the coating, exposing the iron to moisture. Cleaning between uses is essential to maintain its integrity.
What are the recommended maintenance steps to prolong the life of a pre-seasoned coating and prevent rust?
Always dry your pan thoroughly over a stovetop burner after washing to eliminate all moisture. Follow this by applying a microscopically thin layer of a high-smoke-point oil and buffing it until the surface looks dry. For the first several meals, cook with fats and avoid acidic ingredients to help the finish strengthen from use.
Do different brands or materials have significantly different factory coating durability?
No. All factory-applied seasoning, whether on cast iron or carbon steel, is a thin, baked-on layer meant for shelf stability. While application methods vary, this coating is universally a starting point, not a permanent armor. Cast iron seasoning matters because the layers you build over time provide real rust protection and enhance nonstick performance. True, lasting rust protection comes from the layers of seasoning you build yourself through proper care and use.
Building Your Pan’s True Armor
Remember, the factory coating on your new skillet is a good beginning, but your own routine is what guarantees it stays rust-free for decades. Cook with it often, dry it thoroughly after every wash, and apply a whisper-thin layer of oil to maintain and build the seasoning yourself. For next steps, you might find our guides on removing rust and seasoning your cast iron skillet or comparing seasoning oils useful.
Deep Dive: Further Reading
- Amazon.com: Utopia Kitchen Cast Iron Skillets 12 Inch, Chef’s Pan, Pre-Seasoned Frying Pan, Stovetop, Oven, Campfire and Grill Large Skillet, Even Heat Distribution Multipurpose Cast Iron Pan – Black: Home & Kitchen
- Pre-Seasoned Cast Iron – Tramontina USA
- The Best Cast-Iron Skillet for 2025 | Reviews by Wirecutter
- Should I buy a pre-seasoned cast iron pan? – Spoon Spices
- The Truth About Cast Iron Pans: 7 Myths That Need To Go Away
- What is pre-seasoned cast iron? Is it non-stick? – Quora
A material science expert by profession, Joseph is also an avid cook. He combines his 10+ years expertise in material science and metallurgy with his passion for cast iron cookware to bring you best hands on advice. His expertise ranges from types of cast iron cookware to best seasoning tips as well as restoration of vintage cast iron utensils. Joe is here to help you solve all your cast iron cookware queries and questions.